

1. Introduction
 There are cases where a Checkmk site cannot reach the host, for example when firewall configuration blocks incoming traffic from a network.
With
Checkmk Ultimate,
the Checkmk Relay can be deployed to collect monitoring data and send it to the monitoring site.
There are cases where a Checkmk site cannot reach the host, for example when firewall configuration blocks incoming traffic from a network.
With
Checkmk Ultimate,
the Checkmk Relay can be deployed to collect monitoring data and send it to the monitoring site.
1.1. Differences from distributed monitoring
There are notable differences compared to distributed monitoring:
The communication direction: The Relay always sends data to the monitoring site.
The place of data processing: The Relay neither processes, nor stores data, it just collects monitoring data and passes it on.
Using the Relay in combination with distributed monitoring is currently limited to the central site. This also means that there is typically no practical use for it in environments using Checkmk Ultimate with Multi-Tenancy as intended.
1.2. Scope of functionality
The current state of the Relay encompasses functionality as follows:
A growing selection of special agents
Monitoring via SNMP
Work on extending functionality towards running active checks is currently under way. The prioritizing of special agent additions is dependent on user benefit and the effort needed. A list of the special agents that are included in the Relay is available at GitHub. Special agents deployed via MKP to the Checkmk site are not synced to the Relay.
2. Setup
2.1. Technical requirements
Supported operating systems
The Checkmk Relay is provided as a container for the x86-64 platform. The following operating systems are currently supported:
Ubuntu Linux 24.04
Red Hat Enterprise Linux 8.10+, 9.7+, and 10
Windows Server 2022 and 2025
On Windows, the Checkmk Relay runs on the Windows Subsystem for Linux version 2 (WSL2). To prepare the necessary environment for this, an Ubuntu distribution is set up in WSL during the installation process.
If you run Windows in a virtual machine, this system must enable nested virtualization in order for the Relay to work as expected.
Podman and connection to Docker Hub
For the installation we provide a script that requires the Podman package provided by your distribution to be installed. The required container image is downloaded directly from Docker Hub during installation and with every update. Make sure your target system can connect to Docker Hub.
The installation wizard on Linux systems includes a step for explicitly installing Podman. When installing on Windows, the MSI installer we provide also handles the installation of Podman within the WSL environment.
We chose Podman because its tight integration with Systemd facilitates automatic updates of the Relay container.
Deploying on container runtimes other than Podman, running on distributions other than those listed, updating via methods other than direct access to hub.docker.com, using Podman packages other than those provided by the distribution, or using multiple Relays on a single Linux host may work for experienced users—however, Checkmk does not provide support for such environments.
You can run the installation script on distributions other than those listed above. If compatible versions of Podman and Systemd are found, the script will prompt you to either abort or proceed with an unsupported installation.
Windows: Connection to GitHub
An additional requirement under Windows is that a connection to GitHub must be possible at installation time. This connection is needed in order to download and install the latest version of WSL2.
Hardware requirements
In the standard configuration (13 fetchers), you should expect RAM requirements of about one gigabyte and CPU core utilization of less than 20 % on current hardware. With these resources, we were able to monitor more than 50 SNMP devices without any problems. If the number of devices to be monitored is significantly higher, the number of fetchers may need to be increased. As the number of devices increases, resource requirements scale almost linearly with the number of devices being monitored.
For each Relay registered on a site, the number of fetchers can be customized via Setup > Hosts > Relays by clicking the edit icon ( ).
).
2.2. Configuring and installing a Relay
To set up a Relay, navigate to Setup > Hosts > Relays. There, click Add Relay configuration to launch the setup wizard for configuring a new Relay. First, choose between Linux and Windows to get the appropriate instructions for your target system.
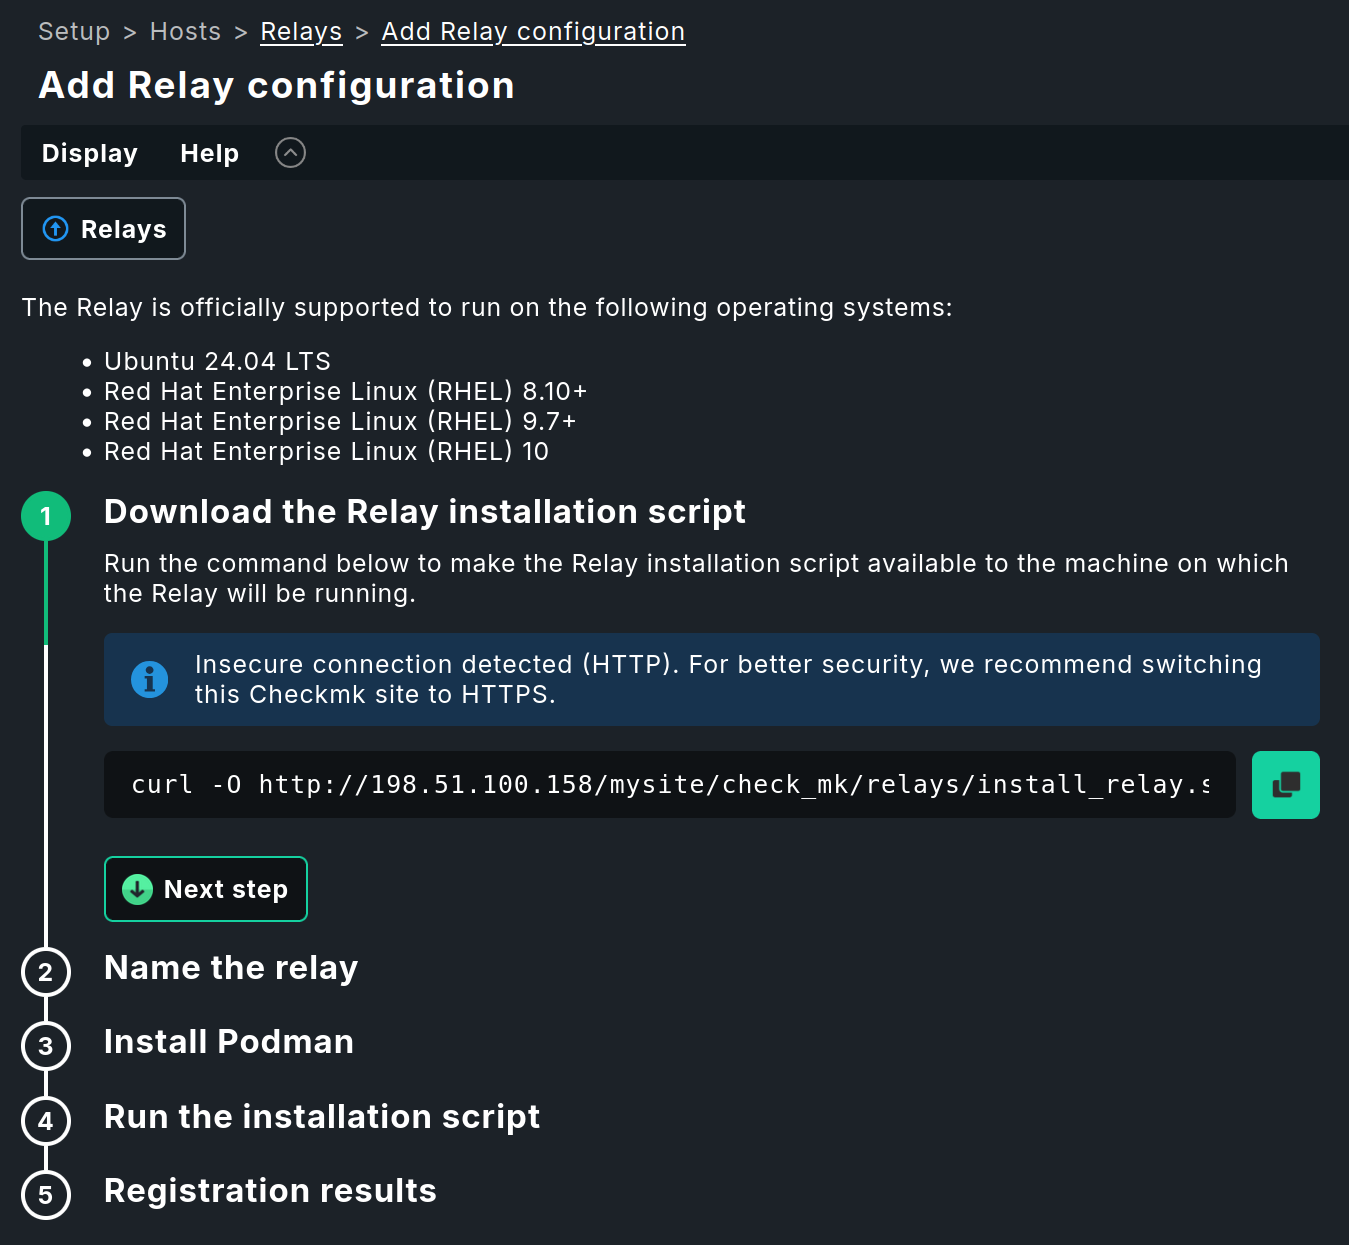
Follow the wizard’s instructions.
- Linux
In the wizard for Linux systems, installing Podman is a separate step that you perform individually on the target system.
Afterward, you can run the provided installation script as described in the wizard. When you run the script, the container with the Relay is downloaded and set up, the update service is installed, and the Relay is connected to the Checkmk site—all in a single action.
On Linux, no separate log file is created for the installation. If needed, you can redirect the output of the installation script to a file.
- Windows
In the Windows wizard, you first prepare the WSL environment on the target system. This step may take a few minutes and requires a reboot of the system.
You can then download and run the provided MSI installer as described in the wizard. When the script runs, Podman is installed first, followed by the download and setup of the container containing the Relay, the installation of the update service, and the connection of the Relay to the Checkmk site—all in a single operation.
If necessary, you can check the installation script’s log file to verify that the installation proceeded as expected. On Windows, you can find this log file in the
C:\ProgramData\checkmk\relay\logsfolder.
 |
To register the Relay with your Checkmk site, the wizard will prompt you to complete the installation using a one-time token. This token is valid for one hour after it is generated. If one hour is not sufficient, you can also complete the registration using the username and password of a user who has sufficient permissions to register the Relay. |
In the Checkmk site to which you just added the Relay, you must now activate pending changes to complete its registration.
Notes on reinstallation
If you install and register the Relay multiple times on the same system, your Checkmk site will treat each installation as a new Relay. Hosts that were already being monitored by the previous Relay must then be explicitly assigned to the newly registered Relay—even if the Relay is running on the same machine as before.
2.3. Updates
A Checkmk Relay deployed using the provided installation script automatically keeps itself up to date. As soon as it detects that the version of the associated Checkmk site has changed, it downloads the appropriate container image from Docker Hub and restarts without requiring manual intervention. Depending on your network speed, this process can take up to 10 minutes.
If you encounter issues with incomplete updates, please refer to our troubleshooting guidelines.
2.4. Monitoring the Relay
If you want to monitor the container in which you are running the Relay, you can add it to your monitoring using the mk_podman agent plug-in.
3. Monitoring with the Relay
Once you have set up the Relay, you can now start using it to monitor hosts via a special agent or SNMP. When adding a host, enable Monitored on Relay in the Basic settings section and select the Relay that can contact the host you are currently adding. Note that hosts assigned to a Relay cannot be monitored with the Checkmk agent.
The Relay will not begin monitoring the assigned hosts until special agents or SNMP connections have been configured for those hosts.
Each Relay periodically contacts its assigned Checkmk site for configuration updates. After receiving an updated configuration, it immediately executes the special agents and other checks. A service discovery for special agents should be completed quickly, but it may take longer with slow SNMP devices. In general, the delay caused by the Relay is marginal and, in most cases, is in the range of a few seconds.
4. Troubleshooting
Reminder: This component of Checkmk is a work in progress! Although it is already quite stable, you may encounter the occasional bug.
If you encounter technical issues, it may be helpful to examine the behavior and status of the Relay and the container in which it is running. On Windows, start by switching to the WSL environment:
On Linux systems the above WSL switch is not necessary.
All commands shown below can be executed directly on Linux systems, and on Windows systems after switching to the WSL environment.
4.1. Checking the Relay’s operating status
You can use systemctl at any time to check whether the Relay is active and view details about its operating status:
4.2. Verifying the version of the Relay
The version of the Relay container image must exactly match the version of the Checkmk site to which it is assigned.
You can verify the Relay version using the podman images command.
Run this command as root or with sudo prefixed to ensure that the output includes all relevant images:
4.3. Restarting the container
As mentioned earlier, Podman is tightly integrated with Systemd. Therefore, restarting containers is simply a matter of restarting Systemd units.
4.4. Status of the update service
When deploying using the included installation script, the Checkmk Relay sets up a service that automatically updates the container image to the same version as the associated site and then restarts the container.
To check the status of the update service for the Checkmk Relay, run the following command:
The service has been loaded here, but no update has been performed yet.
Since the update itself is only triggered when a file appears, the service displays the (misleading) status inactive (dead).
If you notice that the Relay is in an error state because an update could not be performed, you can resolve this issue manually. First, reset the error status of the update service:
After that, you can restart the update service:
Finally, check to make sure the status of the update service is okay after the restart.
If you manually restart the service and check its status immediately afterward, you may see output similar to the following:
Here, the running podman pull process shows that an update is currently in progress and that the latest container is being downloaded.
4.5. Checking log files
If something is not working properly or your support contact at Checkmk asks you for log entries, check the container logs.
Use journalctl with the -f option (like follow) to display ten log lines and immediately output any new lines as they arrive:
4.6. Troubleshooting on Windows
You can find hints for resolving specific issues with running the Relay on Windows in the Checkmk Knowledge Base.
5. Removing the Relay
If the Relay is no longer required, you can uninstall it.
- Linux
To uninstall, run the installation script with the
--uninstalloption, which will remove the Relay without further prompting.- Windows
In Windows, you can uninstall the Relay via Settings > Apps > Installed Apps. Select the Checkmk Relay from the list of installed programs and click Uninstall.
As long as the downloaded MSI installer is present on the system, you can use it to perform the uninstallation via PowerShell instead. This step does not take place within the WSL environment, but directly in Windows.
Don’t forget to delete the associated Relay in your Checkmk site after you have removed the Relay.