1. Introduction
Proxmox monitoring is essential for accurate, real-time insights into the state of your virtual environment.
For a quick introduction, this article only covers the relevant settings for using the special agent in Checkmk. It is therefore primarily intended for users who 'only' want to set up Checkmk. If you are also interested in further information, for example, the monitoring of Proxmox clusters and the setup within Proxmox, we recommend the Proxmox monitoring: How to do it efficiently with Checkmk blog article.
2. Prerequisites in Proxmox
As a basis for successful monitoring with Checkmk you will need a properly set up Proxmox VE configuration.
Create a user in the ‘Proxmox VE authentication server’ realm in Proxmox, which you use exclusively for monitoring with Checkmk (in the following example this user is called ‘checkmk’).
This user needs the following entries in their permissions (via User permissions or Group permissions):
Role: PVEAuditor
Path: /
We also recommend that you install Checkmk Linux agents on the Proxmox nodes — this will provide you with much more interesting information about your Proxmox environment.
3. Setting up in Checkmk
Once you have prepared your Proxmox, set up the Checkmk page.
3.1. Creating a host for Proxmox
First create a host for the Proxmox node as described in the section Creating and editing hosts in the Setup menu.
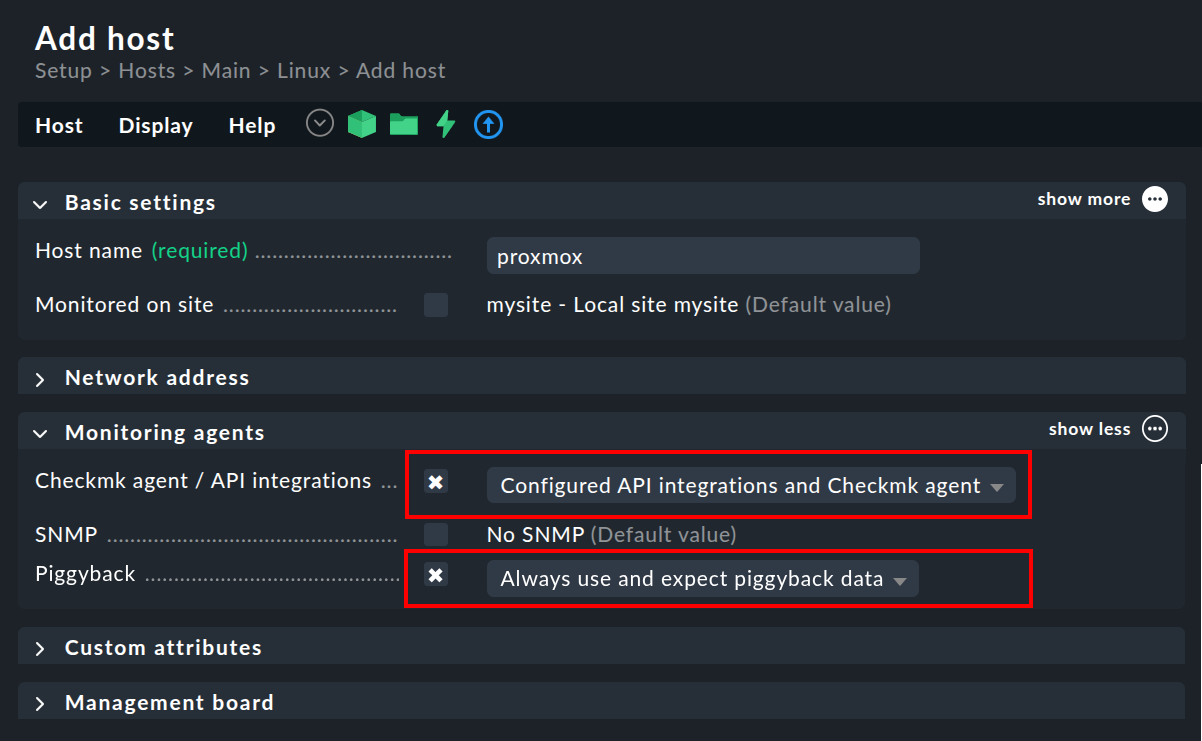
If you have followed our recommendation and have installed an agent on the Proxmox node, then set the Checkmk agent / API integrations option to Configured API integrations and Checkmk agent.
Next, configure the Proxmox special agent via Setup > Agents > VM, cloud, container > Proxmox VE and then Add rule:
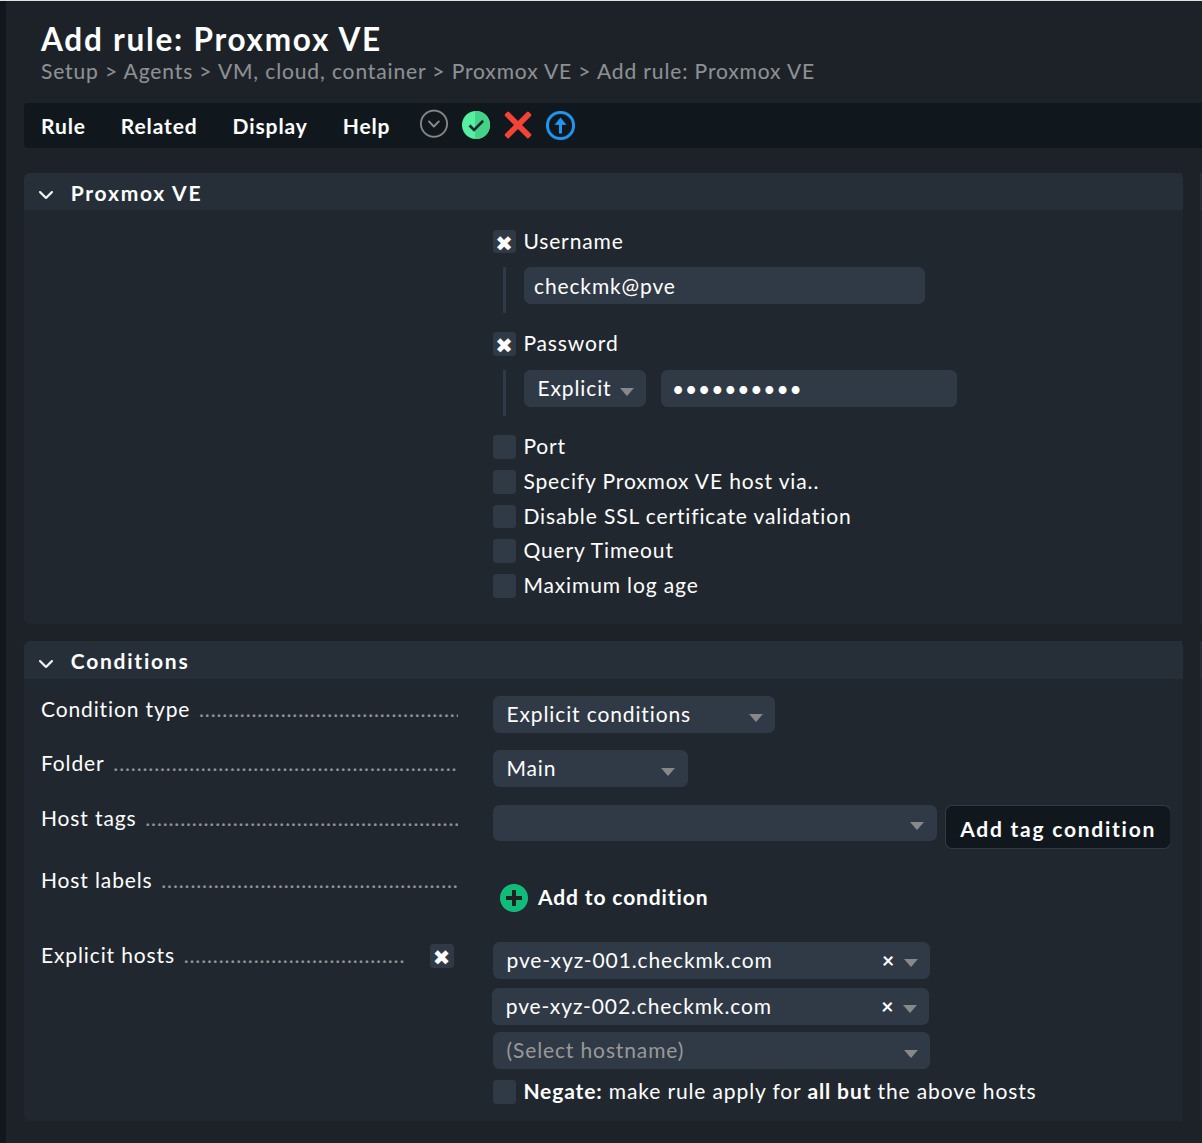
You must specify checkmk@pve as the username.
At the same time, you should explicitly restrict the monitoring to your Proxmox nodes.
3.2. Creating hosts for the Proxmox VMs
The special agent provides a lot of data about the VMs and containers (Piggyback). To create the desired piggybacked hosts from this, you must next create various hosts. Their names must correspond exactly to the names in Proxmox. As a user of one of our commercial editions, you can alternatively simply leave this to the Dynamic host management.
Setting up dynamic host management
![]() The Setup > Hosts > Dynamic host management menu item takes you to the overview page for all of the connections that have already been configured.
Here, click on
The Setup > Hosts > Dynamic host management menu item takes you to the overview page for all of the connections that have already been configured.
Here, click on ![]() Add connection and then give the connection an ID and a Title.
Add connection and then give the connection an ID and a Title.
Not all options in the Connection properties are covered below. If you have any questions, please consult the inline help and the main article linked above.
First make sure that the show-more mode is activated for the Connection properties box so that all available options are displayed.
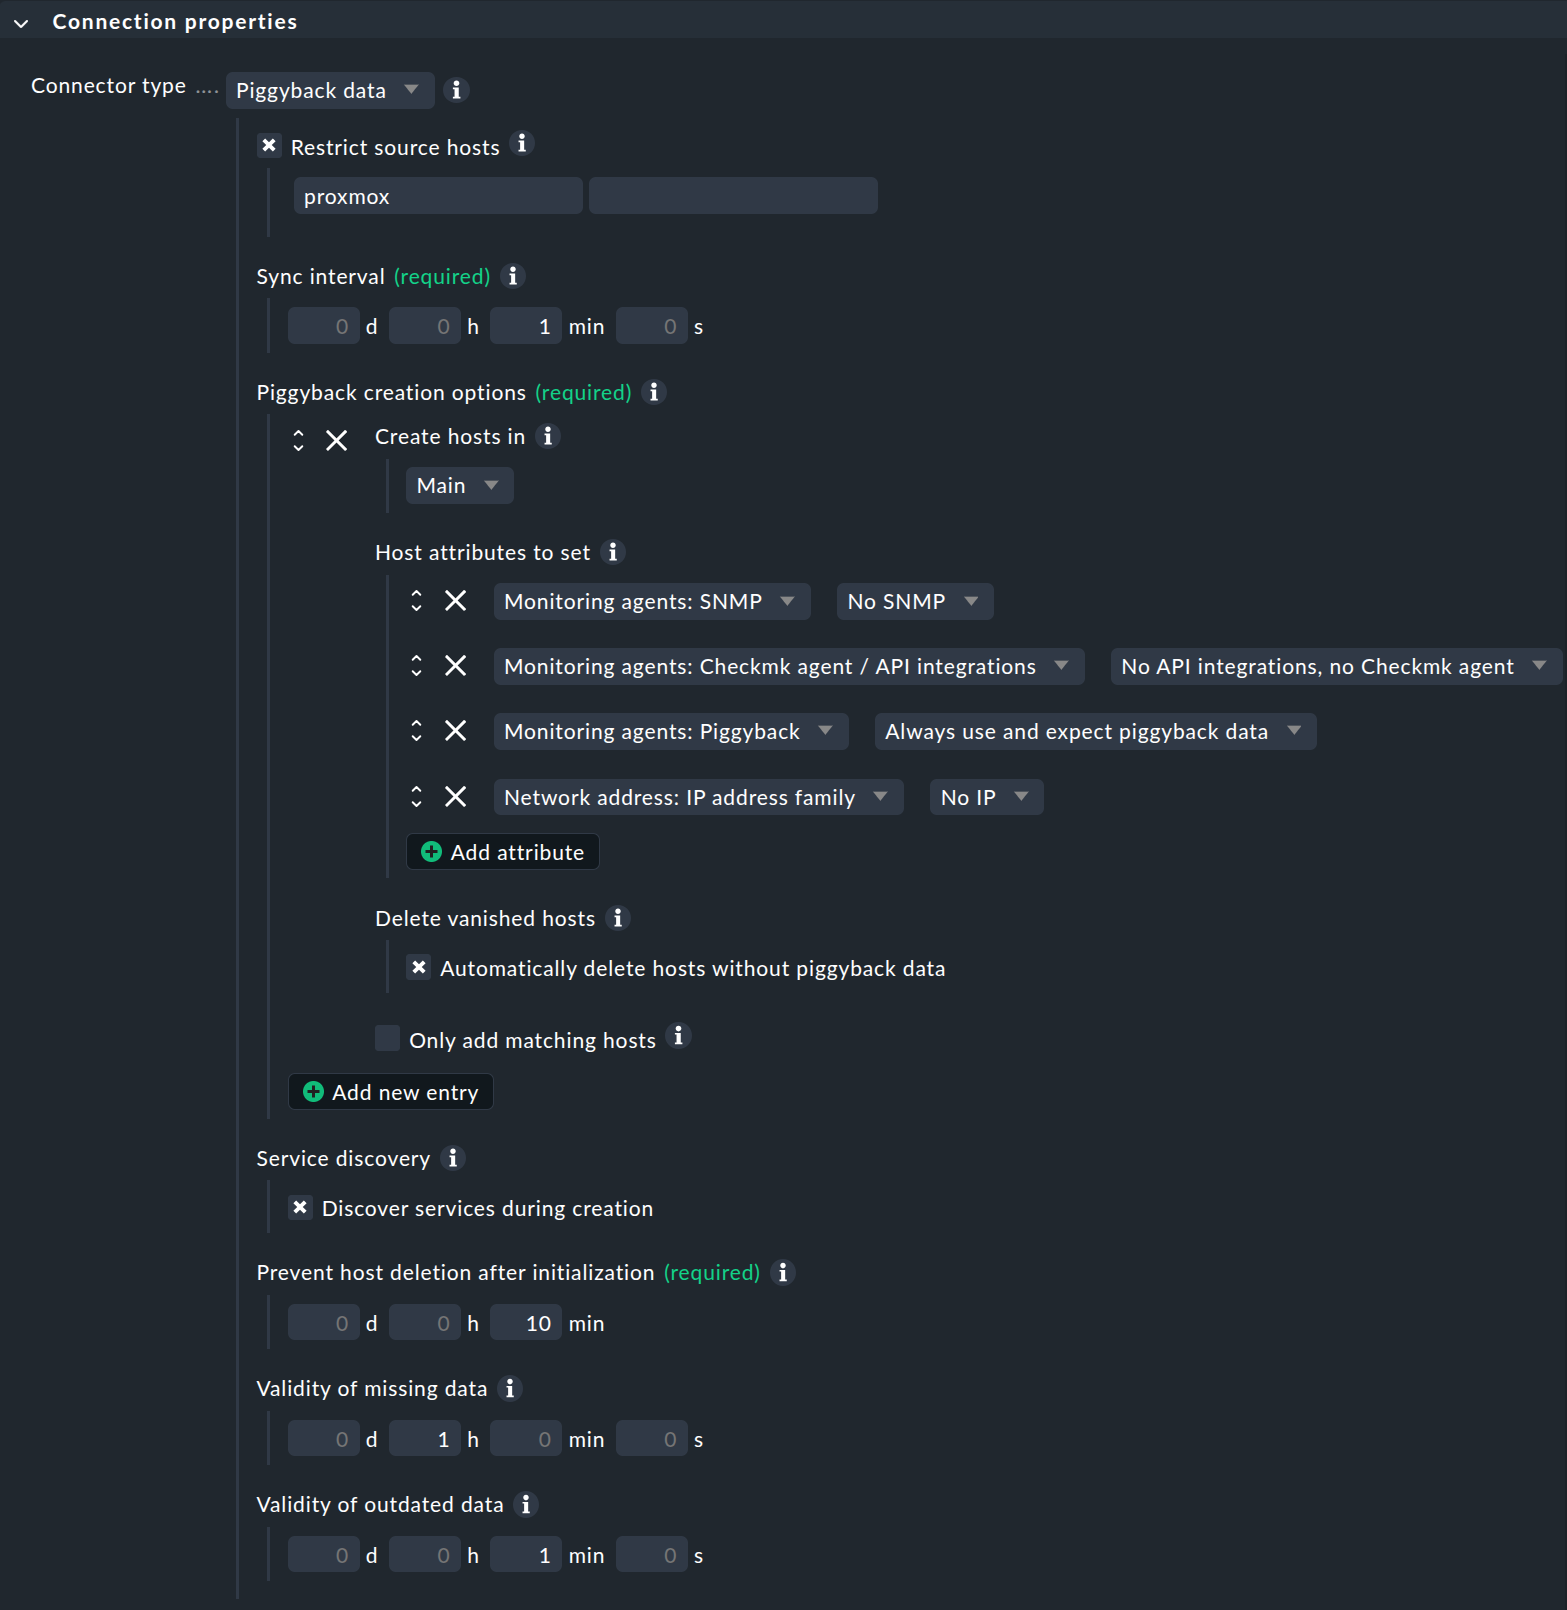
Next, under Piggyback creation options, click Add new element. Customize the folder in which the hosts for your VM sites are to be created. The preselected Host attributes are basically correct for piggybacked hosts and do not need to be changed.
By activating the Delete vanished hosts option, you can ensure that piggybacked hosts for which no more fresh data is received over a certain period of time are automatically deleted again.
The Restrict source hosts option should be activated as part of the monitoring of your Proxmox environment. Enter your Proxmox host from the section Creating a host for Proxmox here.
A typical configuration of the connection could then look like this:
Manually creating hosts for Proxmox
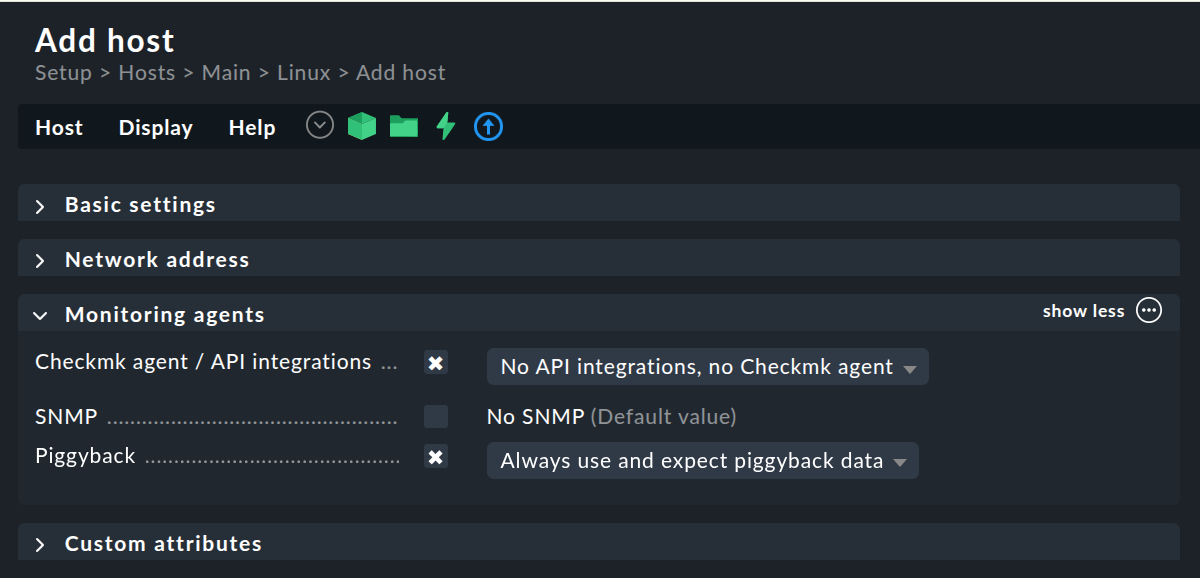
Alternatively, you can also create hosts for the piggyback data manually. It is important that the names of the hosts correspond exactly to the scheme described above.
With the |
Configure the hosts for your Proxmox VMs and containers and select No API integrations, no Checkmk agent as the monitoring agent. If you also select the Always use and expect piggyback data option under Piggyback, you will be warned accordingly if the data is not received.