1. Introduction
![]() The Checkmk extension packages (MKPs) can package functional extensions as well as those for the graphical user interface (GUI), i.e. dashboards, views or reports.
The advantage with this feature is that in the commercial editions you can create such MKPs directly from the web interface, and no external files or tools are needed.
Of course, the command line is also available for this purpose, also exclusively in the commercial editions.
The Checkmk extension packages (MKPs) can package functional extensions as well as those for the graphical user interface (GUI), i.e. dashboards, views or reports.
The advantage with this feature is that in the commercial editions you can create such MKPs directly from the web interface, and no external files or tools are needed.
Of course, the command line is also available for this purpose, also exclusively in the commercial editions.
The MKPs can then be shared internally with other users and Checkmk installations, and of course via the Checkmk Exchange. But even without the participation of the community or other sites, it can be useful to be able to package complex creations.
For example, if a dashboard is created using the Make this dashboard available for other users option, it will also be available to all or to selected users. If users delete their dashboards at some point, they are of course lost for everyone else — unless others have already made personal copies. This is why it makes sense for users with the appropriate rights to make dashboards available as an extension.
This also enables the versioning of dashboards — useful for problem-free updates.
The procedure for creating MKPs is identical for all types of GUI extensions, so we will limit ourselves to the dashboard example described below.
Prerequisite: Users need the Manage Extension Packages (MKPs) permission.
2. Web interface
2.1. Creating GUI MKPs
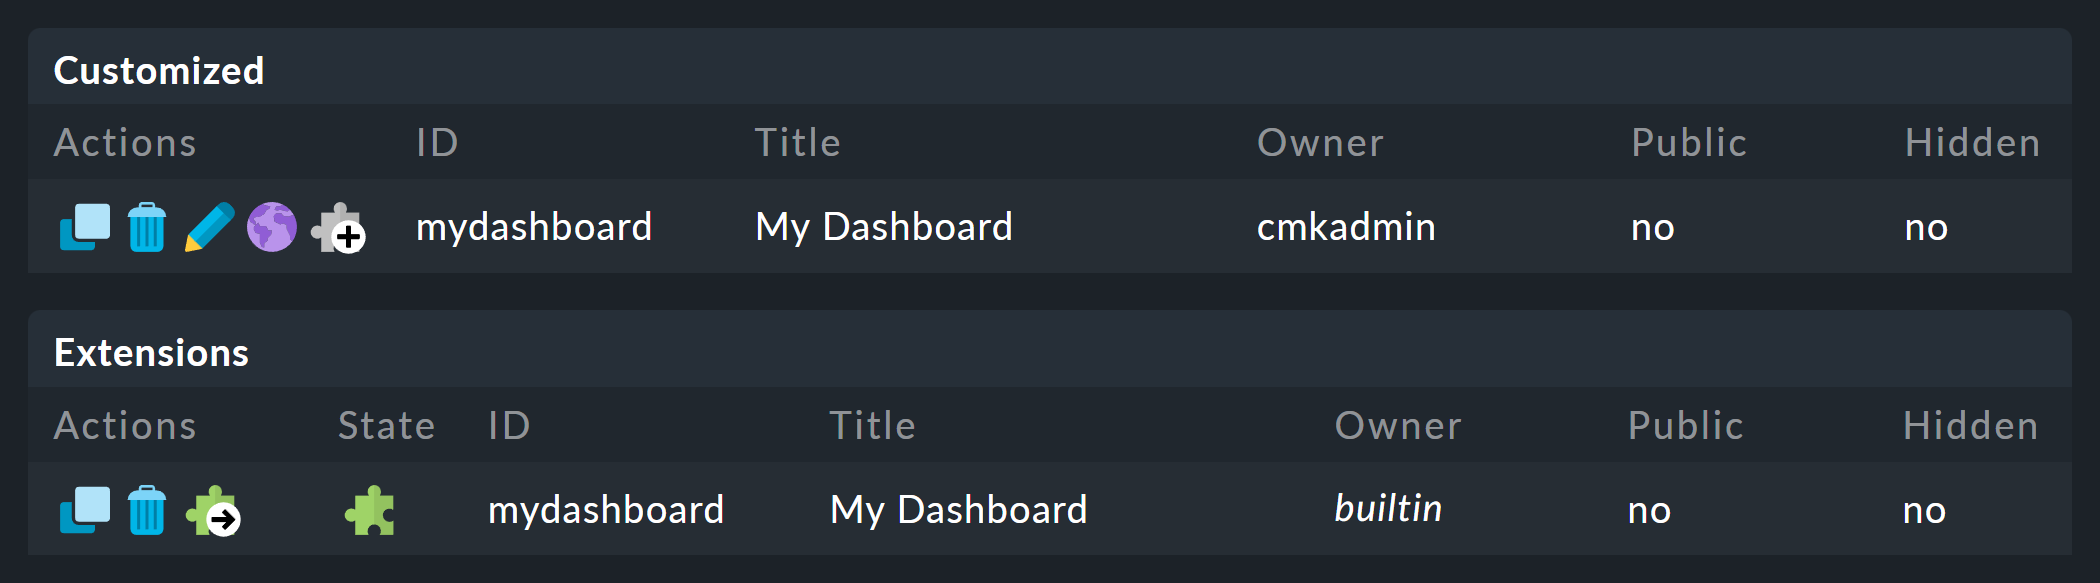
Let’s start in the dashboard list under Customize > Visualization > Dashboards. If you have already created your own dashboard, you can work with that one. Otherwise, create a private copy of any built-in dashboard. In both cases, your starting point is a dashboard in the Customized section.

Via ![]() Clone this dashboard for packaging as extension package you create an extension from the dashboard, which will subsequently be listed in the Extensions section:
Clone this dashboard for packaging as extension package you create an extension from the dashboard, which will subsequently be listed in the Extensions section:
From here, ![]() Go to extension packages will take you to the extension package management.
You can see your unpackaged extensions, or files, under Packages > List unpackaged files.
Go to extension packages will take you to the extension package management.
You can see your unpackaged extensions, or files, under Packages > List unpackaged files.

Via ![]() Create Package you can now create the package.
Create Package you can now create the package.
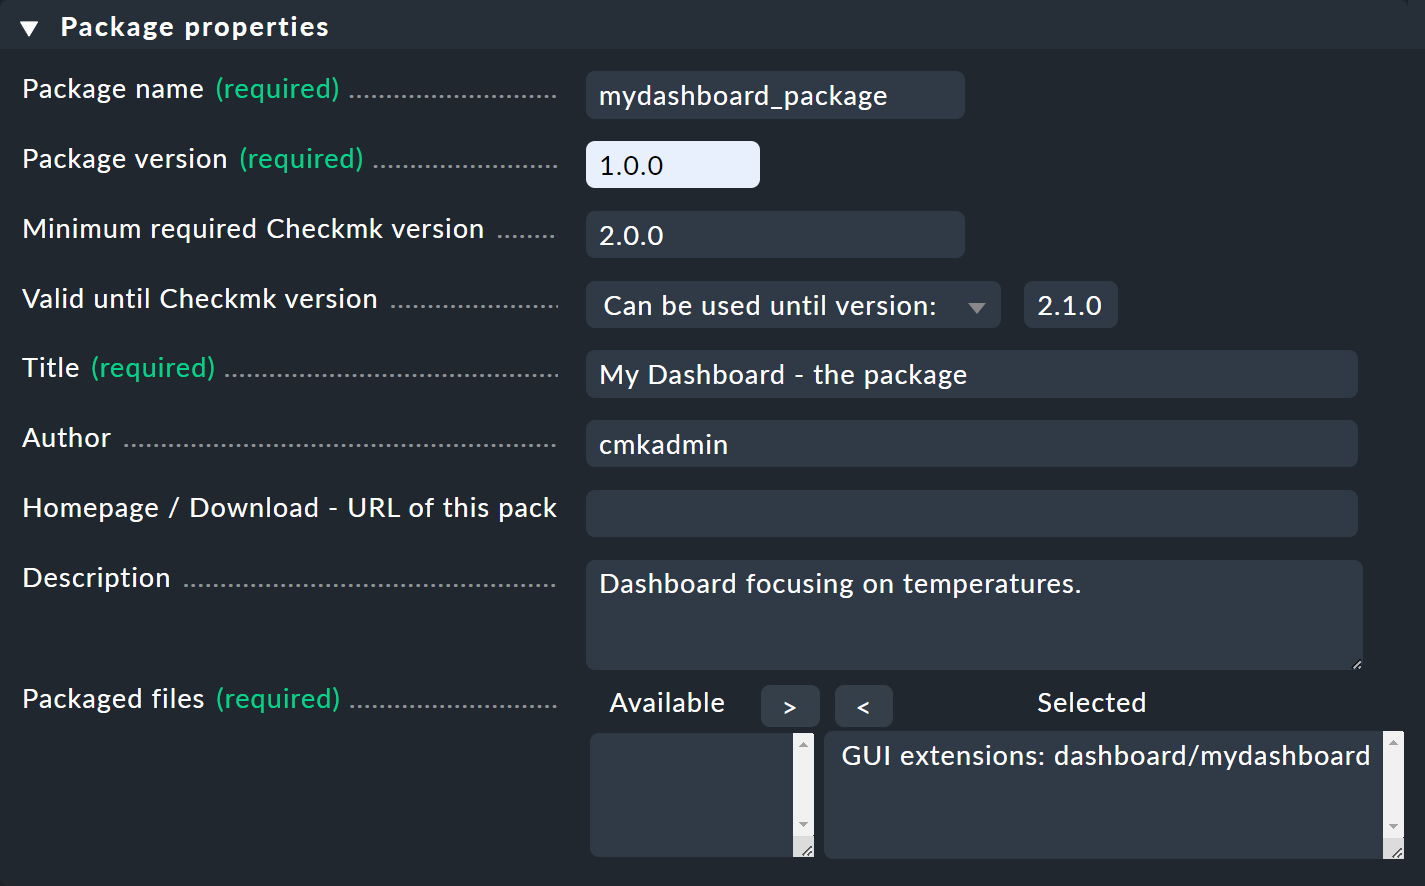
In the package properties, at the bottom under Packaged files, add the GUI extension you have just created.
Of course, this can also be multiple dashboards or other elements.
Otherwise, the main thing you need to pay attention to is the correct version information.
First, the package itself needs a version number.
This must follow the guidelines explained in Semantic Versioning, for example 1.0.0.
Secondly, you can specify the minimum and maximum supported Checkmk versions.
Versioning is handy for Checkmk updates and distributed monitoring which includes sites with different Checkmk versions (see the MKP article for more information).
After packaging, your new packages will be listed on the extension packages home page — here in our example in two different versions, one activated, one deactivated:
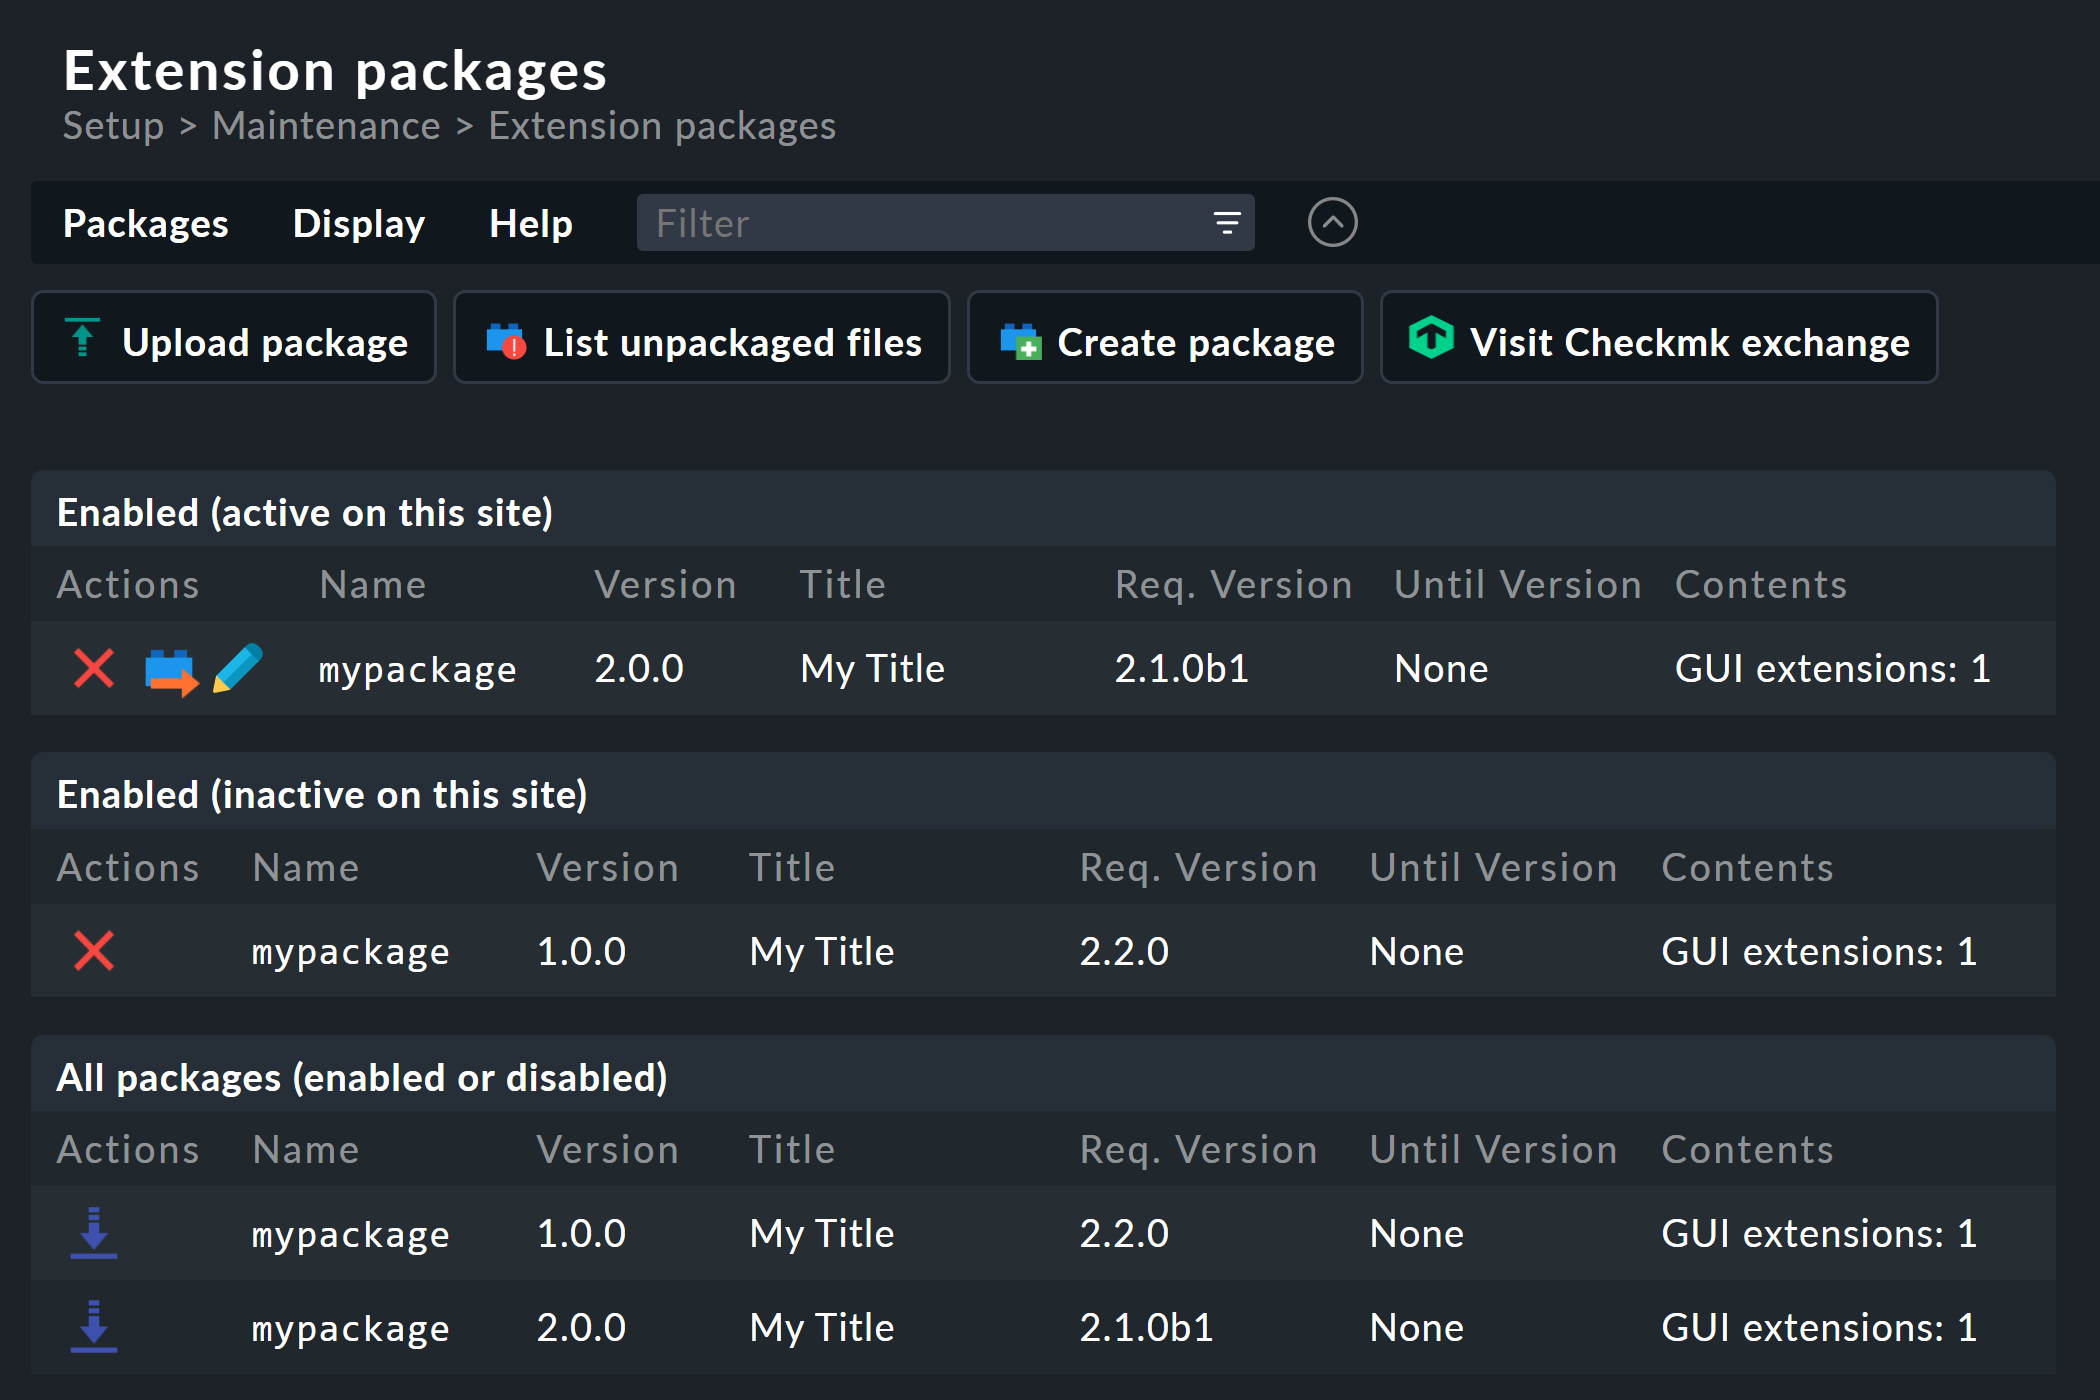
Under All packages (enabled or disabled) you now have the option to download the packages as MKP files.
2.2. Installing GUI MKPs
The installation of packages is largely self-explanatory.
First, upload the desired package via ![]() Upload package under Setup > Maintenance > Extension packages.
Upload package under Setup > Maintenance > Extension packages.

The package then ends up in the All packages (enabled or disabled) table again and from there can be activated via ![]() .
.

3. Command line
3.1. Creating GUI MKPs
As an alternative, you can also perform packaging from the command line. The procedure is exactly the same as packaging functional extensions, as described in detail in the MKP article, so only a shortened version is presented here:
Create the dashboard.
Switch to the command line as site user.
List unpackaged files:
mkp findCreate the package configuration:
mkp template mydashboardEdit the configuration in:
~/tmp/check_mk/mydashboard.manifest.tempCreate the package with:
mkp package tmp/check_mk/mydashboard.manifest.tempPackage is saved as:
/var/check_mk/packages_local/mydashboard-1.0.0.mkp
3.2. Installing GUI MKPs
If you now want to install and activate such MKPs:
Install:
mkp add /tmp/mydashboard-1.0.0.mkpActivate:
mkp enable mydashboard-1.0.0.mkp
For command references, a description of the MKP format, and other notes, see the MKP article.
![]() Note for users of Checkmk Community:
Again, you can install GUI extensions just like all other MKPs.
However, since the commercial editions contain some exclusive visual elements (such as widgets), you might stumble across a message of the following type:
Note for users of Checkmk Community:
Again, you can install GUI extensions just like all other MKPs.
However, since the commercial editions contain some exclusive visual elements (such as widgets), you might stumble across a message of the following type:
Widget type 'state_host' could not be found. Please remove it from your dashboard configuration.
In this case a single widget is missing, but the rest of the dashboard is still usable.
4. Files and directories
| File path | Description |
|---|---|
|
Depository for views cloned as extensions. |
|
Storage location for reports cloned as extensions. |
|
Location for dashboards cloned as extensions. |
|
Configuration file to build the package. |
|
Location for installed MKPs. |
|
Location for activated MKPs. |