1. Introduction
![]() In the commercial editions of Checkmk
you can configure agent packages so that they can be executed on the host by an unprivileged user, i.e. not by
In the commercial editions of Checkmk
you can configure agent packages so that they can be executed on the host by an unprivileged user, i.e. not by root.
This feature is initially fully usable for Linux agents that have been installed as DEB or RPM packages.
Starting with Checkmk 2.5.0,
the Agent Updater agent plug-in is also compatible with unprivileged execution.
The prerequisite for unprivileged execution is that the agent package has been installed within a single directory. The option to select an installation directory is available for Linux, as well as for Solaris and AIX.
The two related rules define Installation paths for agent files (Linux, UNIX) and Run agent as non-root user (Linux) have been deprecated. It is planned to remove both in a future Checkmk version.
2. Configuring the agent packages
The agent packages are configured in the Agent Bakery, which you open via Setup > Agents > Windows, Linux, Solaris, AIX. Click the Agent rules button. Under Agent rules > Linux/UNIX agent options you will find the rule Customize agent package (Linux).
2.1. Specifying the installation directory
With Directory for Checkmk agent you can specify the installation directory:
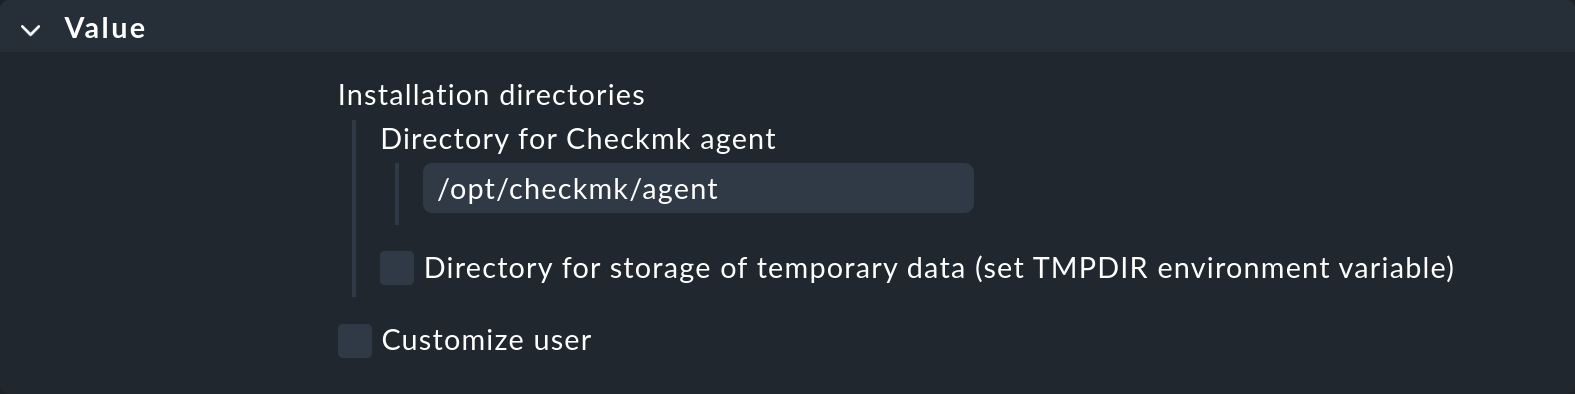
All agent package files are installed in this directory instead of in directories such as /etc/, /usr/lib/ or /var/lib/.
For security reasons, do not select any directory in a user’s home directory.
For Solaris and AIX you are now finished. For Linux, you can also specify unprivileged execution.
2.2. Configuring unprivileged execution
Two basic options are available for the Linux agent after selecting Customize user:
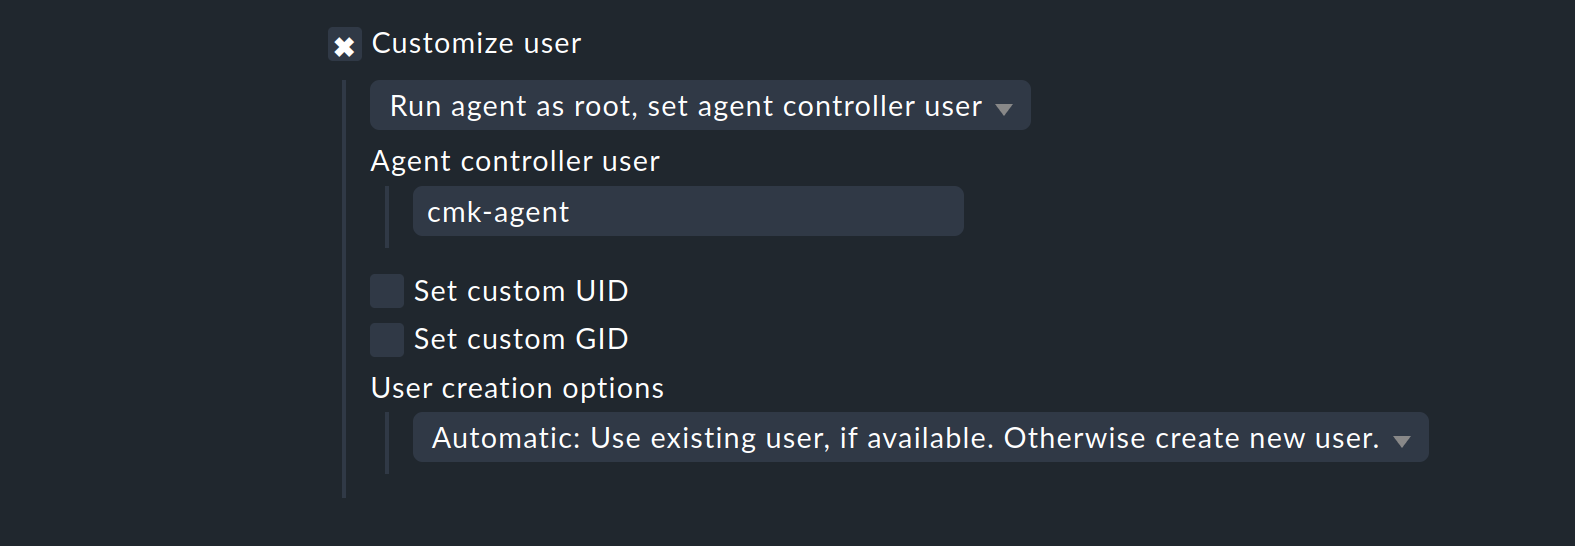
The default values Run agent as root, set agent controller user, and cmk-agent as user specify exactly the behavior that is the default behavior of the Checkmk agent for Linux, even without configuring this rule,
so that the Agent Controller will be executed under cmk-agent, and the agent script under root.
What is new, however, is the option of specifying a different user as cmk-agent.
The second option is Run agent as non-root, set agent user. This specifies that, in addition to the Agent Controller, the agent script will also be executed under the specified user — i.e. both are unprivileged.
Note that your choice for the Agent Controller user also applies to the Agent Updater, as the Agent Updater runs under the user of the Agent Controller. Only the installation of packages comes with a temporary switch to privileged execution.
You can also assign numeric IDs to the user (UID) and group (GID). Note the conventions of your Linux distribution and any existing limitations of the file systems used.
The last option determines whether the user selected in this rule should be created if it does not already exist.
2.3. Preparing privileged execution of individual agent plug-ins
For agent plug-ins, the Plug-ins, local checks and MRPE for non-root users rule allows you to individually specify the executing users for specific directories. This allows you to run plug-ins in specific folders under other unprivileged user IDs or as root. This rule generates an agent configuration that is installed automatically. We describe further configuration on the host below.
3. Configuring unprivileged execution on the host
If you have configured agent packages for unprivileged execution, additional configuration may be required on the Linux host on which the package is installed.
For security reasons, an agent configured for unprivileged execution offers a slightly smaller range of functions than an agent executed with root permissions. In order to make the missing functionality available, you as the administrator must find methods that are both effective and compatible with the security guidelines of your organization and the conventions of the Linux distribution used.
Note that this chapter provides no single best solution for either the configuration supplied with the agent packages or the configuration carried out on the host. All possible and sensible solutions must be based on the distributions used, the operational guidelines in your organization, and maintainability. |
3.1. Configuration of sudo
We have added a wrapper function for the agent script, which prefixes commands that generally require high-level privileges with sudo.
This affects in Checkmk 2.5.0 mdadm (for reading the status of various software RAIDs and encrypted drives),mailq (for reading the email queue of the postfix MTA), the scripts for monitoring Checkmk sites and the commands required for the Veritas Cluster Service plug-in.
Example configurations for sudo can be found in the installation directory of the agent in the subfolder default/package/agent/checkmk_agent_sudoers_template.
You can transfer the required lines to your /etc/sudoers or copy the entire file to /etc/sudoers.d (not recommended).
Adjust the entries accordingly.
For example, in some cases no superuser permissions are required to read the email queue and the user ID under which the MTA is executed can be used.
3.2. Executing agent plug-ins without root privileges
For the execution of agent plug-ins we recommend ensuring access to the required information via file permissions, group assignments or access control lists. The following list shows possible methods:
Add the user under whose ID the agent script is executed to a group that can read required data in monitoring.
Change the access rights or group assignment of device files (e.g. via
udevrules) so that the unprivileged user can access them.
3.3. Executing agent plug-ins with root privileges
If an agent plug-in requires root privileges to run, you have the following options:
If necessary, run plug-ins via cronjob and redirect their output to a spool file. With intervals longer than one minute between executions, you also cover plug-ins that would otherwise require asynchronous execution.
If you have already packaged agent packages with the rule Plug-ins, local checks and MRPE for non-root users, then you must move plug-ins that need to be executed as root to the configured directories and apply the configuration for
sudo.
4. Legacy deployment
Unprivileged execution is also possible without an Agent Controller or if the installation cannot be carried out via a DEB or RPM package.
4.1. Installation without a package manager
When using the TGZ packages provided in .tar.gz format, you must ensure that permissions are granted correctly after the installation.
Use a sample installation that you have carried out under Linux with package management as a guide.
We will gradually add further information to this section. |
4.2. Execution without Agent Controller
If the Agent Controller cannot or should not be used, both the unencrypted call via (x)inetd or the encrypted call via secure shell are possible.
Minor modifications are required compared to the call with root permissions.
Xinetd
If the Agent Controller is disabled or incompatible, the configuration file for xinetd provided in the installation directory under default/package/config/xinetd-service-template.cfg is activated.
This file already contains the unprivileged user specified by the agent rule.
If you are using a different Internet super-server (for example, the OpenBSD inetd), create the configuration according to its documentation.
Examples can be found in the Monitoring Linux in legacy mode article.
Secure Shell
The call via SSH also corresponds to the procedure described in the Monitoring Linux in legacy mode article.
Only the path to the configuration file .ssh/authorized_keys and the username used must be adapted to the unprivileged user you are using.