1. Introduction
![]() If you use the Jira software for project management, software development or for tracking bugs,
with the commercial editions
you can send notifications from Checkmk to Jira and create or update Issues there.
This works for the products Jira Work Management (formerly Jira Core), Jira Software and Jira Service Management (formerly Jira Service Desk).
If you use the Jira software for project management, software development or for tracking bugs,
with the commercial editions
you can send notifications from Checkmk to Jira and create or update Issues there.
This works for the products Jira Work Management (formerly Jira Core), Jira Software and Jira Service Management (formerly Jira Service Desk).
The following options are supported:
Create issues for host and service problems.
Create issues with a defined Priority.
Create issues with a defined Label.
Set links to host/services in Checkmk from the generated Jira issues.
Set a Resolution in the issue when OK conditions occur.
To set up the connection between Checkmk and Jira, first create some new fields in Jira and define some Jira-IDs.
Next configure the notification method for Jira in Checkmk, entering the Jira IDs that have been created and read. You will gain more flexibility if you also use custom user attributes. Instead of entering the Jira IDs directly in the notification method, you can define some Jira IDs as custom user attributes. This makes it easy for individual users to create issues in a variety of JIRA projects.
2. Configuring Jira
When interacting with Jira, Checkmk needs to know which notifications have already created an issue and which have not. To make this possible, you need to create two so-called custom fields in Jira—one for notifications on host issues, and one for service issues.
In order to be able to correctly identify host and service issues, the IDs of these issues must be unique. This is the case if your Jira instance receives notifications from only a single Checkmk site, as the monitoring core of a Checkmk site ensures uniqueness. Now, in distributed monitoring, multiple Checkmk sites may send notifications if decentralized notifications has been configured. If your Jira instance receives notifications from multiple Checkmk sites, any uniqueness is most likely over—at the very latest when the ID from a host issue has already been used by another Checkmk site. In such a configuration you need another custom field for the Checkmk site with which a unique assignment again becomes possible.
For the configuration in Checkmk you need the Jira IDs of the custom fields you created—and additionally those of some other fields, so all together the following are required:
Project/Space ID
Issue type ID
Priority ID (optional)
Host custom field ID
Service custom field ID
Site custom field ID (optional)
(Workflow) Transition ID (optional)
The vast majority of these IDs can be read using the script below via one of Jira’s REST APIs. Jira administrators can also retrieve the IDs via Jira’s GUI—even those IDs that cannot be retrieved via the API and thus the script.
2.1. Setting up the custom fields in Jira
You can learn how to create custom fields in Jira in the Jira documentation, including the assignment of the field to the so-called issue screens in Jira.
When creating the fields required for Checkmk, please note the following points regarding the field type. You are free to name your fields as you wish. However, the field names as shown in the following table match the script with which you can read the Jira IDs in the next section Determining Jira IDs using an external script.
| Custom field | Field type | Name |
|---|---|---|
Host custom field |
|
|
Service custom field |
|
|
Site custom field (optional) |
|
|
The field type |
Also make sure that the Jira user used by Checkmk to create issues, i.e. entered in the Checkmk notification rule, has read and write access to these custom fields.
2.2. Determining Jira IDs using an external script
You can query the IDs collectively with the following script, which uses the Jira REST API.
To do this, replace the placeholder values for the following variables:
user: Jira user, specified as an email address.api_token: For instructions on creating a token, see the link: support.atlassian.com/atlassian-account/docs/manage-api-tokens-for-your-atlassian-account/ [Jira documentation.^]space_key: The space key as seen in the web interface and the URL (often a 3-letter abbreviation).jira_instance: The URL to the Jira instance (often something like MY_JIRA_URL.atlassian.net)
The script is designed for Jira Cloud and API version 3.
On-premise versions of Jira require password-based authentication instead of API tokens and may use API version 2.
If you want to use the script for older on-premise versions, change the |
The output from the script will look something like this:
=== IDs for space MY_SPACE ===
10401

=== Issue types
Test case: 10600
Epic: 10000
Task: 10003
Sub-task: 10004
Bug: 10006
Story: 10001
Feedback: 10200
New Feature: 10005
Support: 10500
Improvement: 10002

=== Priority types
Blocker: 1
High: 2
Medium: 3
Low: 4
Lowest: 5
Informational: 10000
Critical impact: 10101
Significant impact: 10102
Limited impact: 10103
Minimal impact: 10104

=== Field types
CMK_HOST_FIELD: 11400
CMK_SVC_FIELD: 11401
CMK_SITE_FIELD: 11403
2.3. Determining Jira IDs using the GUI
As an alternative to executing scripts, you can also read out the IDs via the Jira GUI, but for this you need to log in to Jira with an administrator account.
Project vs. Space: Some time ago, Atlassian replaced the term Project with Space—but only in the GUI, not in the technical infrastructure, i.e., URLs and APIs.
Therefore, the Space ID corresponds to the projectid in technical outputs.
Finding the projectid is a bit cumbersome: Open the Space settings and click on Toolchain in the navigation bar on the left—the URL that opens will then contain an entry at the very end like projectId=10000.
Alternatively, you can also call the URL MY_JIRA_URL.atlassian.net/rest/api/3/project/MY_SPACE_KEY and look it up in the displayed JSON document.
The IDs of the other fields and types of issues can be read by editing the respective element in the Jira Administrator GUI. You can find the fields under Settings > Work types > Fields. The ID is then usually the last value in your browser’s address bar.
3. Configuring Checkmk
You have already learned how to set up Checkmk notifications in general in the article on notifications.
To use the Jira notifications, proceed as follows in Checkmk:
-
If you want to use custom user attributes, you can create them for the following Jira IDs: Project/Space ID (
jiraproject), Issue type ID (jiraissuetype), Priority ID (jirapriority) and Transition ID (jiraresolution). The names that you enter as the Name of an attribute are shown in brackets. You create a user custom attribute with Setup > Users > Custom user attributes > Add attribute: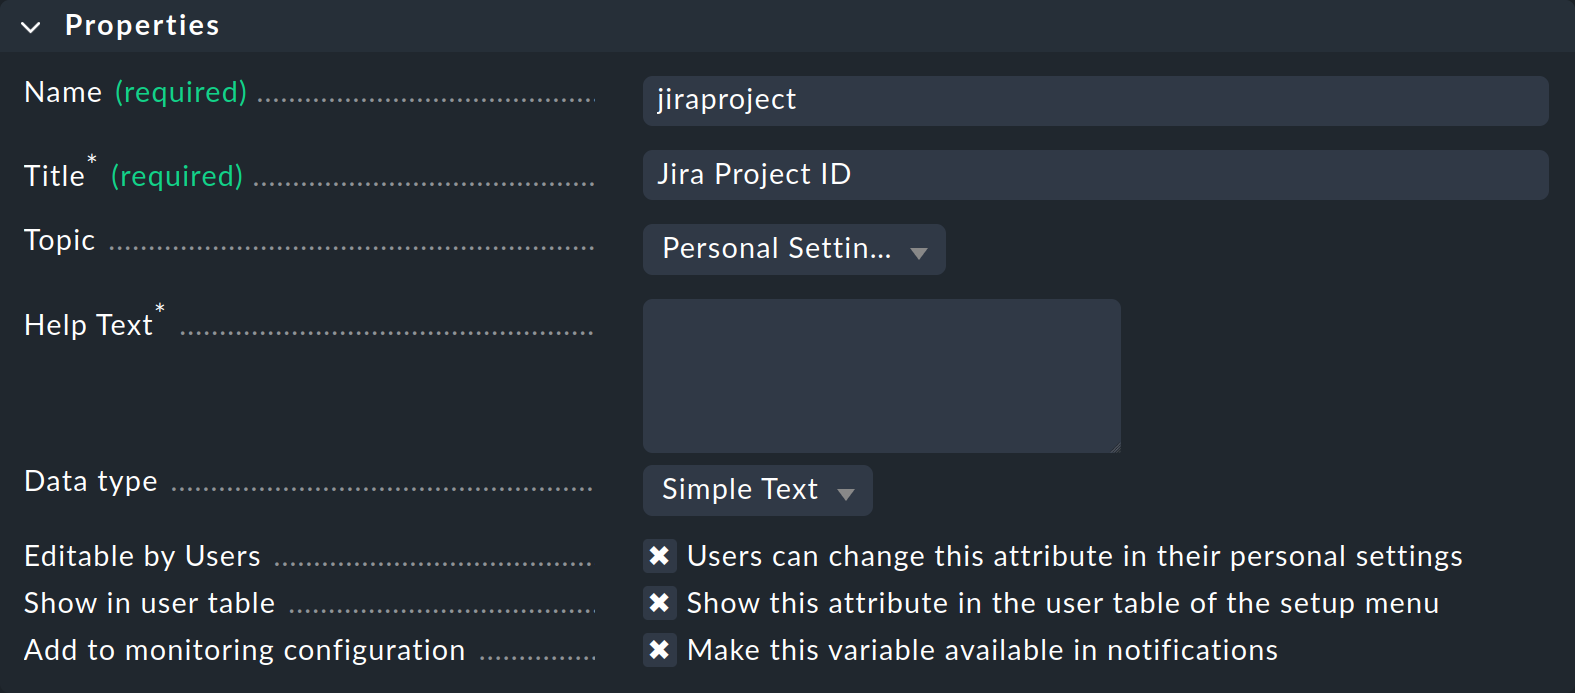
Make sure that the checkbox Make this variable available in notifications is set for all these custom user attributes created for Jira.
In the properties of a user, you can then enter in these attributes the Jira IDs for which this user is responsible.
For each custom user attribute, leave the field of the associated Jira ID empty in the notification rule that is created in the following steps. These fields are then filled with the custom user attributes. -
Create new parameters for Jira with Setup > Events > Notifications > Parameters for notification methods > Parameters for Jira > Add parameter.

In the JIRA URL field, enter the URL of your Jira instance, e.g.
jira.server.your-domain.com.-
In the Authentication section, enter the Jira account credentials for access.
Jira Data Center and Jira Server: API/PAT token.
Jira Cloud products: Basic authentication with username and password—note that an API token must be entered here under Password (more information at Atlassian)
For Project ID and Issue type ID you need the previously-identified IDs in Jira, in the example '10401' for the Project ID and '10006' for the Issue type 'Bug'.
For Host custom field ID, Service custom field ID and (optionally) Site custom field ID enter the IDs of the custom fields you created in Jira.
To be able to link directly to Checkmk from any generated issues, under Monitoring URL enter the URL for your Checkmk site, for example:
https://mycmkserver/mysite/, where it is important to enter the trailing slash (/).
Among other, you also have the following optional settings:
With the Priority ID you can define with which priority the issues are created in Jira. Here you can enter one of the 'priority types' read out in the script, from '1' to '5'.
You can change the descriptions that are created for host and service problems in the issues via the options Summary for host notifications and Summary for service notifications.
You can use the Label option to define whether you want to pass labels when creating issues in Jira. If you activate Label without entering a value,
monitoringwill be set.
Checkmk writes the value of the label into the Jiralabelsfield, that only works if this field exists in your Jira application, which is the case with Jira Software, but not with Jira Service Desk for example.Attach graphs adds related graphs with the current status to new issues.
If you also want to have a Resolution entered into the issue in Jira when notifying of a state change to OK in Checkmk, you can define it under Activate resolution with following resolution transition ID.
To be able to determine the correct ID here, you also need administrator rights in Jira. Navigate back to the Issues area and click on Workflows. Then click on View in the row of the standard workflow of the Jira project you are using. If you now see a flowchart, change the display by clicking on Text. You will be able to read the desired ID in the Transitions (id) column.With Set optional timeout for connections to JIRA you can configure the timeout for connections to Jira. If you do not enter anything here, the default value of 10 seconds will apply.
When using the following Contact selection box, note the following points:
When selecting contacts, make sure that the notifications are only sent to one contact, e.g. by selecting a single user. With the notification methods for ticket systems etc., the contact selection only serves to specify that notifications are sent. However, the notifications are not sent to the selected user, but to the ticket system. Note that a contact selection via contact groups, all contacts of an object or similar usually generates several identical notifications for an event, which then end up in the ticket system twice, three times or even more often.
If the first point is fulfilled, but the user is used in several notification rules for the same method, then only the last rule applies in each case. It is therefore advisable to create a separate functional user for each of these notification rules.
The topic of contact selection is somewhat different when using custom user attributes, as this is intended to assign different Jira IDs to different users. Therefore, in this case you will usually want to inform several contacts, namely those users to whom you have assigned the custom attributes. If these users use different Jira IDs, identical notifications will not be generated.
You can find out how to test the new notification method in the article on notification rules.
4. Diagnostic options
If no tickets arrive in Jira after setting up the notification rule in Checkmk, check the associated log file ~/var/log/notify.log.
Jira usually returns quite useful error messages here, which can actually help you with the problem diagnosis.
In the following we list some examples.
Error message: Unable to create issue, JIRA response code 400, Field 'labels' cannot be set.
Your Jira product may not have labels. Simply disable the use of labels in your notification rule in Checkmk by unchecking Label.
Error message: Unable to create issue, JIRA response code 400, b’project is required'.
This error message indicates that the ID you entered in the notification rule for the field in question (here: Project ID) is incorrect.
Error message: Unable to resolve https://jira.server.your-domain.de/browse/ISSUE-123, JIRA response code 500, b’Internal server error'.
If you get this error message when a ticket in Jira is supposed to be closed automatically by Checkmk, or respectively should be changed to another status, then this may be a hint that the Transition ID you entered is not correct. The Transition ID is in the notification rule in the Activate resolution with following resolution transition ID field. As a rule, you should compare this ID again with the Jira web interface.