1. Introduction
In this article you will learn how to set up a login via Secure Assertion Markup Language (SAML) in Checkmk.
SAML is a standardized method for informing external applications and services that a user is actually who they claim to be. SAML makes single sign-on (SSO) possible because it can be used to authenticate a user once and then communicate that authentication to multiple applications. With the help of the connection and communication between the so-called 'Service Provider' (SP) and the so-called 'Identity Provider' (IdP), it is thus possible for employees to access various web applications with just a single login. In the SAML architecture, the Service Provider makes the application available and the Identity Provider manages the digital identities of the users.
SAML is supported in the commercial editions of Checkmk and can be set up directly in the Checkmk web interface. Checkmk takes the role of the Service Provider. For example, as described in the setup chapter, Entra ID is an example of an Identity Provider.
Microsoft Entra ID (short: Entra ID) is the new name for Azure Active Directory (Azure AD) since 2023. However, the screenshots and contents of configuration files contained in this article still use the old name Azure AD. |
![]() Up to Checkmk version 2.2.0, as an alternative, SAML was also supported by the Apache
Up to Checkmk version 2.2.0, as an alternative, SAML was also supported by the Apache mod_auth_mellon module, which was supplied as part of the Checkmk software.
From version 2.3.0, mod_auth_mellon is no longer included in the Checkmk software.
If you want to use SAML as a ![]() Checkmk Community user, you must therefore install
Checkmk Community user, you must therefore install mod_auth_mellon yourself.
The configuration based on this is described in chapter on Checkmk Community.
However, it is no longer supported by us.
The whole topic of transport encryption (TLS/SSL) is only included in the examples in a simple, demonstration implementation. In production environments with your own Certificate Authority (CA) and proper certificate handling, there will be some differences which will depend on your own infrastructure. |
2. Using SAML in Checkmk
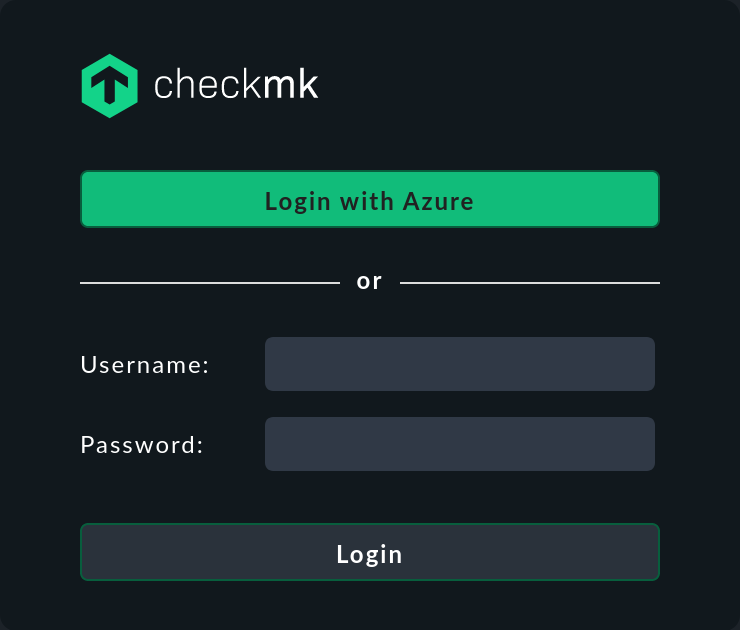
Once you have gone through all of the points of the setup process, the SAML login can be used by the user in Checkmk. The button text can be customized, as described below.
Any user authorized by SAML will be automatically created in Checkmk the first time they log in there — provided that there is not already a user with the same ID. If a user with the same ID already exists, the current user creation will be rejected.
The user data will be synchronized every time the user logs in to Checkmk.
Several prerequisites must be met for SAML to function:
The web interface must be secured with HTTPS. For security reasons HTTP addresses are not accepted.
Checkmk’s SAML endpoints for ID/metadata and responses (Assertion Consumer Service) must have been registered with the IdP. Below we will show how this can be done.
Messages directed by the IdP to Checkmk — responses to authentication requests (only mandatory for the assertion) and attribute statements — must be signed with one of the supported algorithms.
2.1. Supported algorithms
Checkmk accepts the following algorithms for communication with the IdP:
RSA-SHA256
RSA-SHA384
RSA-SHA512
ECDSA-SHA256
ECDSA-SHA384
ECDSA-SHA512
Checkmk itself uses RSA-SHA256 for signing its requests.
If the IdP does not use any of the above algorithms for its response, the response will be rejected by Checkmk.
3. Setting up SAML
To be able to use SAML in the commercial editions, the IdP must first be set up. In our example this is Entra ID (called Azure Active Directory until 2023). Once this has been done, the SP, i.e. Checkmk, is then supplied with the required information.
3.1. Logging in to Entra ID
Registering the Checkmk SAML service in Entra ID
Next, register the Checkmk SAML service with Entra ID. To do this, call Enterprise applications > Create your own application.
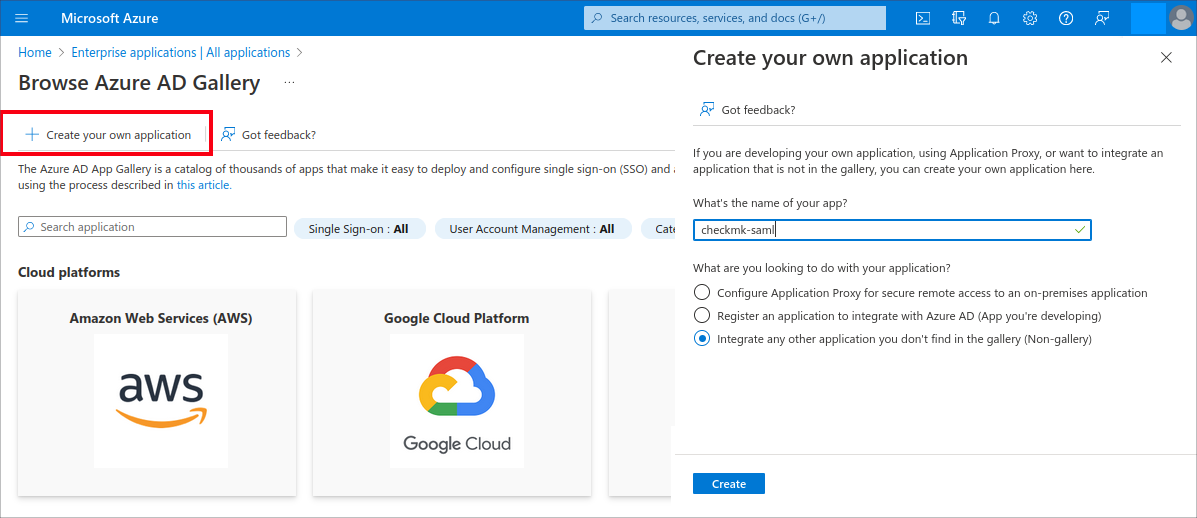
Assign an arbitrary, preferably meaningful name, e.g. checkmk-saml.
We recommend not naming the application simply checkmk to avoid confusion with the Checkmk agent.
Select the Integrate any other application you don’t find in the gallery (Non-gallery) option and then click the Create button.
On the Entra ID overview page you will have created the following function: Single sign-on > SAML > Basic SAML Configuration:
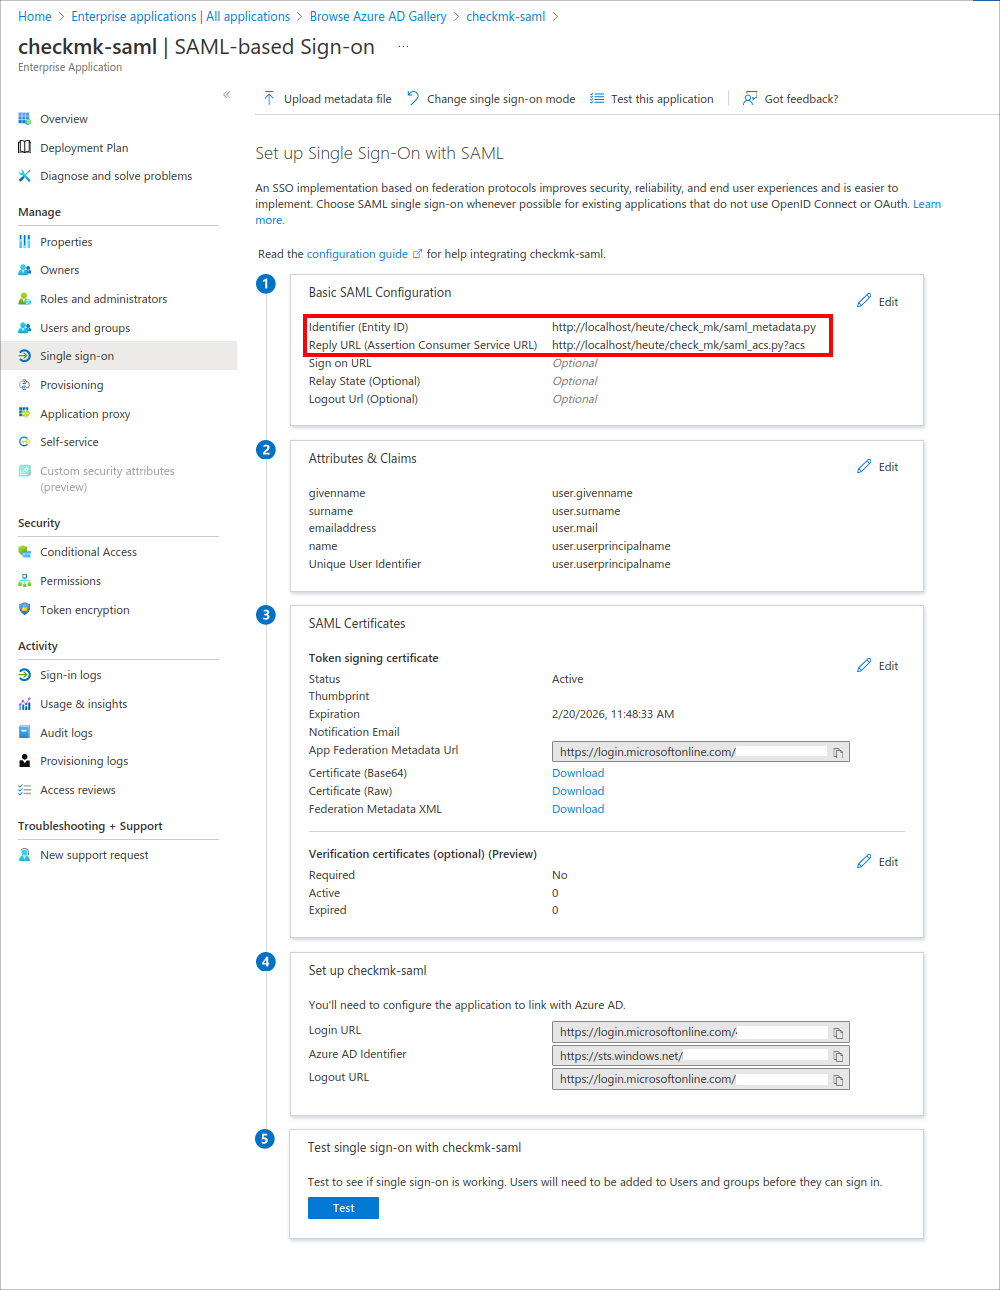
At this point, Entra ID will require two more pieces of information:
the Identifier (Entity ID) in the
https://myserver.com/mysite/check_mk/saml_metadata.pyformat, andthe Reply URL (Assertion Consumer Service URL) in the
https://myserver.com/mysite/check_mk/saml_acs.py?acsformat.
Leave all other options unchanged at their default value or empty. In particular, the Relay State in the Basic SAML Configuration must remain unchanged, otherwise SAML will not work.
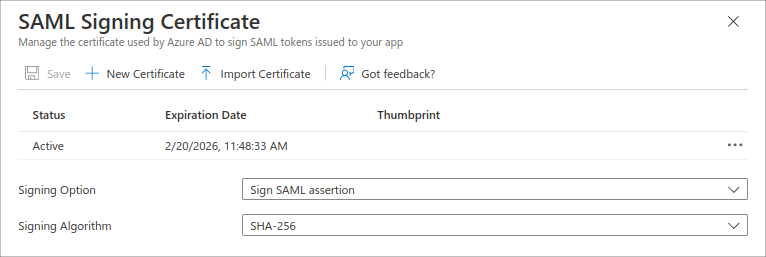
Now call Edit > Signing Option > Sign SAML assertion to configure an Entra ID for responses and verifications:
Retrieving SAML information from Entra ID
Next, go to Entra ID to find the SAML information you need for Checkmk.
This is available in the Enterprise applications | All applications > Browse Microsoft Entra Gallery > checkmk-saml | SAML-based Sign-On view (see above):
In the SAML Certificates box, find the App Federation Metadata URL. You will need this in the next section for setting up SAML in Checkmk (Identity provider metadata).
The Attributes & Claims box takes you to a view of the user attributes for Checkmk, e.g. email address, first and last name:

3.2. Activating SAML in the Checkmk web interface
With the information obtained earlier, set up the SAML connection on the Checkmk side.
If necessary, add the TLS certificate issued by your IdP to the trusted certificates in Checkmk by entering it in Setup > Global settings > Trusted certificate authorities for SSL.
Now open Setup > Users > SAML authentication. Use Add connection there to start configuring a new connection:
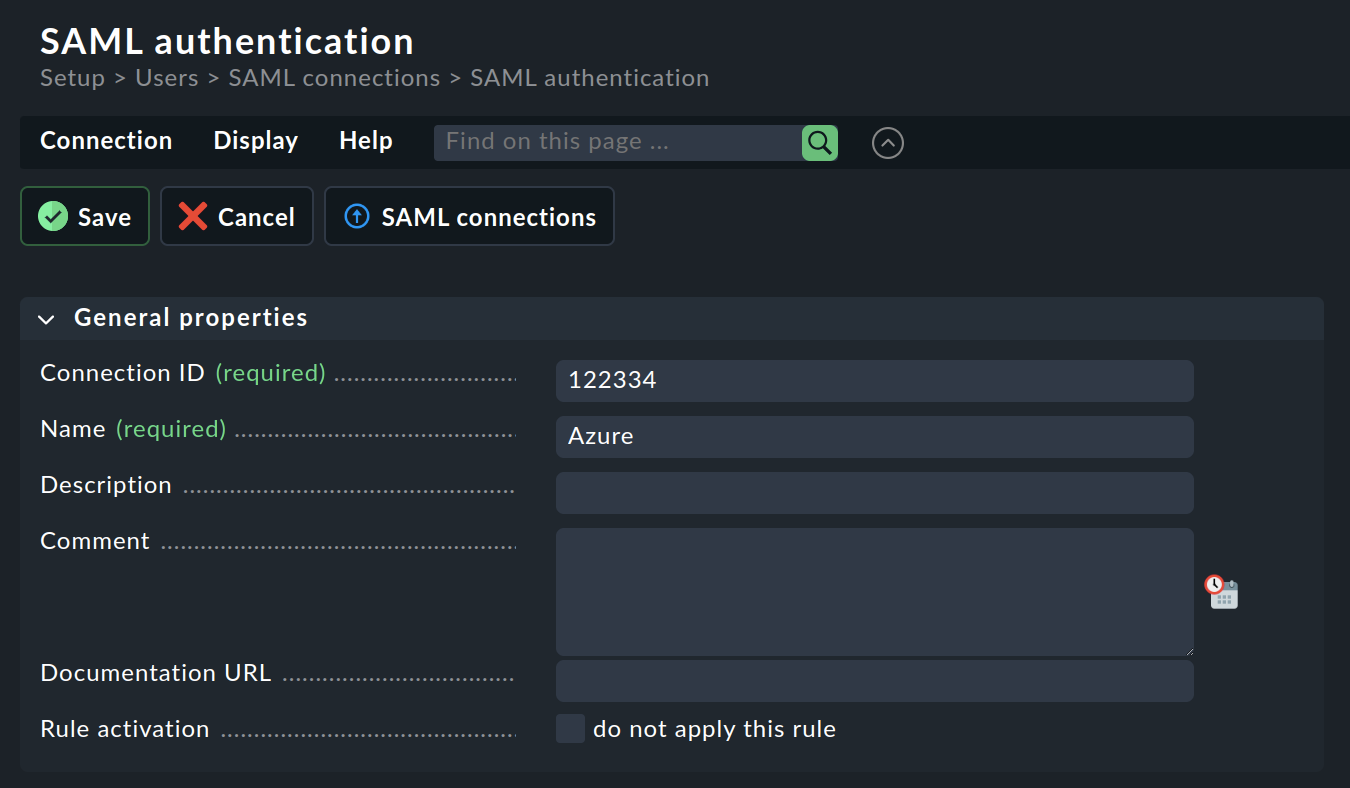
Assign a Connection ID and a Name for the new connection. The Name will be used afterwards for naming the Checkmk login button.
Next, in the Security box, you specify whether you want to secure the access connections with Checkmk or with your own certificates:
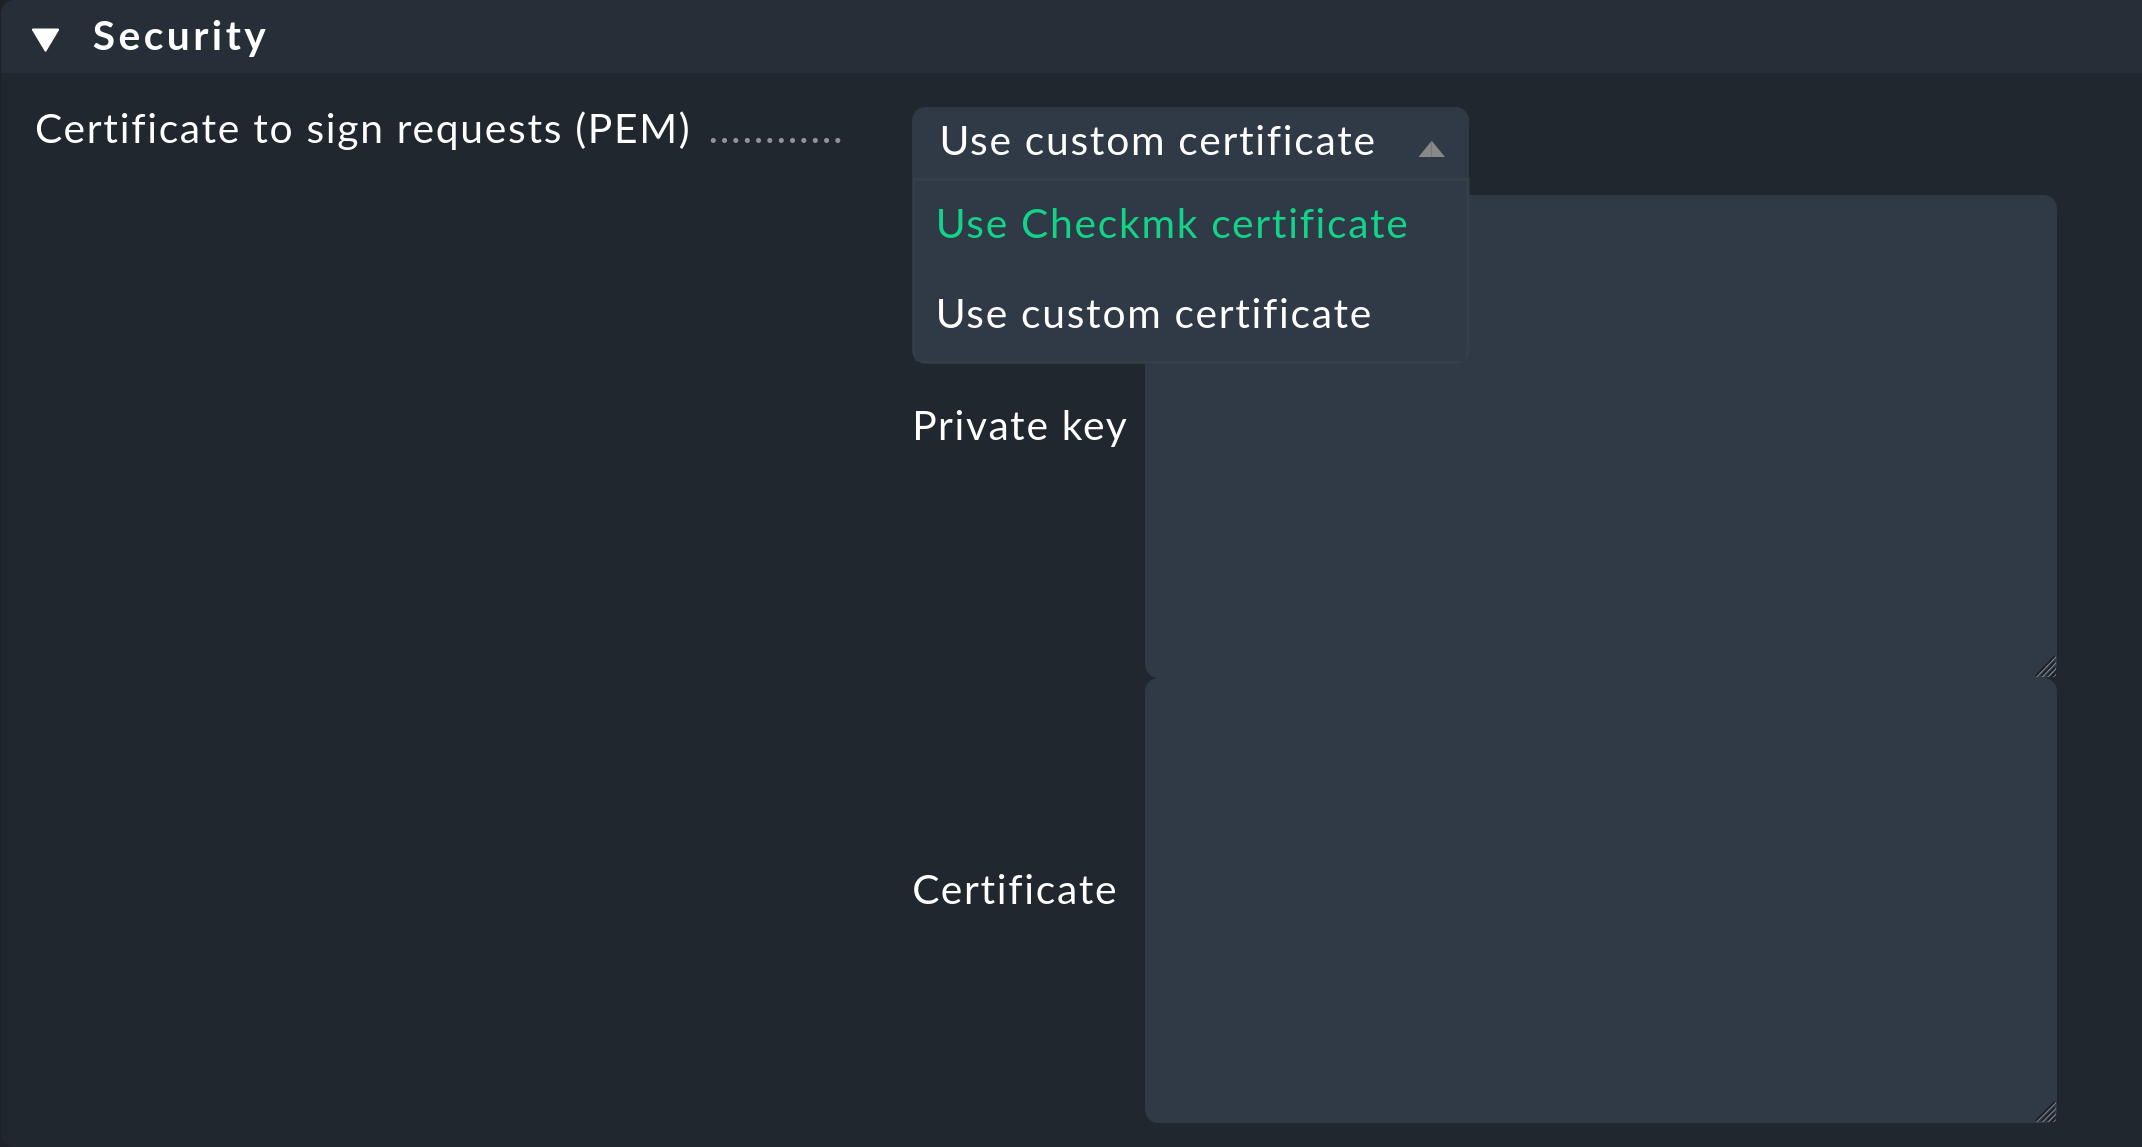
If you use your own certificates, you must specify the Private key and the Certificate.
Custom certificates are stored in the site directory under ~/etc/ssl/saml2/custom/.
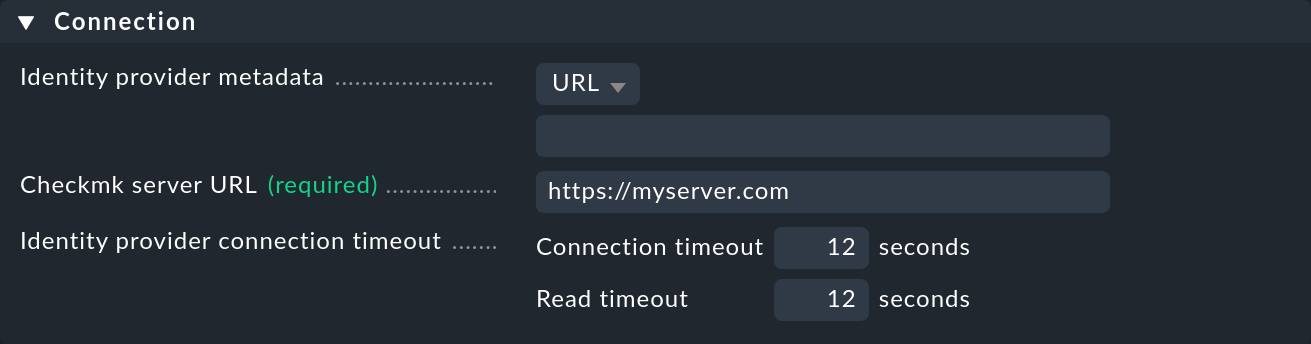
Next, in the Connection box, as the Identity provider metadata enter the URL (e.g. App Federation Metadata URL) you selected as described in the previous section:
Alternatively, you can download the metadata XML file directly from Entra ID and upload it in the dialog above with the Upload XML file in the Identity provider metadata option.
This is convenient, for example, if your Checkmk server has no access to the internet.
For the mandatory Checkmk server URL, enter the address you — not Entra ID — normally use to access Checkmk, e.g. https://myserver.com.
You will now need to enter the user details into the Users box:
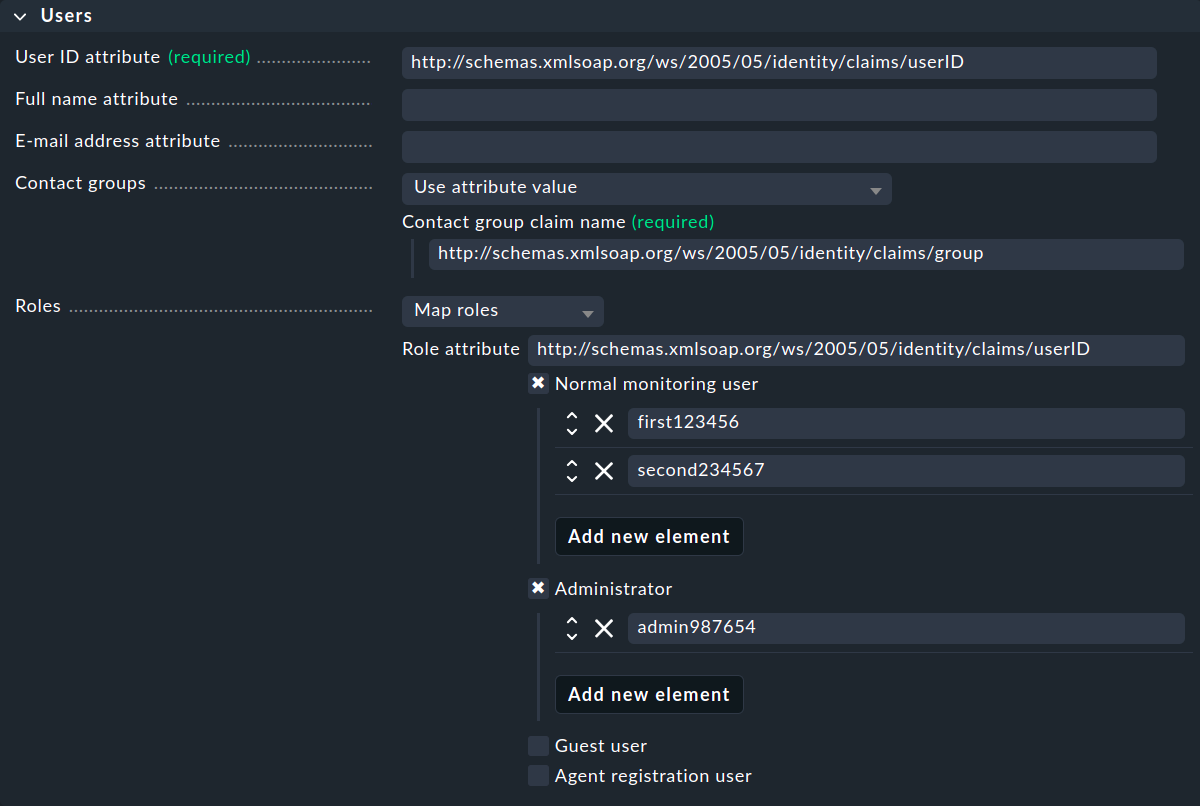
You also need to obtain this information as described in the previous section.
It is important to note that the User ID attribute must be unique, for instance the user ID.
Checkmk here requires the complete claim name from Entra ID, i.e. the URL address starting with http, for each entry,
for instance, in the above example, the user ID is http://schemas.xmlsoap.org/ws/2005/05/identity/claims/userID.
In order to define the responsibilities for all users who authenticate themselves with SAML in Checkmk, each user can be assigned to one or more contact groups. You have various options for defining the mapping in the Contact groups.
You can use the Roles to assign users to different roles in order to define normal users, administrators, etc.
4. SAML in Checkmk Community
The configuration described in this chapter is only of interest to Checkmk Community users who cannot use the SAML connection built into the commercial editions of Checkmk.
The prerequisite is that you have installed the Apache module |
The following sections only describe the configuration of mod_auth_mellon for any IdPs that may already be running, using Active Directory Federation Services (ADFS) as an example.
The connection in Checkmk itself is limited to the last step from the ADFS instructions.
On the Checkmk server, mod_auth_mellon acts as the service provider for authentications.
4.1. Logging in with Active Directory Federation Services
Prerequisites
Logging on to Checkmk using Active Directory is basically relatively simple: Active Directory Federation Services (ADFS) serves as Identity Provider (IdP), Checkmk provides the SAML authentication.
Prerequisites for this tutorial are accordingly:
Functioning LDAP-AD integration
Working ADFS as IdP
Checkmk server with SSL
A supported operating system.
The setup is accomplished in three steps:
Configuration of Apache (one result: XML file with metadata).
Configuration of ADFS: setting up a relying party trust with Mellon metadata.
Enabling of the login in Checkmk itself.
Configuring Apache
This is, of course, about configuring the site’s own Apache server, so log in there first:
Now create a directory for mod_auth_mellon and switch to it:
Now run mellon_create_metadata specifying your server as well as your site with the mellon suffix:
This module generates three files: Certificate (.cert), key (.key) and static metadata (.xml).
The .xml file is not required and can be deleted:
Rename the key and certificate files for simplicity:
Now get the required metadata directly from your ADFS server (here myadfs) and save it as idp-metadata.xml:
Now you need the public certificate for the ADFS server, which is stored in the idp-public-key.pem file:
Just in case you are wondering about the echo -n:
This is used to terminate the following SSL session.
The certificate should, or even must be uploaded to the trust store if, for example, the IdP service checks the certificate chain. For more information on this topic, see the HTTPS article. |
As a final step, replace the authentication configuration file ~/etc/apache/conf.d/auth.conf with the following variant — of course specifying your Checkmk server (here myserver) and your site (here mysite).
Note in the following example configuration that the path of the installation directory in the line beginning with LoadModule may vary depending on the distribution used:
Then restart Apache:
Last but not least, you now download the dynamically created Mellon metadata as an XML file so that you can import it into AD Management right away:
Configuring Active Directory
To create a relying party trust in ADFS, do the following:
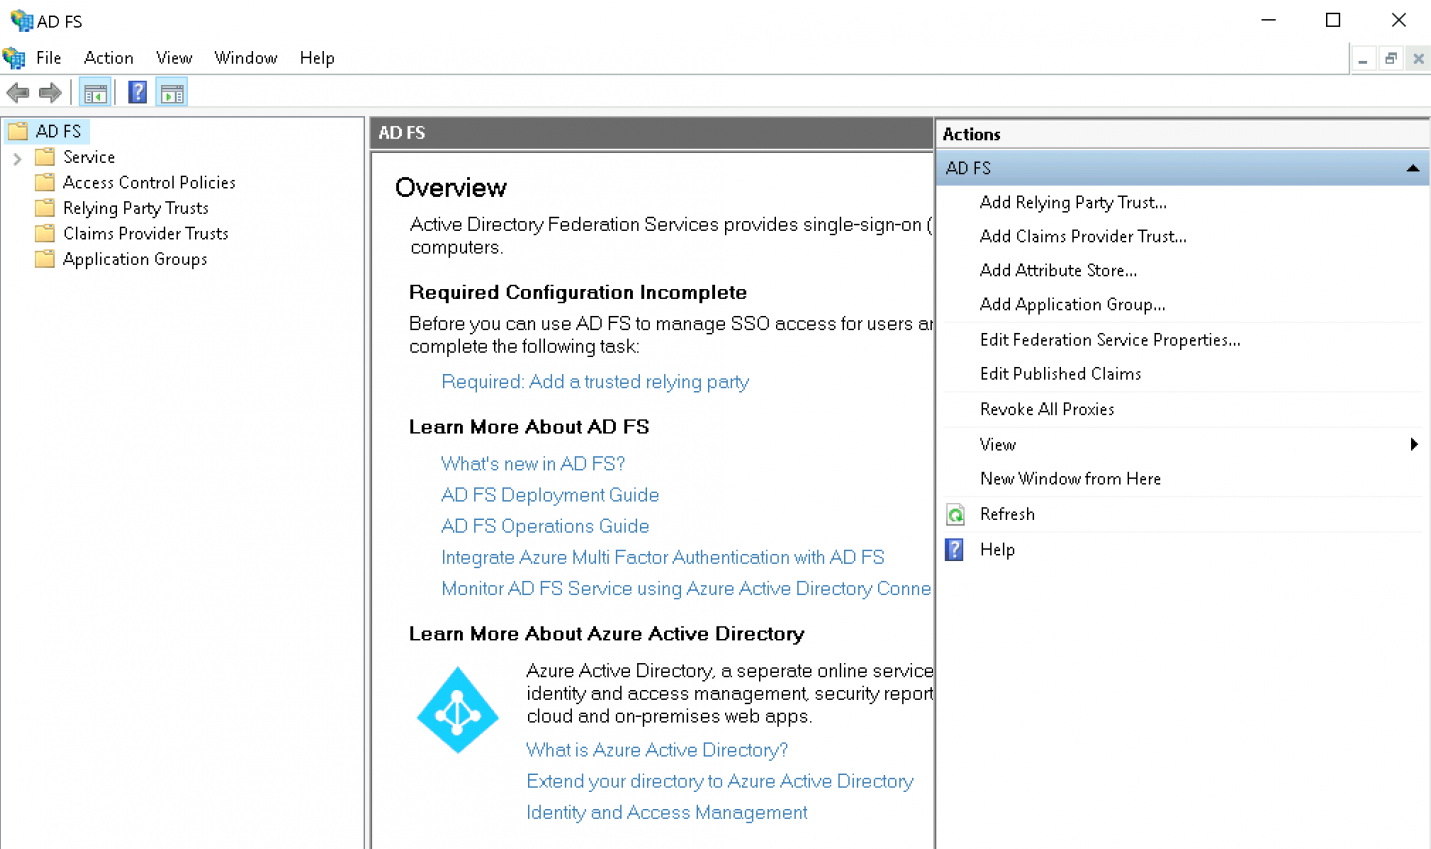
Start the ADFS interface:
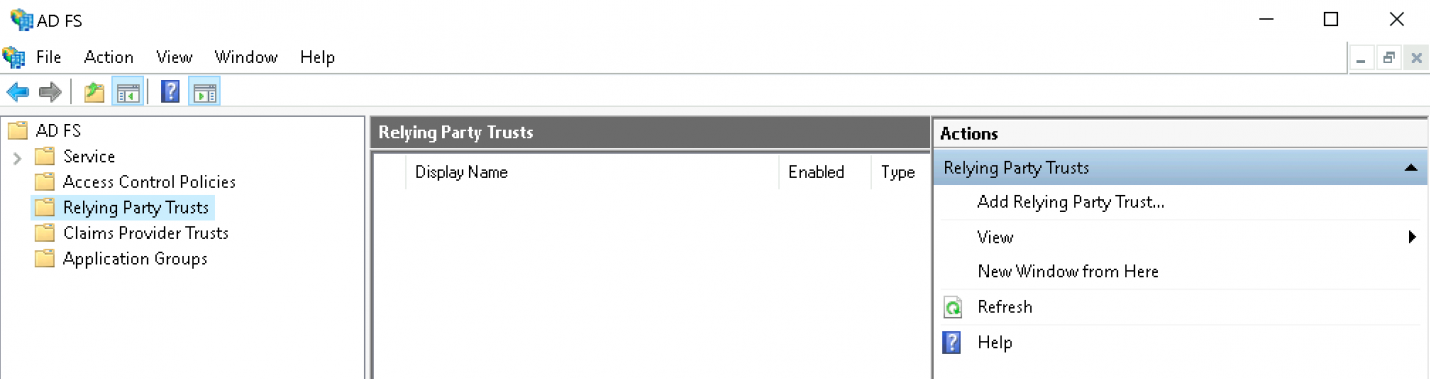
Click Add Relying Party Trust:
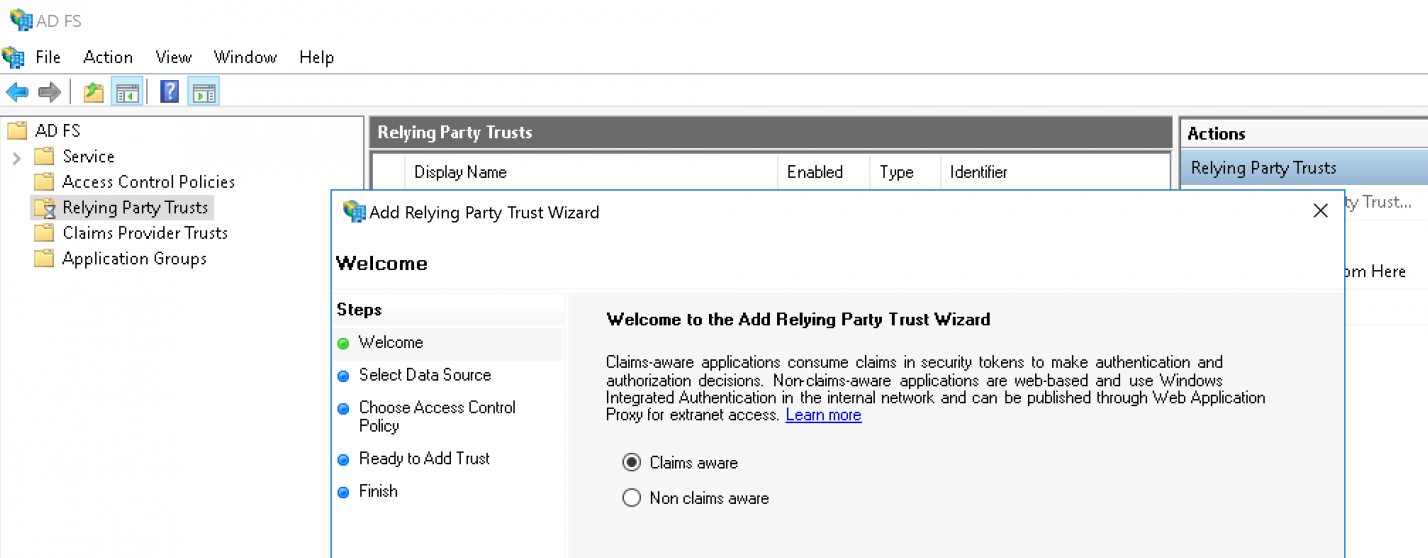
Leave the option set to Claims aware and continue with the Start button:
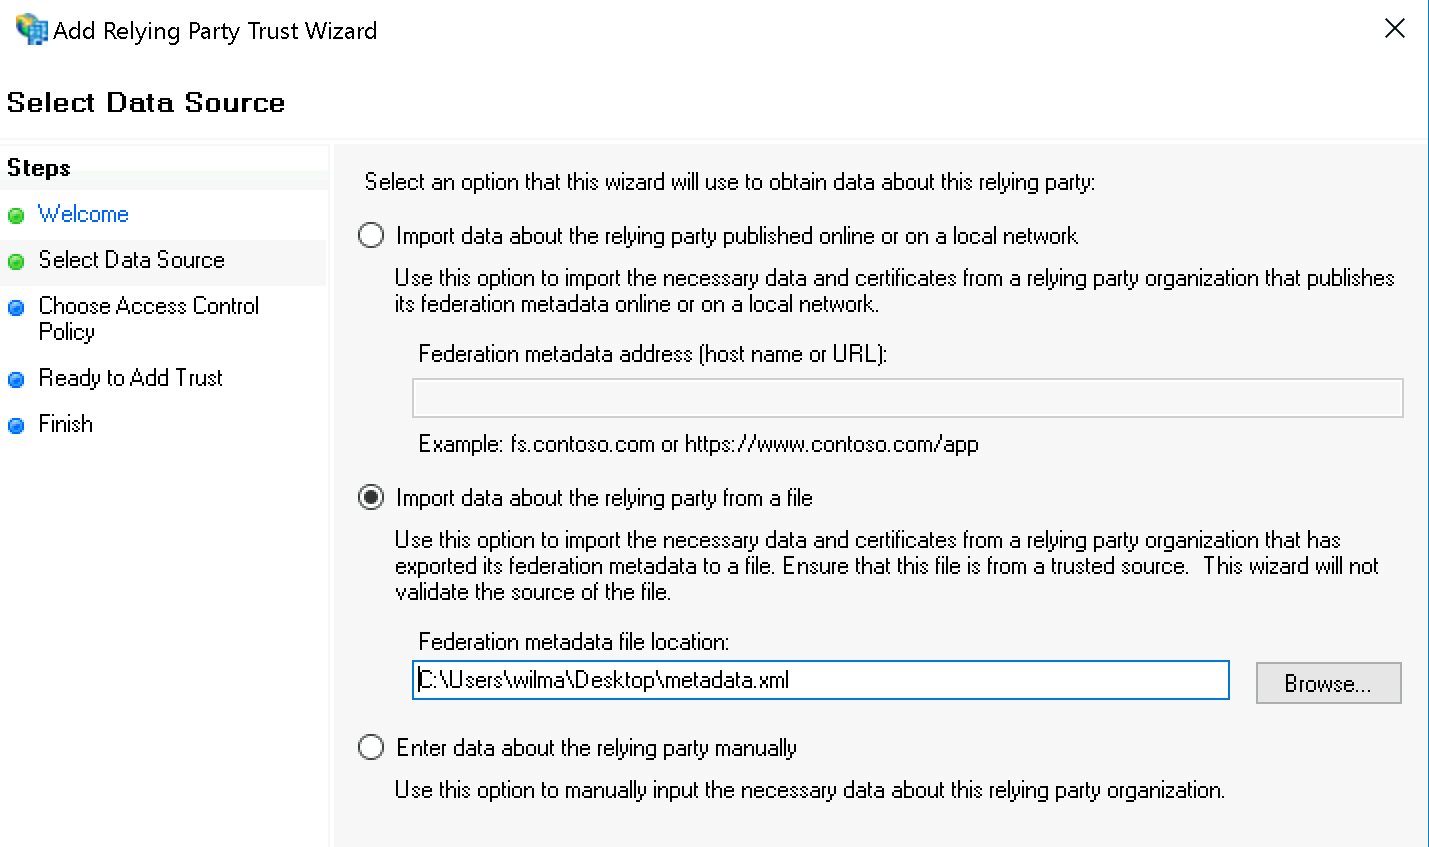
Now select Import data on the relying party from a file and specify the XML file you just downloaded:
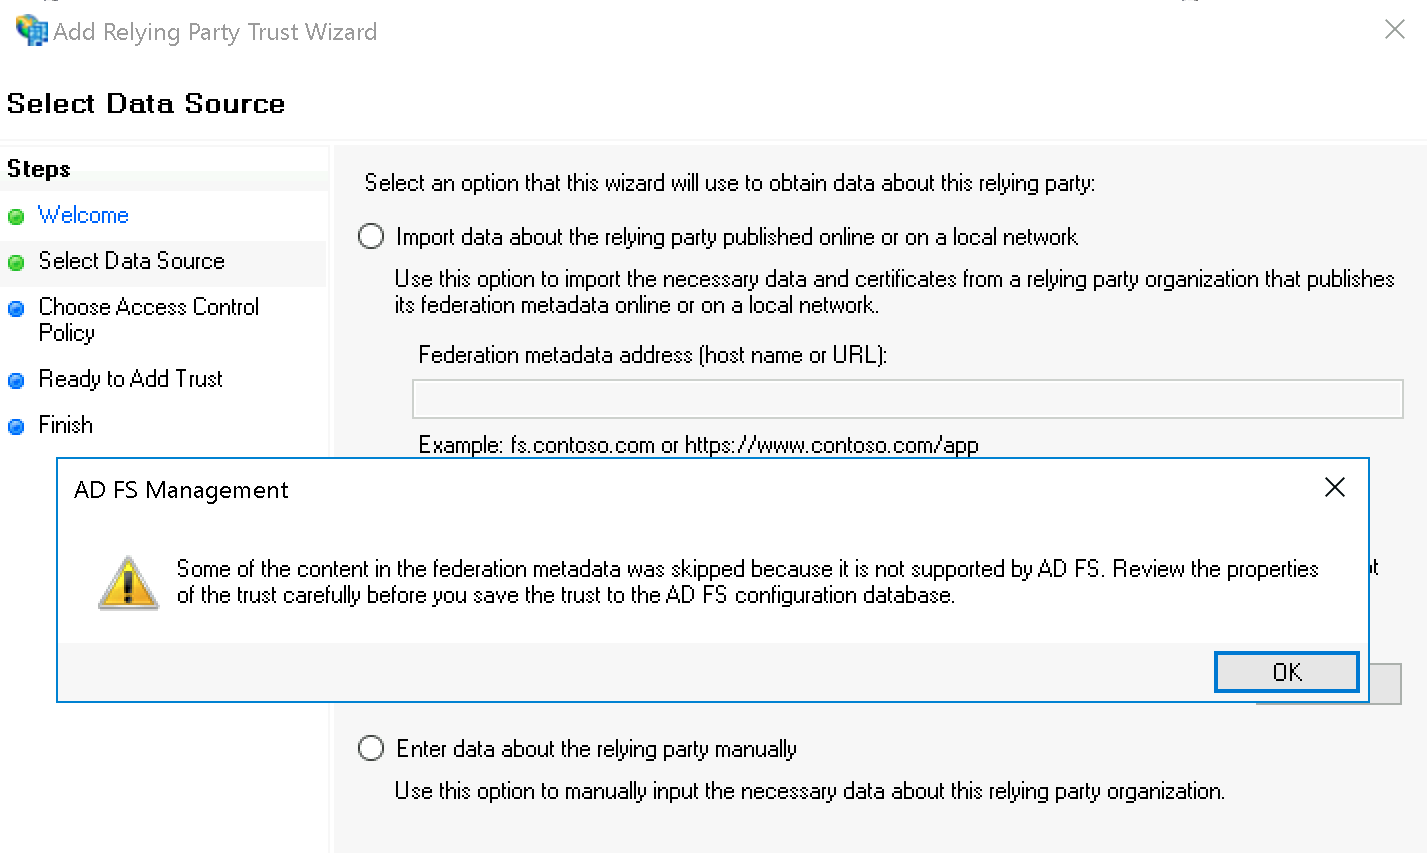
You can safely ignore the AD FS Management warning:
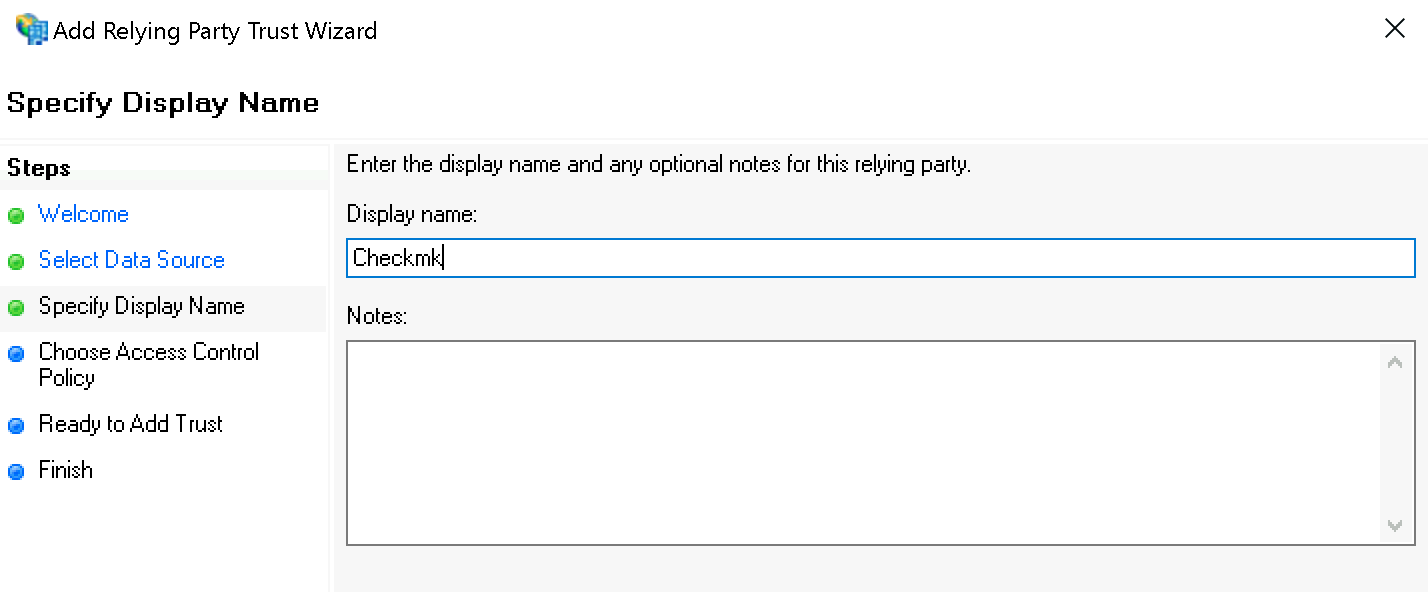
Under Specify Display Name now enter Checkmk as the name:
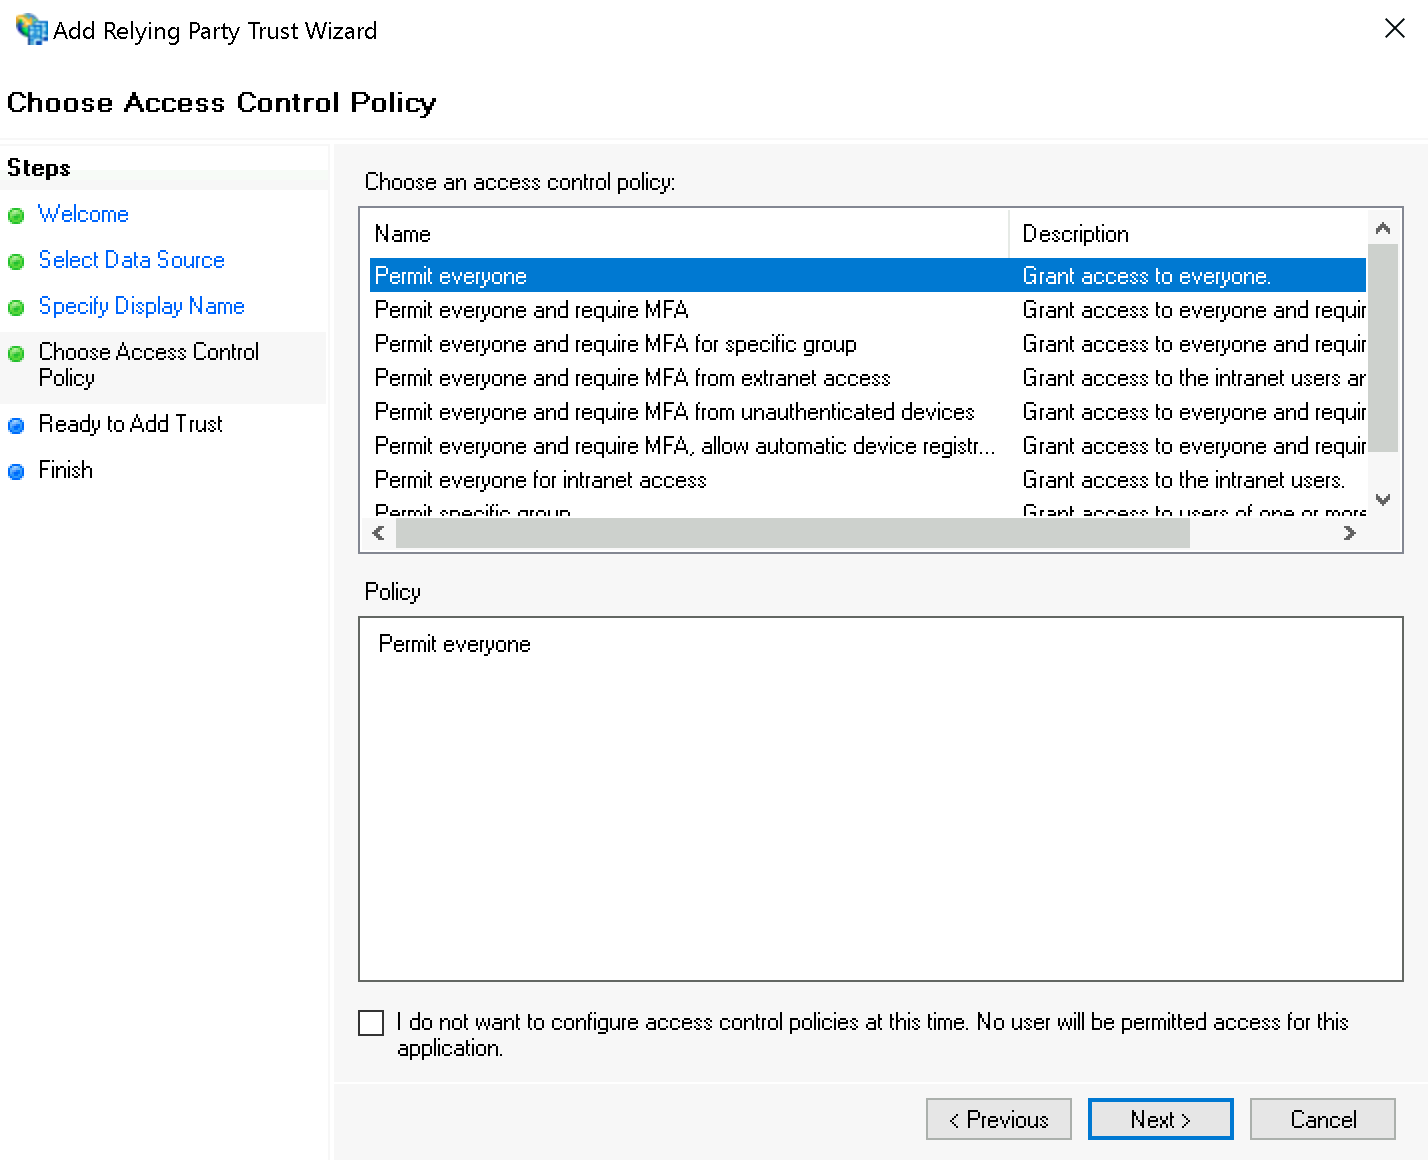
When assigning permissions, for testing purposes, for the Choose Access Control Policy you can first select the value Permit everyone; you should later change this to Permit specific group.
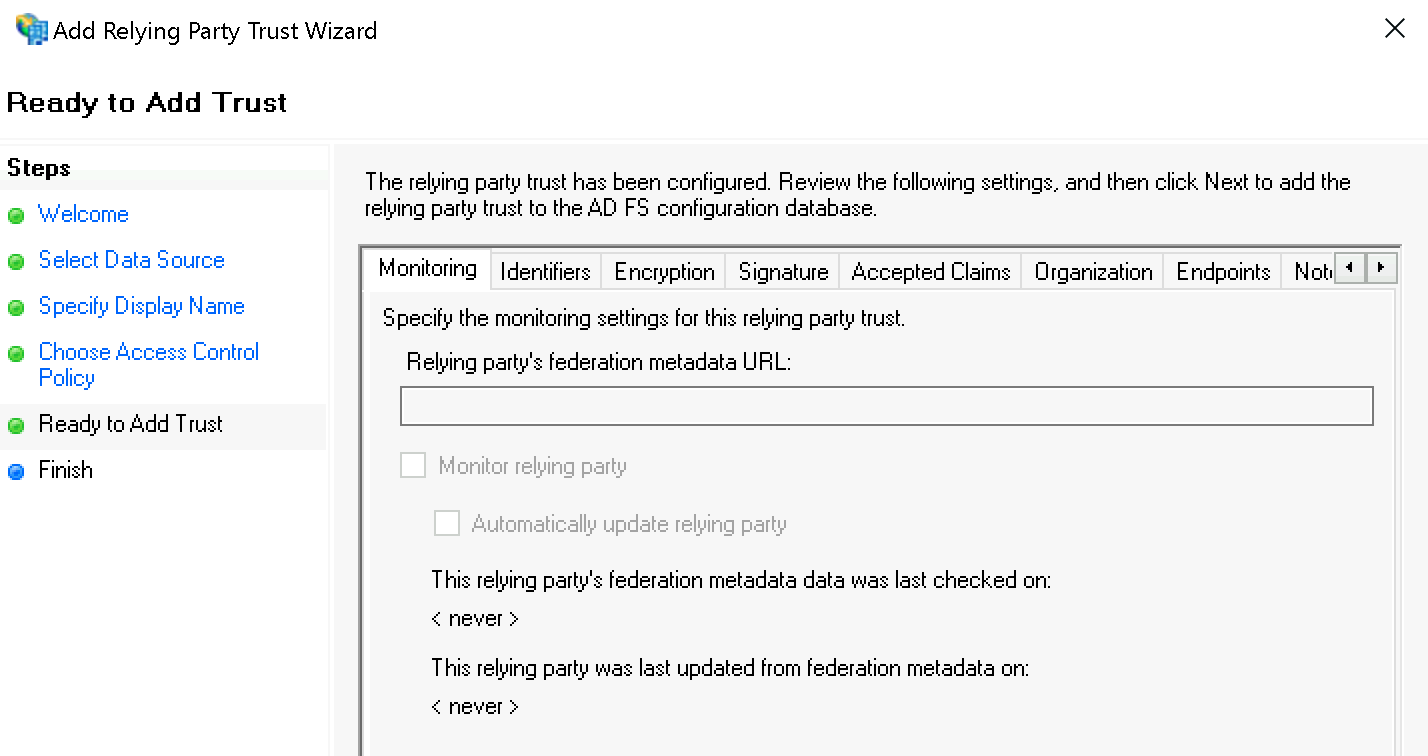
Confirm the summary under Ready to Add Trust:
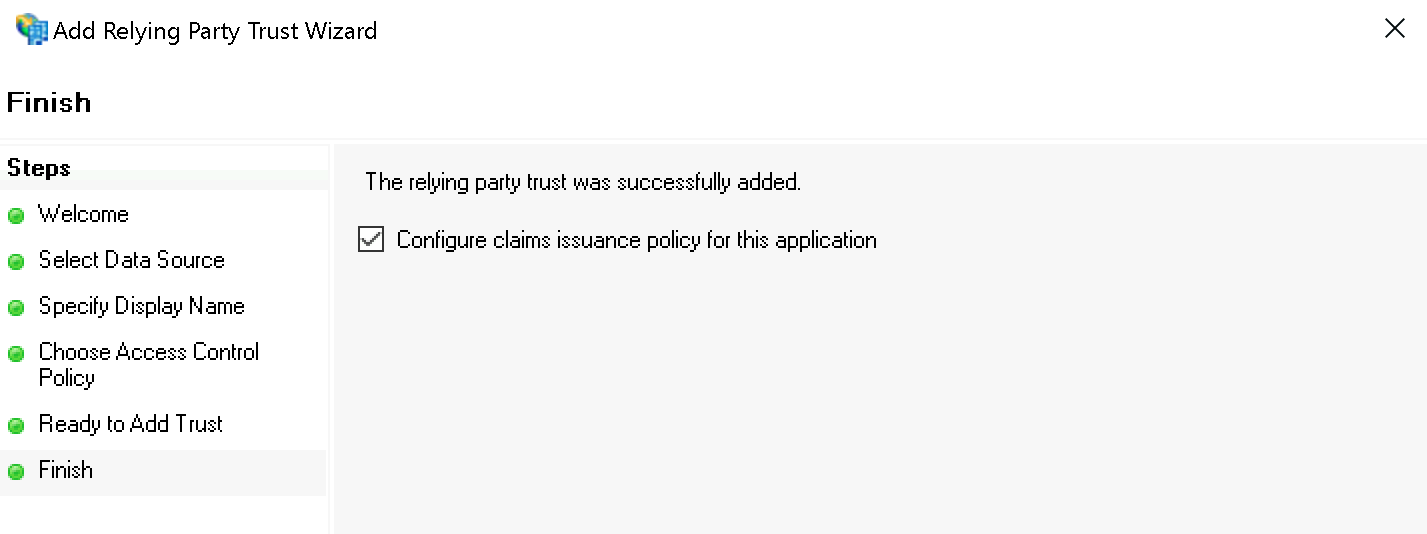
Finally, confirm the Finish dialog and keep the check mark at Configure claims issuance policy for this application:
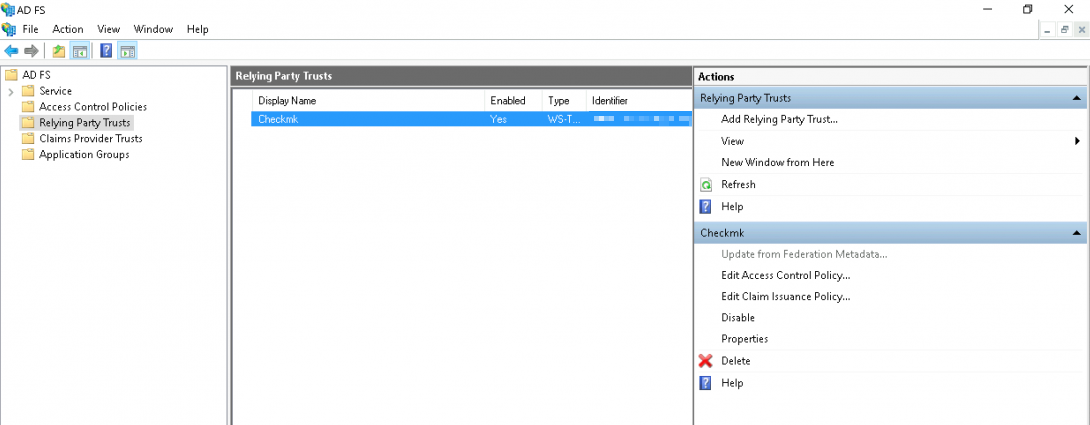
Select the relying party trust you just created and then start the editor with Edit Claim Issuance Policy…:
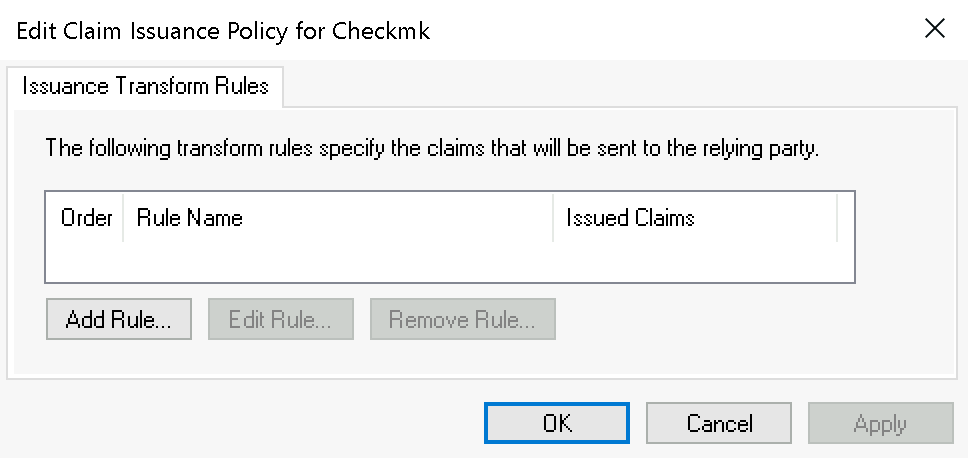
Add a new rule in the following dialog via Add Rule…:
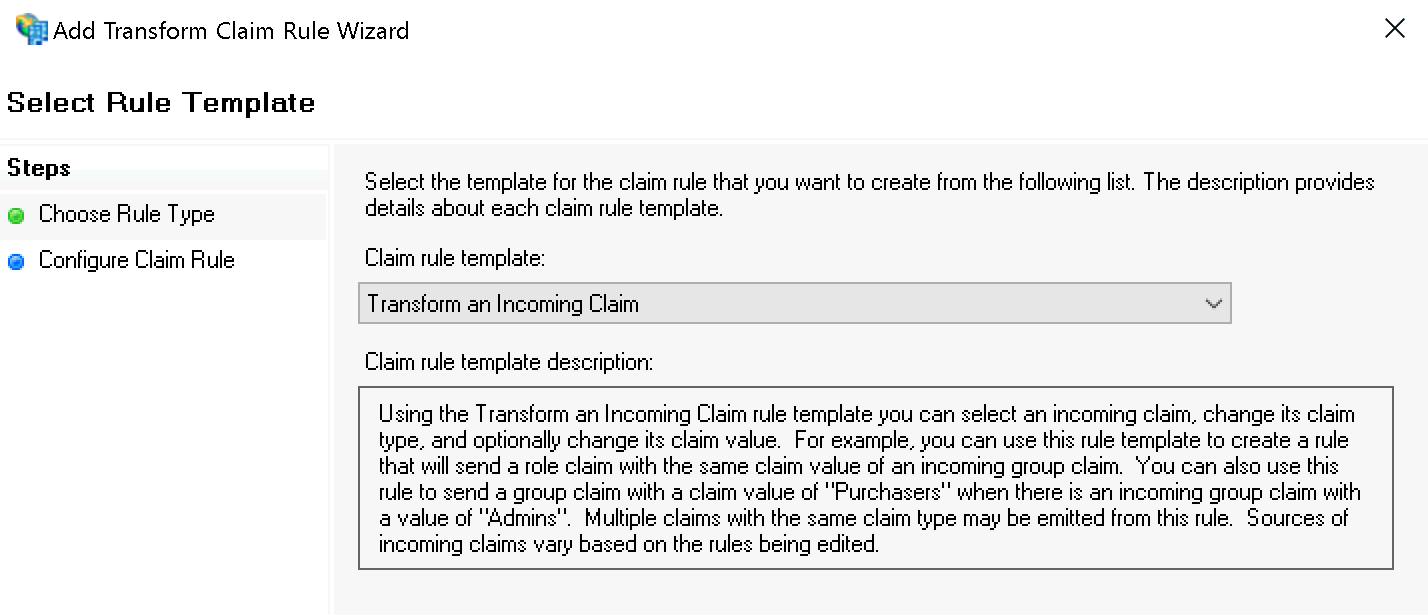
In the first step Select Rule Template select Transform to Incoming Claim and confirm:
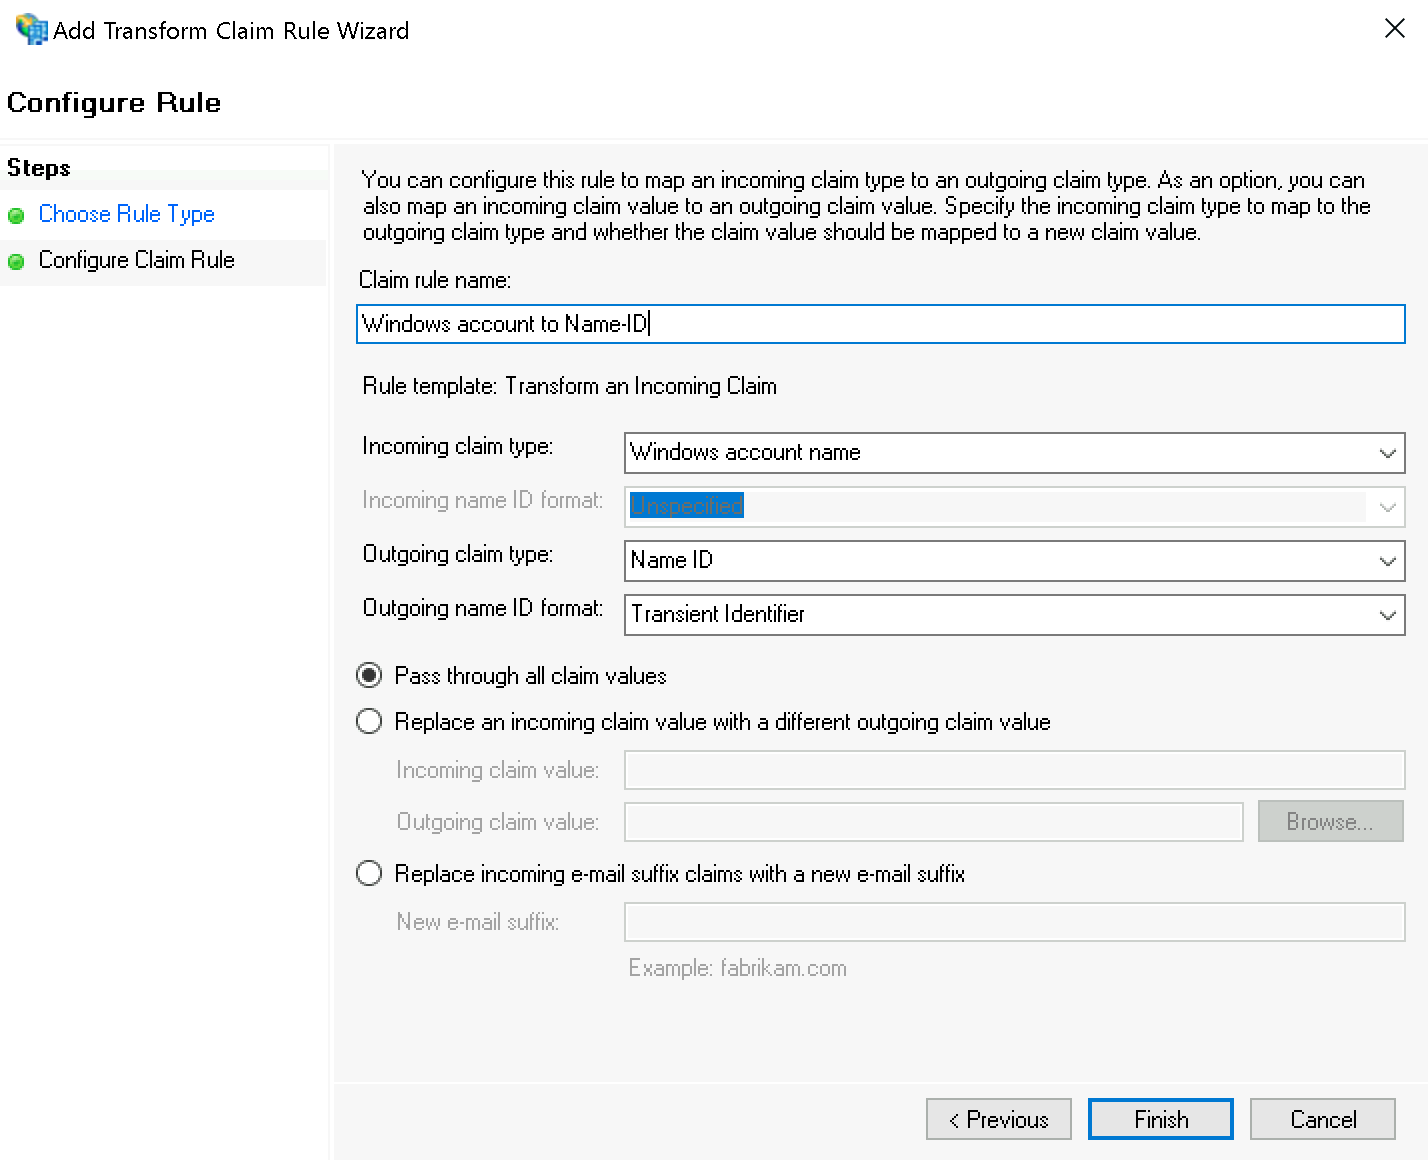
In the second step Configure Rule set the following values:
Incoming claim type:
Windows account nameOutgoing claim type:
Name IDOutgoing name ID format:
Transient Identifier
That step also completes the ADFS configuration. FS can now derive authentication for Checkmk from Windows authentication, which you instruct to authenticate users via HTTP requests in the next step.
Configuring Checkmk
In Checkmk, under Setup > General > Global Settings > User Interface > Authenticate users by incoming HTTP requests, at the Current settings you now only need to activate the Activate HTTP header authentication option.

4.2. Additional information for other systems
Entra ID with mod_auth_mellon
When Entra ID (called Azure Active Directory until 2023) acts as the IdP, there are some differences in the configuration procedure, for example, the username can be specified directly without needing to be rewritten.
Prerequisites for the following sample configuration:
Set UserPrincipalName in LDAP connection as the identifier (more information in the Microsoft documentation).
Custom Enterprise App in Entra ID with UserPrincipalName as the 'name' attribute (for more information see the Microsoft documentation).
Note in the following example configuration that the path of the installation directory in the line beginning with LoadModule may vary depending on the distribution used:
NetIQ Access Manager
When NetIQ Access Manager acts as the IdP, there are some differences in the configuration procedure, for example, the username can be specified directly without needing to be rewritten.
Note in the following example configuration that the path of the installation directory in the line beginning with LoadModule may vary depending on the distribution used:
5. Migrate existing users
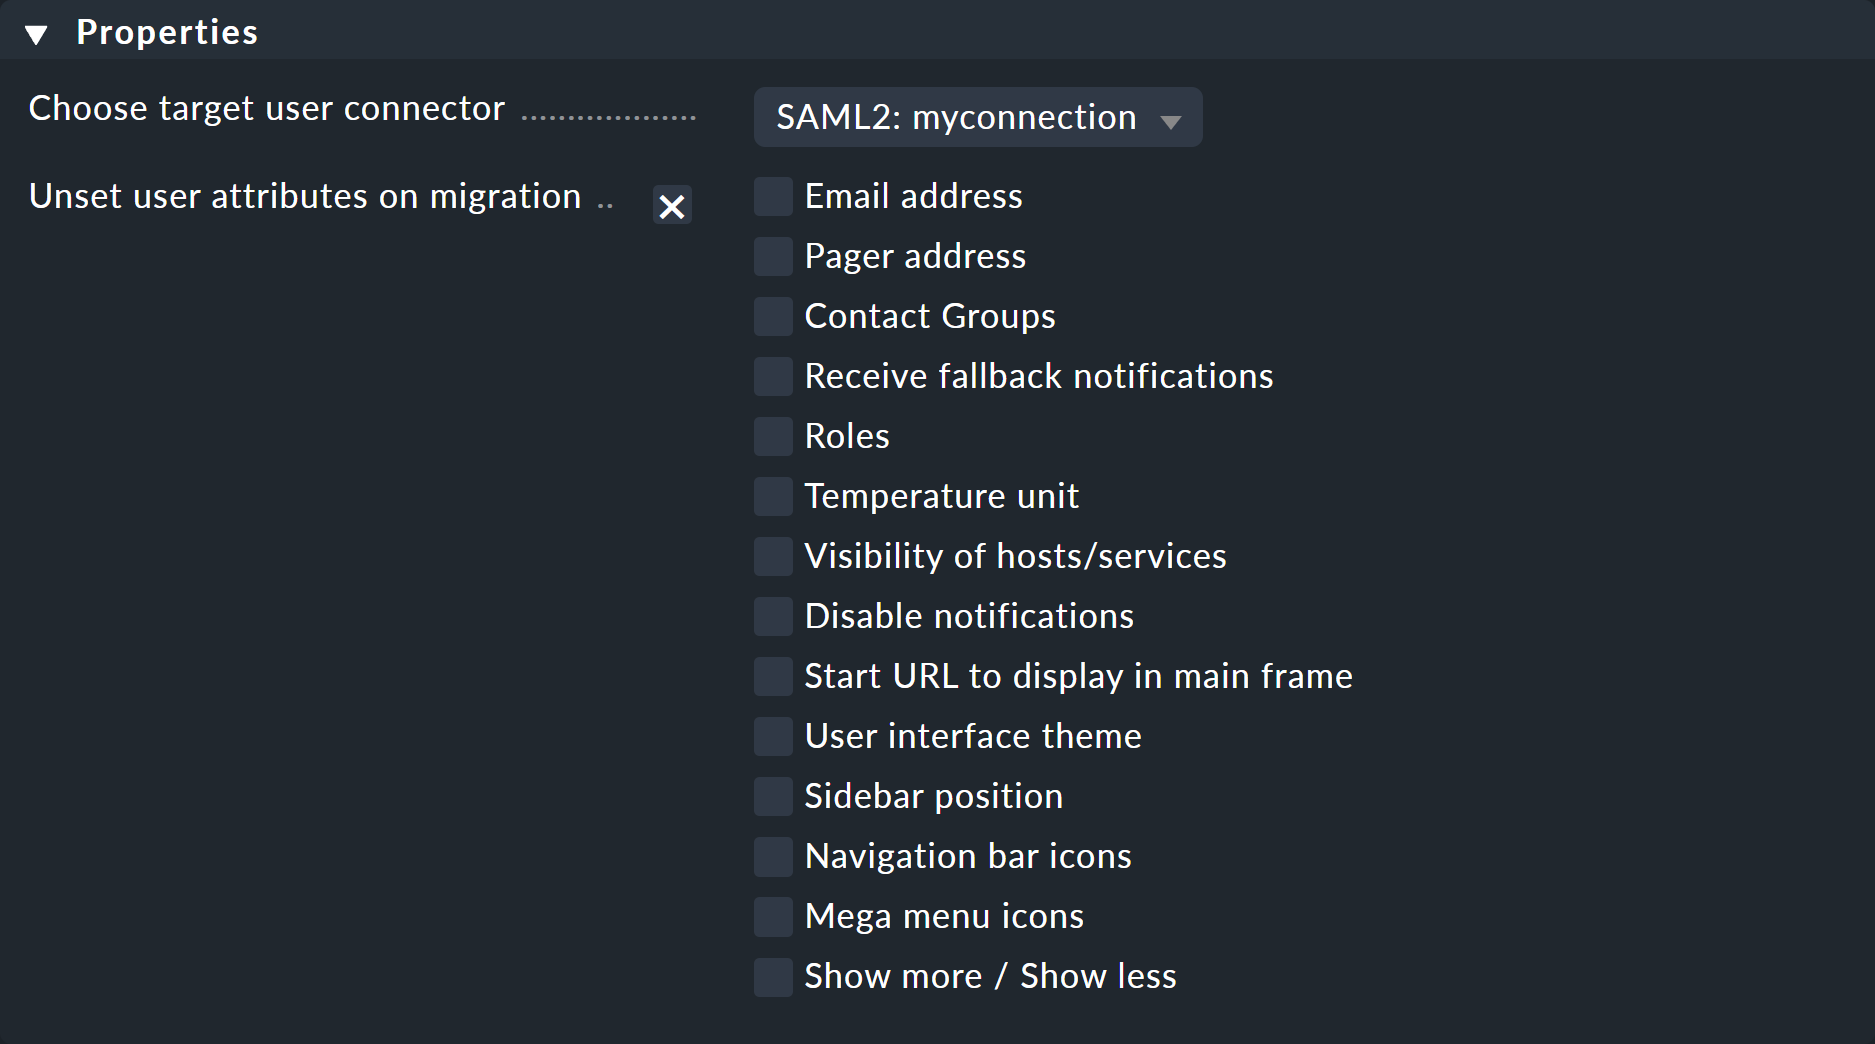
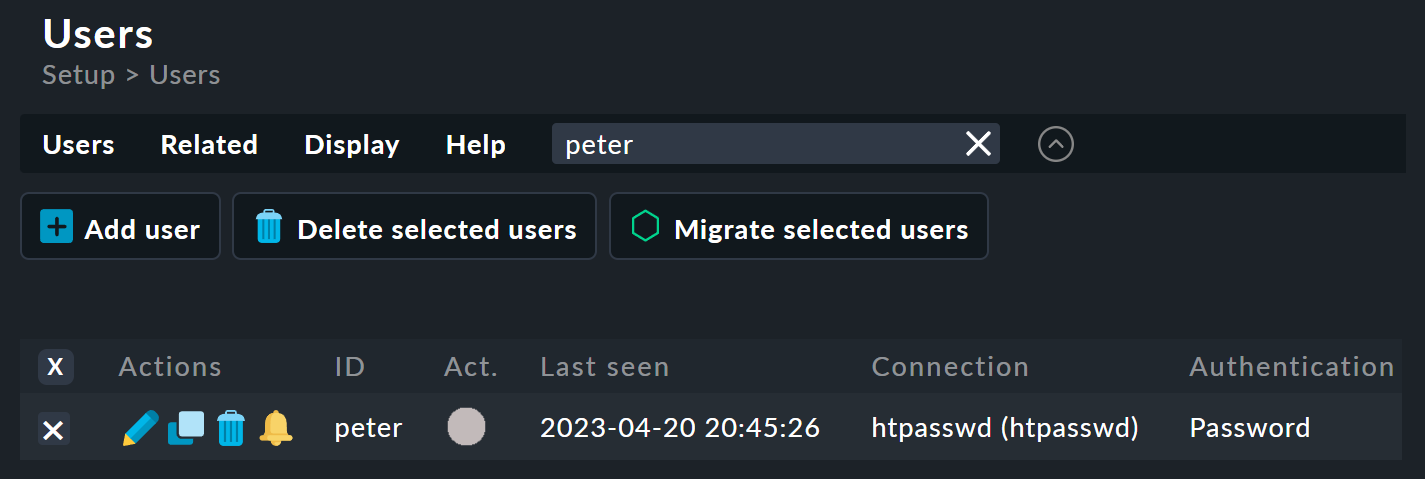
Once you have enabled SAML, you can migrate existing users from a password-based connection to the SAML connection. To do this, check the desired accounts in the user management under Setup > Users > Users. Then start the migration via Migrate selected users.
In an intermediate step, you can have any attributes deleted.