1. Setup menu
Your entry point to the configuration of Checkmk is the Setup menu, which you can open via the navigation bar:
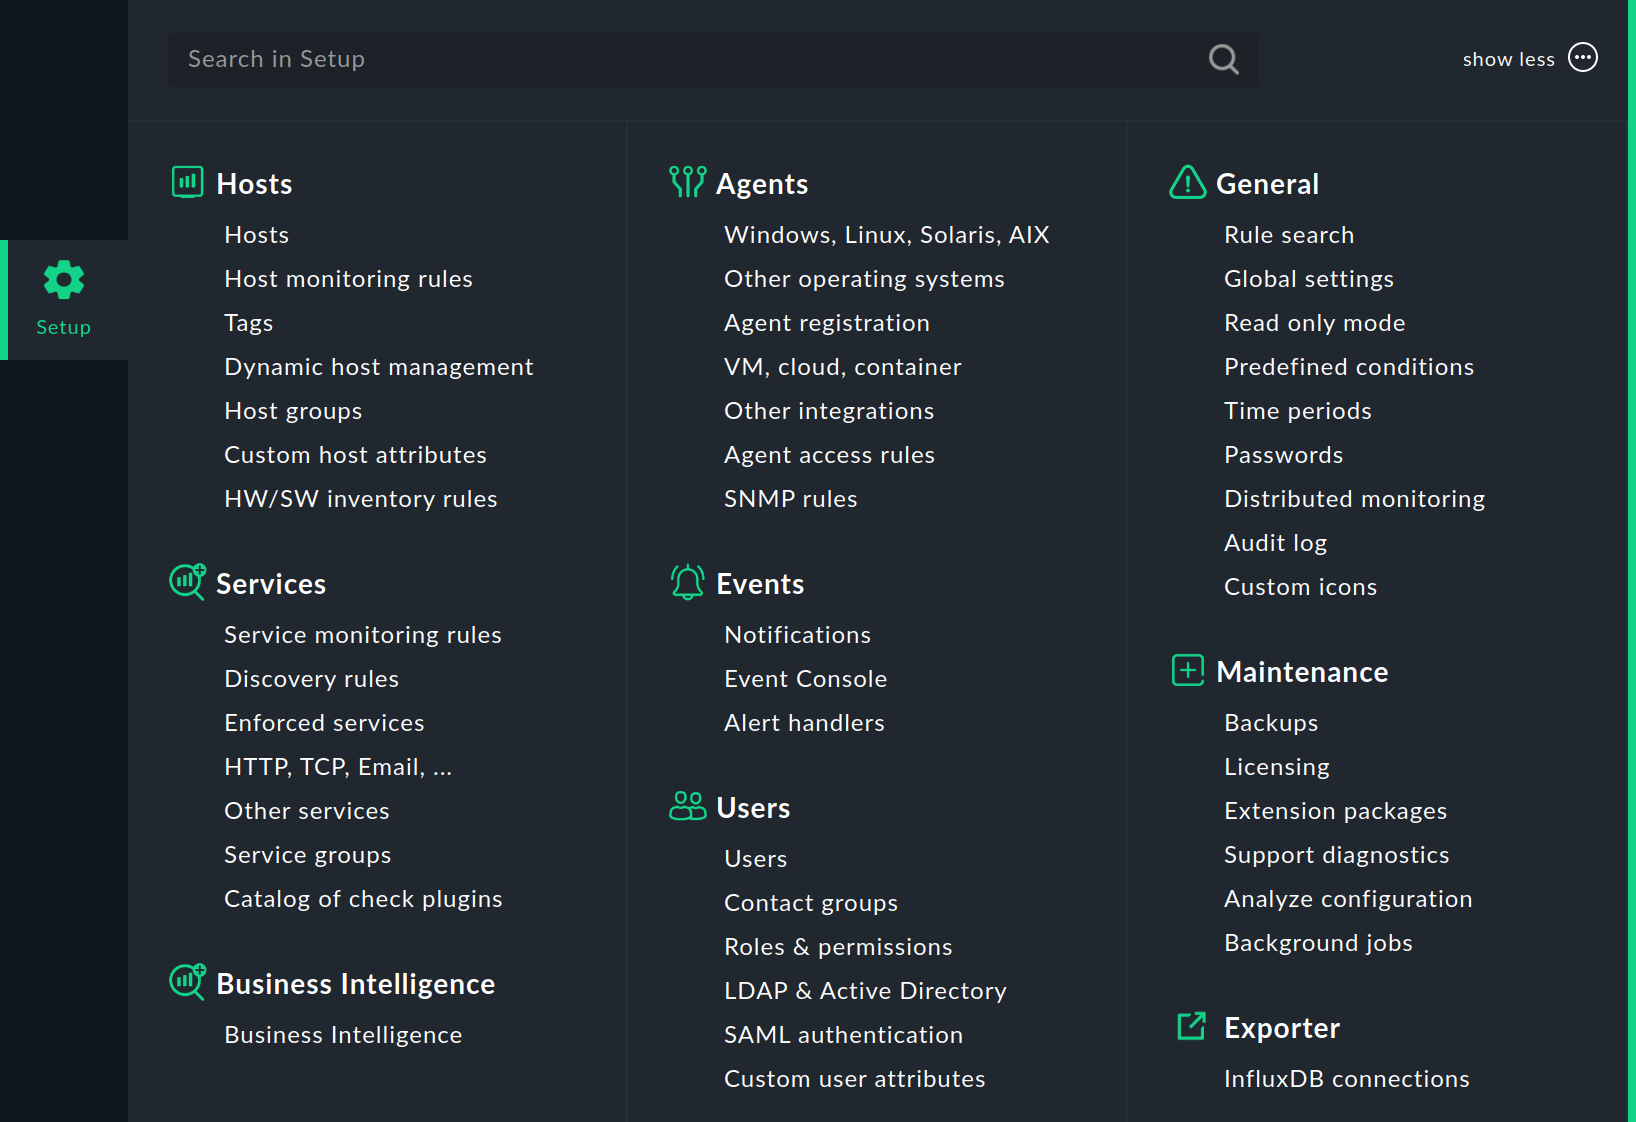
In this menu you will find the tools with which you can set up and configure Checkmk. The menu is divided into topics. Below each topic you will find the menu items.
The following table gives an overview of the menus and in which part of the User Guide you will find more detailed information.
| Menu | Content |
|---|---|
Hosts |
The administration of hosts to be monitored. Here you will find the hosts, the host monitoring rules, the host tags, the connections for the dynamic host management (only in the commercial editions), the host groups, the rules for the HW/SW inventory and the Checkmk Relays (only in Checkmk Ultimate). With Custom host attributes, you can create your own attributes that can be added to the properties of the hosts. |
Services |
The configuration of services running on the hosts. Here you will find the rules for service monitoring, for service discovery, for enforced services, and for monitoring network services like HTTP, TCP, email (active checks). In addition, you can open the list of service groups and the Catalog of check plug-ins in Checkmk. |
Business Intelligence |
Getting started with the management of Business Intelligence (BI). |
Agents |
The monitoring agents that transmit the data from the hosts. Here there are the Checkmk agents for Linux, Windows and other operating systems available for download, access to the Agent Bakery (only in the commercial editions), which can be used to configure, package and automatically update agents, and agent registration to automatically create hosts (only in Checkmk Ultimate). You can also find rules for monitoring other systems — e.g. with special agents and via SNMP. The VM, cloud, container entry leads you, among other things, to the rules for monitoring Amazon Web Services (AWS), Microsoft Azure, Google Cloud Platform (GCP), Kubernetes, Prometheus, and VMware ESXi. |
Quick Setup |
The Quick Setup for monitoring AWS, Microsoft Azure and GCP. |
Events |
The processing of events — with the overview, for testing and analyzing notifications, and with rules for Event Console and alert handler (only in the commercial editions). |
Users |
The topics relating to users, roles and permissions. You can call up the lists of users, contact groups and roles, set up the user management with LDAP/Active Directory and configure authentication with SAML (only in the commercial editions). You can also create custom attributes. |
General |
Comprehensive topics can be found here, including Rule search for finding rules (again), predefined conditions for use in rules, the Global settings, the time periods, the password store and the entry to distributed monitoring. With Audit log you can display all changes ever made to the configuration environment and with Read only mode temporarily prevent such changes. You can also add and use custom icons. |
Maintenance |
This topic summarizes actions to maintain Checkmk, such as creating backups, analyzing the Checkmk configuration or selecting data for support diagnostics. The entries for licensing and handling of Checkmk extension packages (MKPs) are only available in the commercial editions. |
Connectors |
Connections to other systems, for example, for exporting metrics to InfluxDB (and Graphite). This topic is only available in the commercial editions. |
Synthetic Monitoring |
The introduction to Checkmk Synthetic Monitoring with Robotmk. This topic is only available in the commercial editions. |
Telemetry |
Receiving OpenTelemetry data (Checkmk Ultimate only) via the OpenTelemetry Collector or a Prometheus endpoint. |
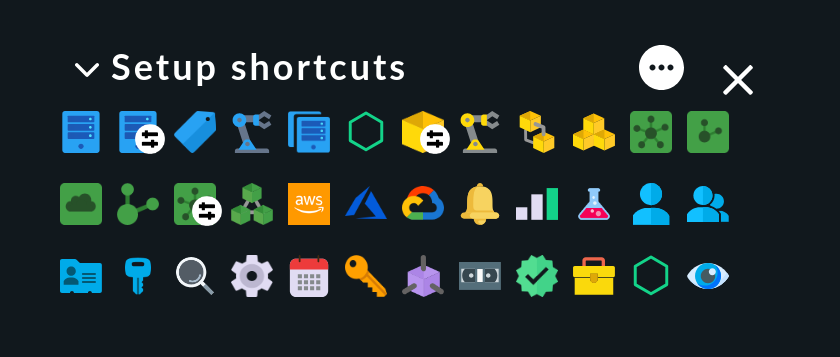
2. Setup shortcuts
Once you have more experience in working with the Setup menu, you will have learned its icons by heart — especially if you have the icons in the mega menus displayed for each menu item, as you can set in the User menu.
Then, for quick access, we recommend the Setup shortcuts snap-in for the sidebar with its icons for each Setup menu item:
3. Activating changes
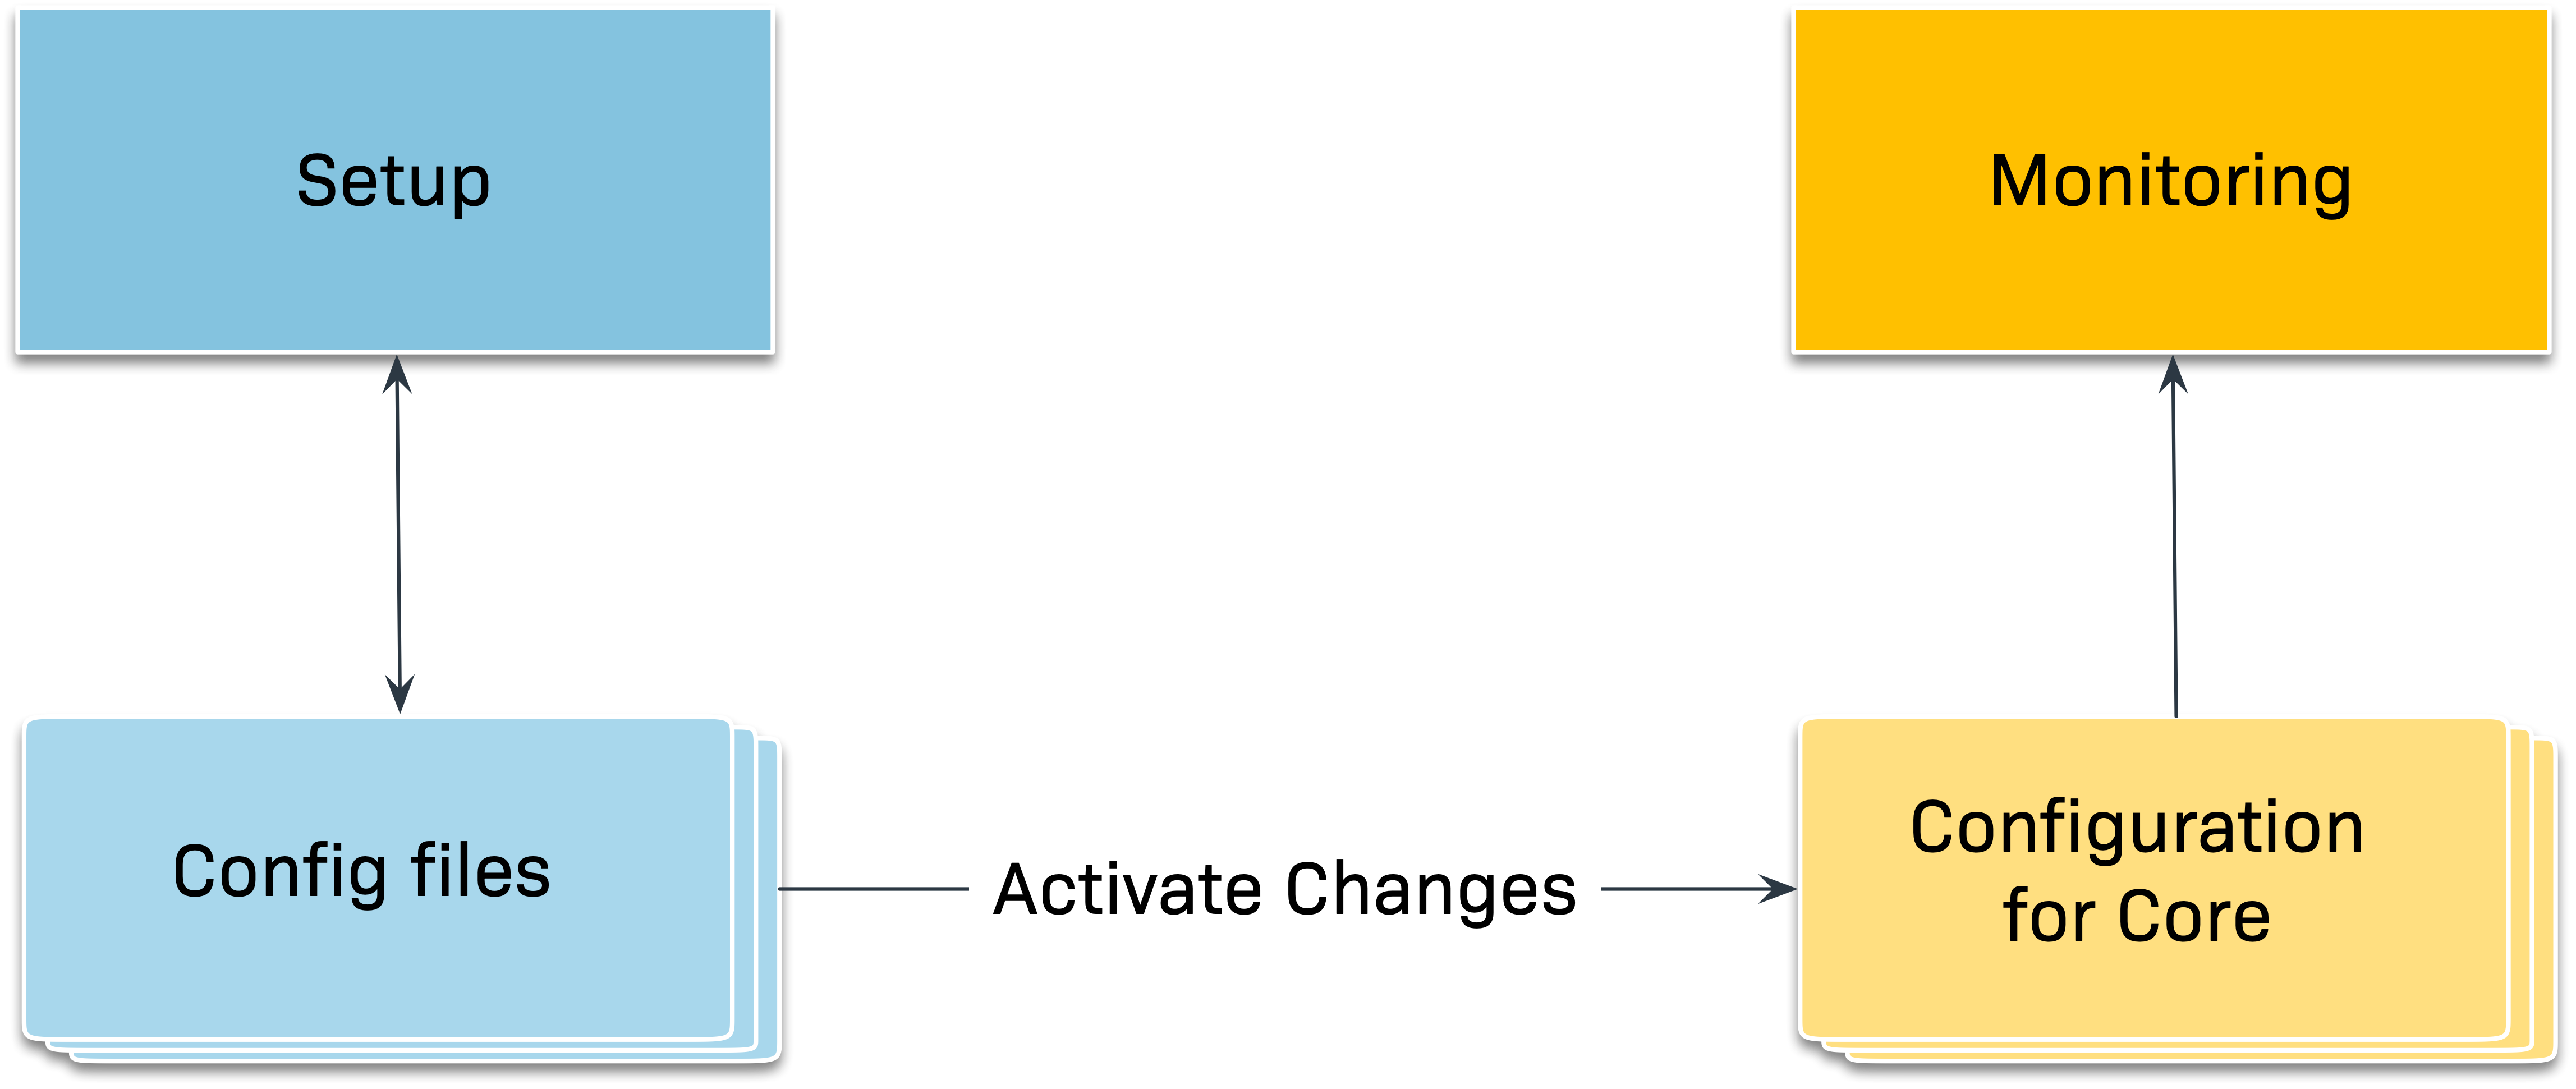
Checkmk initially saves all changes you make only in a temporary configuration environment, in which you manage hosts, services and settings, and which does not yet affect the currently-running monitoring. Only by 'activating the pending changes' will these be transferred to the production monitoring environment.
Changes in the configuration — e.g. the addition of a new host — therefore initially have no influence on the monitoring. Only through activation do all changes that have accumulated since the last activation become active as a ‘bundle’ at the same time.
This might seem a little cumbersome, but it does have the advantage that more complex changes can be prepared without haste in advance before being put into production. For example, after adding a new host, you might want to define thresholds or remove some services before ‘arming’ the whole thing.
Whenever you make a change to the monitoring configuration using the Setup menu, this change will at first be picked up and held as pending.
You can see the number of pending changes that have not been activated yet in the navigation bar, in the Changes menu, indicated by the number in the yellow circle. If you click this icon, you will see the details of these pending changes:
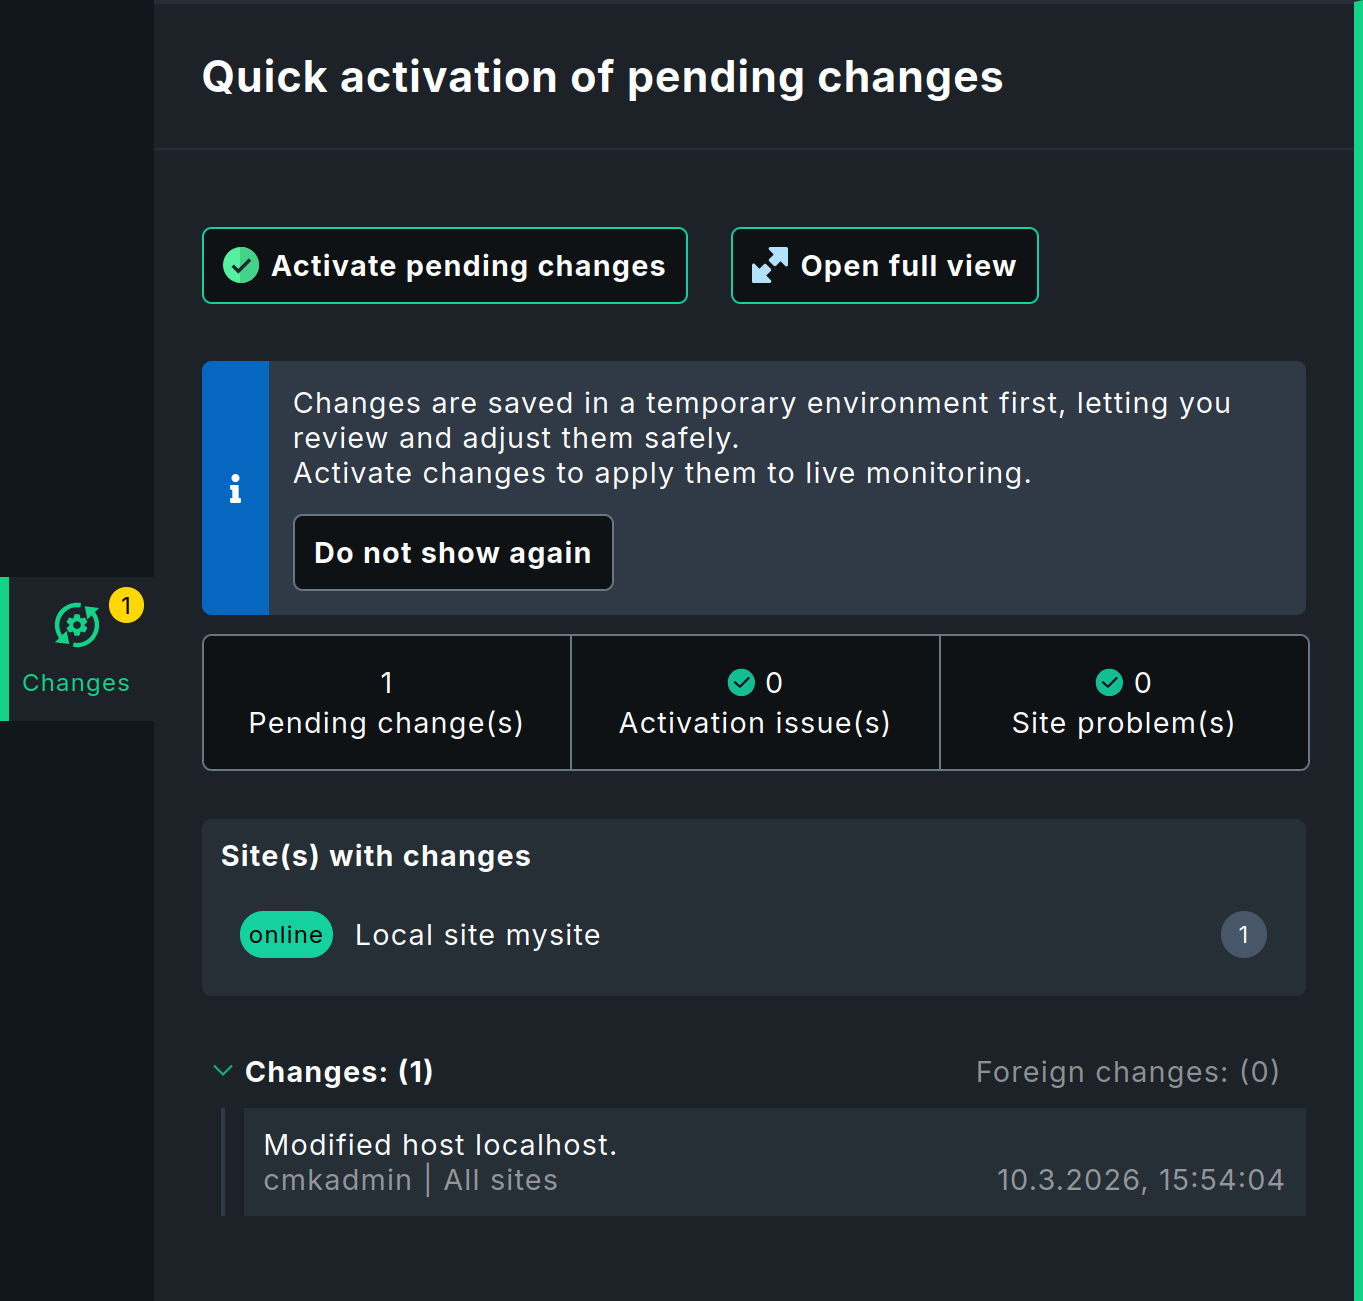
Clicking the Activate pending changes button applies the changes. After a short wait, you will receive a confirmation that the changes have been successfully activated and everything is up to date. The number in the Changes menu has disappeared and will remain so until the next change is pending.
The slideout shown above provides a summary of the most important information. This allows you to see at a glance whether there are any problems with activation or with sites. Such problems can prevent pending changes from being activated. In this case, it is advisable to get the full overview using the Activate pending changes view. You can open this page from the slideout by clicking the button showing the three numbers or on Open full view:
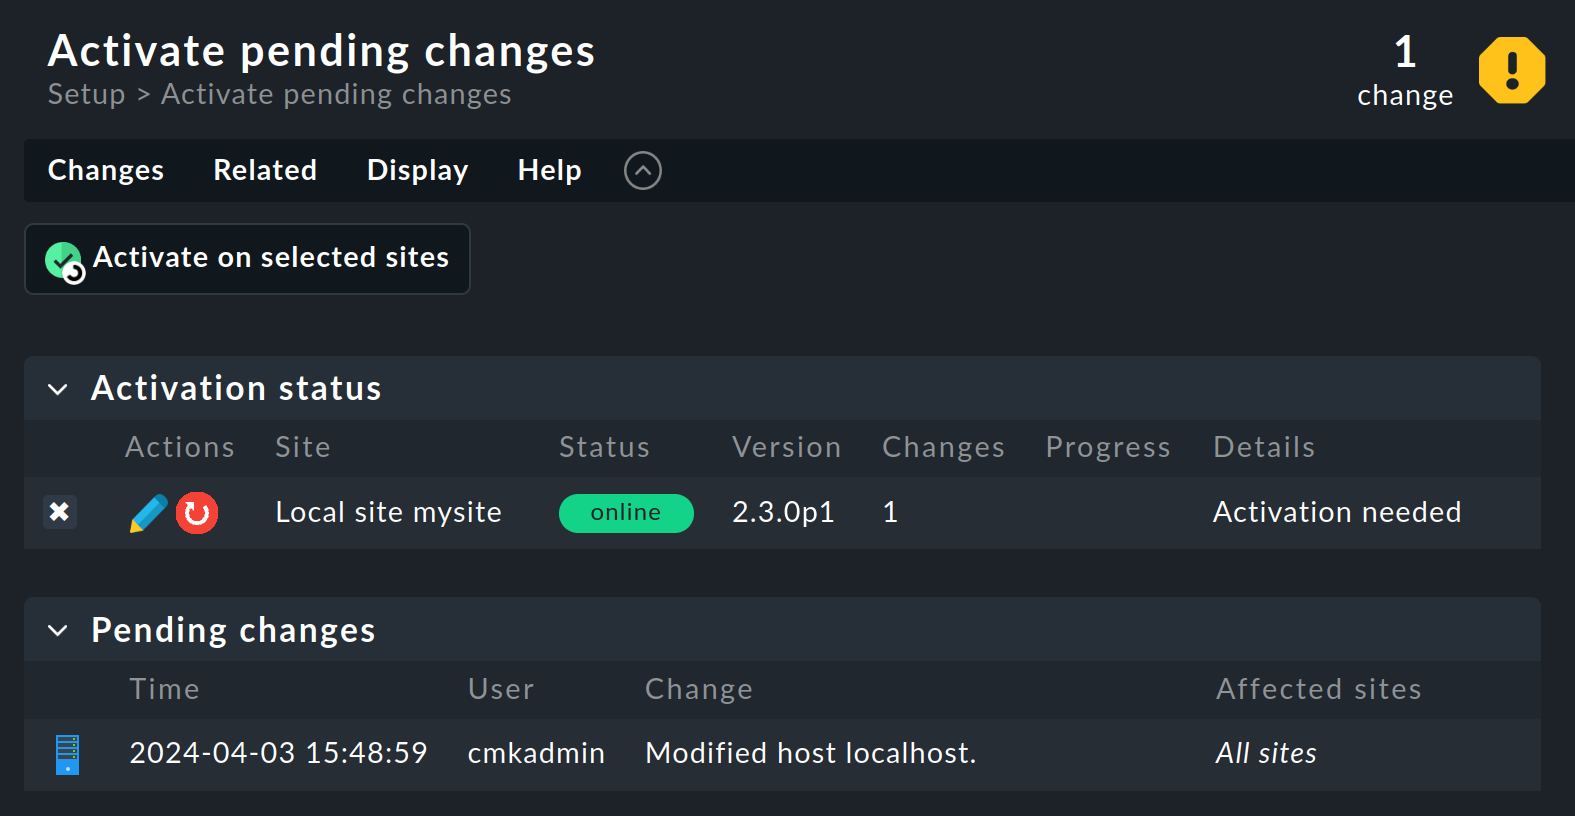
On this page, you can start activating the changes by clicking Activate on selected sites.
You can specify whether clicking the Changes icon should display the slideout, or immediately open the Activate pending changes page. You can find the corresponding option Default behavior for 'Changes' in your personal settings in the User Menu. |
Whichever method you choose, when you activate the changes, a new configuration for the monitoring core is generated from the configuration files, and the monitoring core is instructed to use this configuration immediately:
This clears the list of pending changes. These entries are not lost however — they can subsequently be called up via Setup > General > Audit log. There you will find the contents of the log file with all activated changes that have ever been made in the site. The Audit log can be filtered and shows today’s changes by default.
|
If you try to activate changes and another activation is currently running, you will receive a corresponding warning:  You can see from the message who (i.e. which Checkmk user) has started another activation and how (via the GUI or the REST-API). |
4. Revert changes
You will encounter the activation of changes again and again when setting up your monitoring system, as well as every time you adjust the configuration later on. Especially if you make more complex modifications to your system, you may want to revert changes during the editing process instead of activating them. Use the menu item Changes > Revert changes for this purpose.
This allows you to discard all pending changes since the last Activate on selected sites:
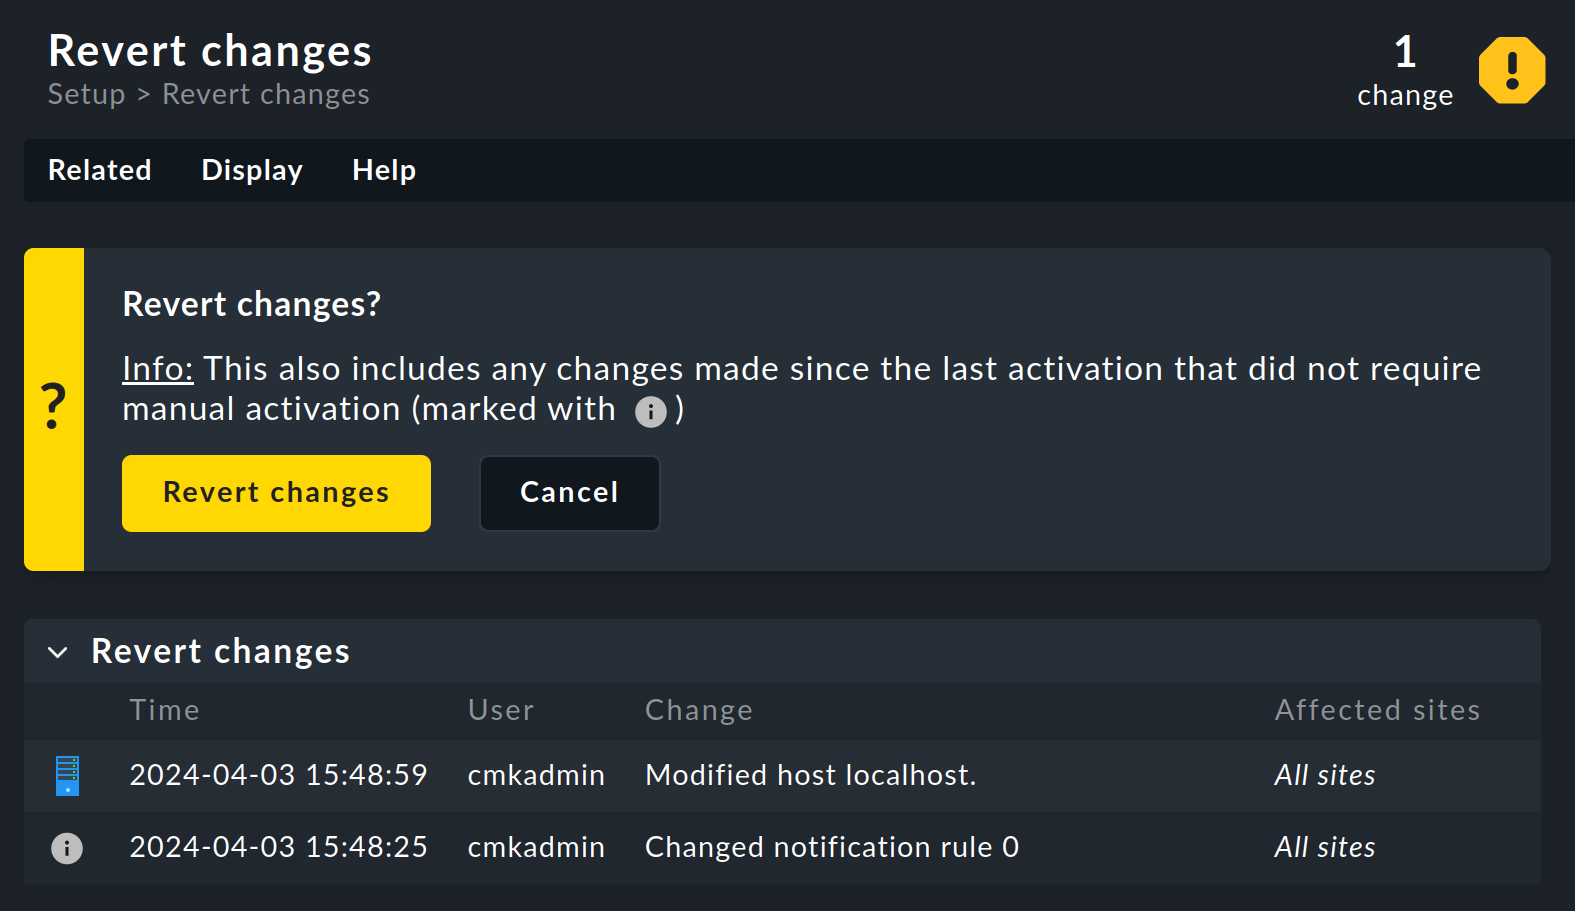
All changes that will be reverted if you approve the confirmation dialog are displayed in the lower area. This takes you back to the status of the last change activation.