1. Introduction
Azure is Microsoft’s answer to the cloud which allows users to use the concepts of infrastructure as a service (IaaS), Platform as a Service (PaaS) and Software as a Service (SaaS).
Checkmk includes a extensive module for monitoring Microsoft Azure, consisting of a connector to Azure and a comprehensive collection of check plug-ins that retrieve and evaluate various metrics and statuses for you.
In addition to general information about the costs that are incurred by your Azure environment and the current status of Azure in your region, you can monitor the following Azure products with all editions of Checkmk:
2. Preparing Azure for Checkmk
2.1. Create the App
To monitor Azure with Checkmk, you will need your subscription ID and your tenant ID (also known as the ‘Directory ID’).
First, register Checkmk Monitoring as an app so that you can work with the Azure API. The option for this can be found in the Azure portal at Azure Active Directory > App registrations > New registration:
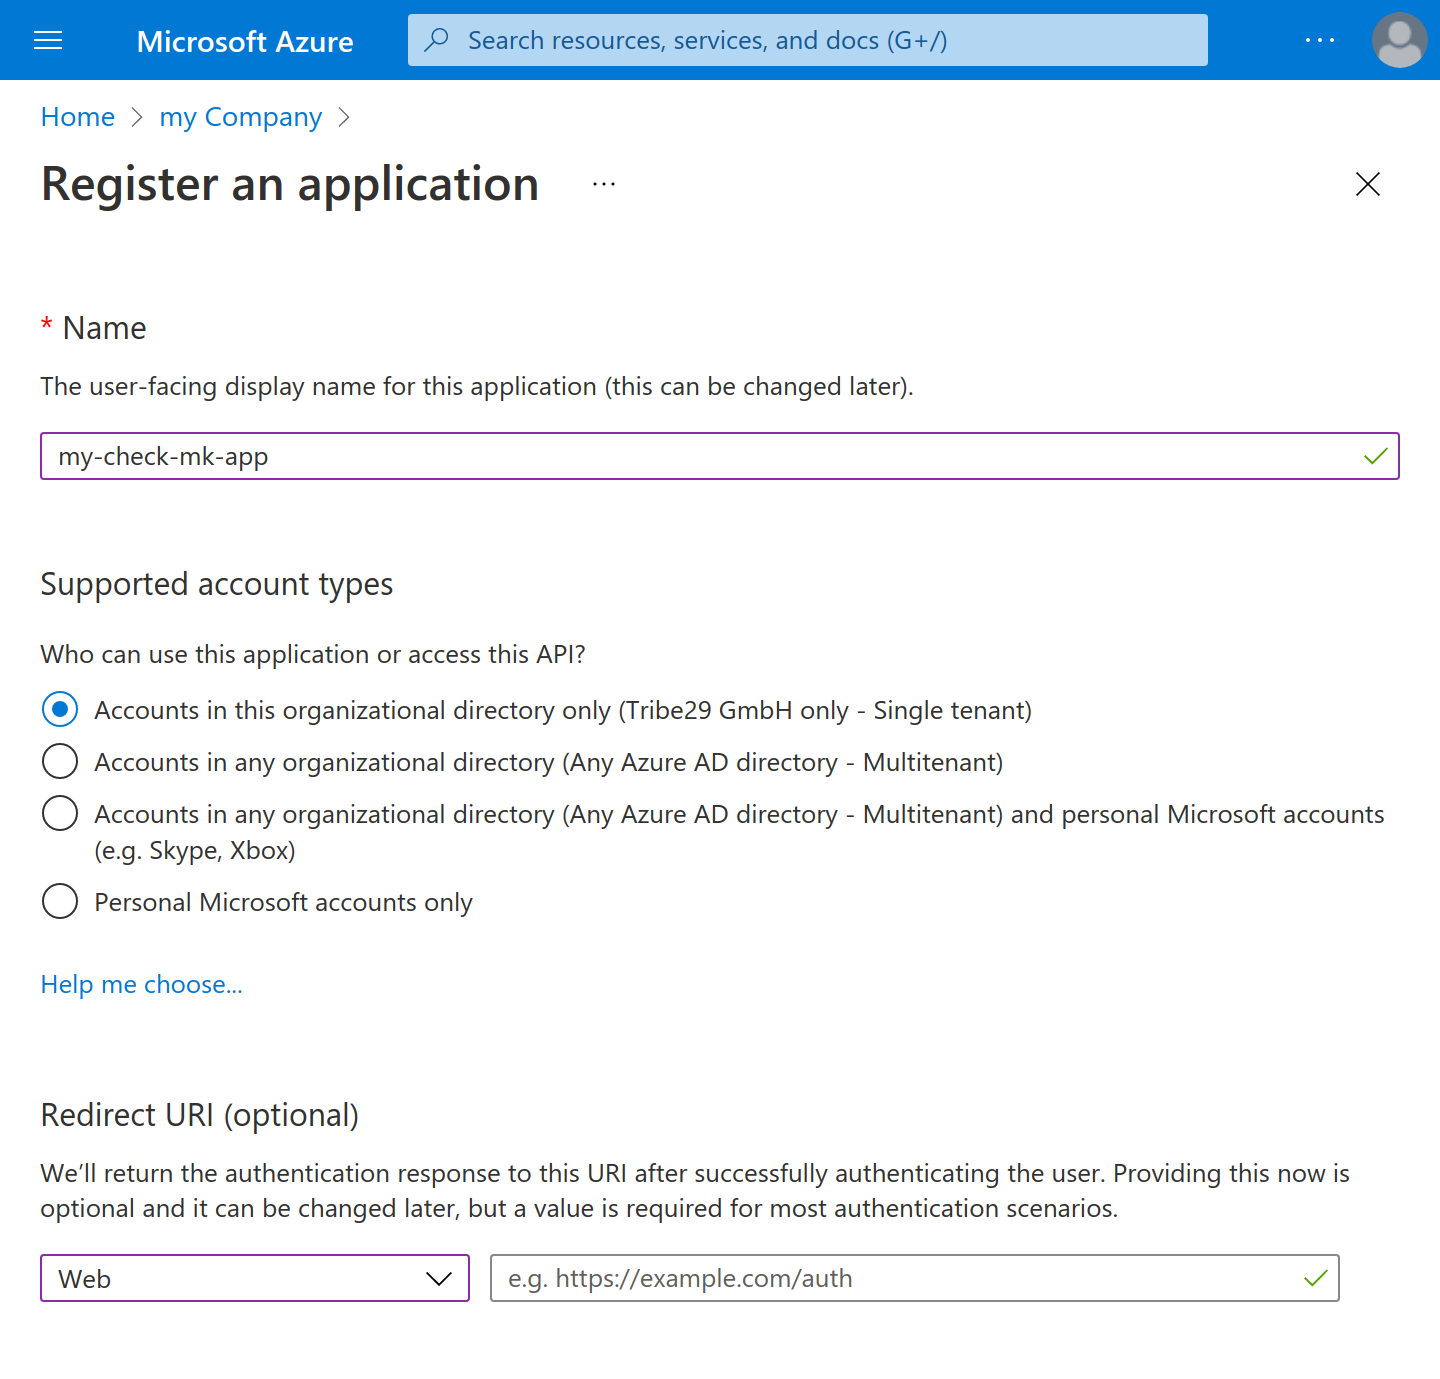
Assign a name of your choice. In the example we use my-check-mk-app.
This is only for information. The reference to the app itself is actually made via a
UUID which you will see in a later step. You don’t need to change anything
in the Supported accout types section. Setting the Redirect URI is optional.
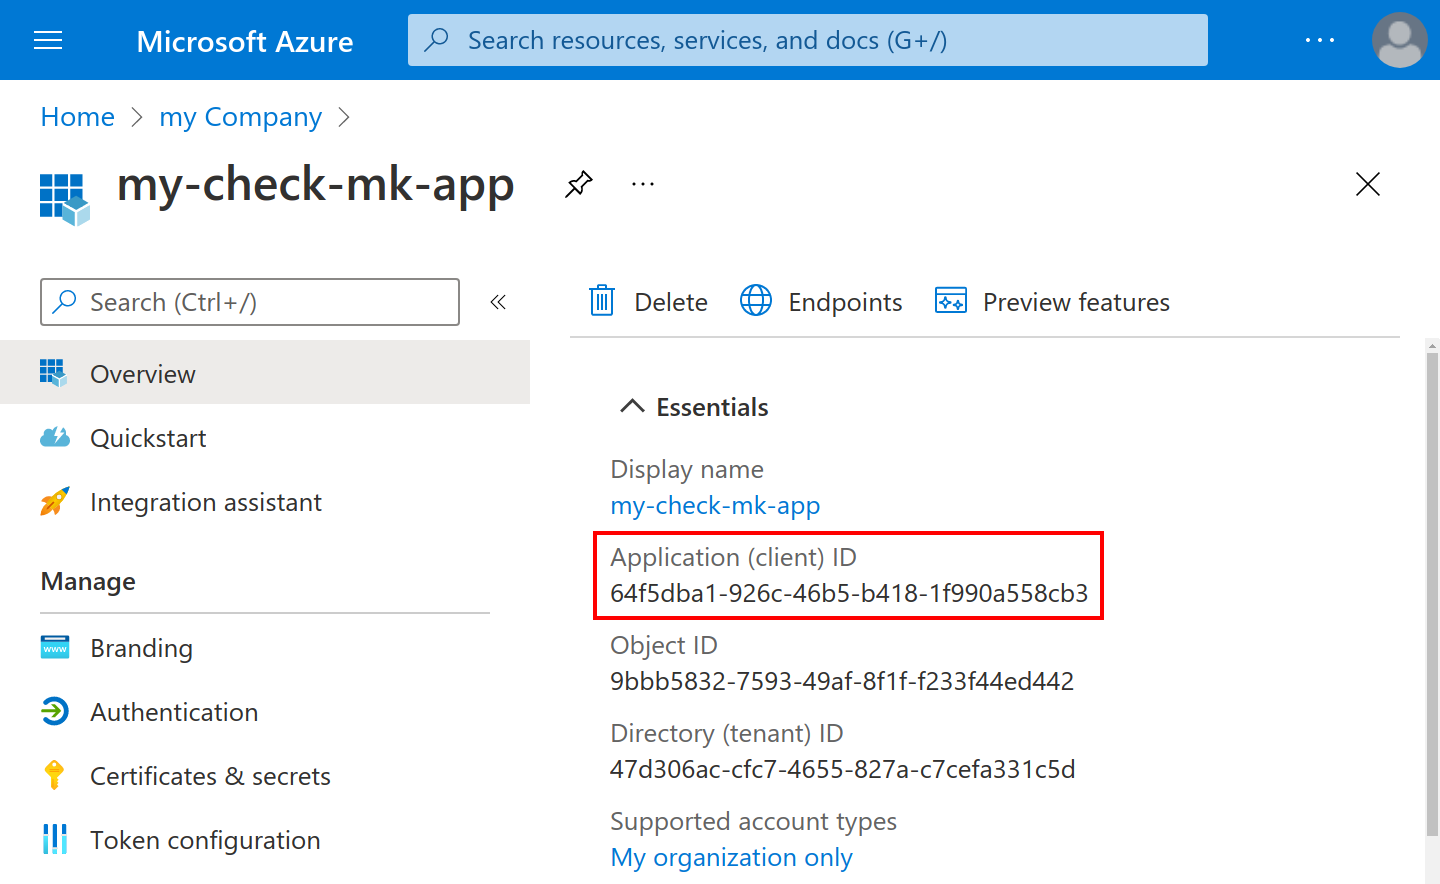
After the creation select the new app from the list of apps. If it does not appear in the list, query Select My apps on All apps. In the details for the app you will also find the Application (client) ID that you will need later. The Object-ID is not required.
2.2. Assigning permissions to the App
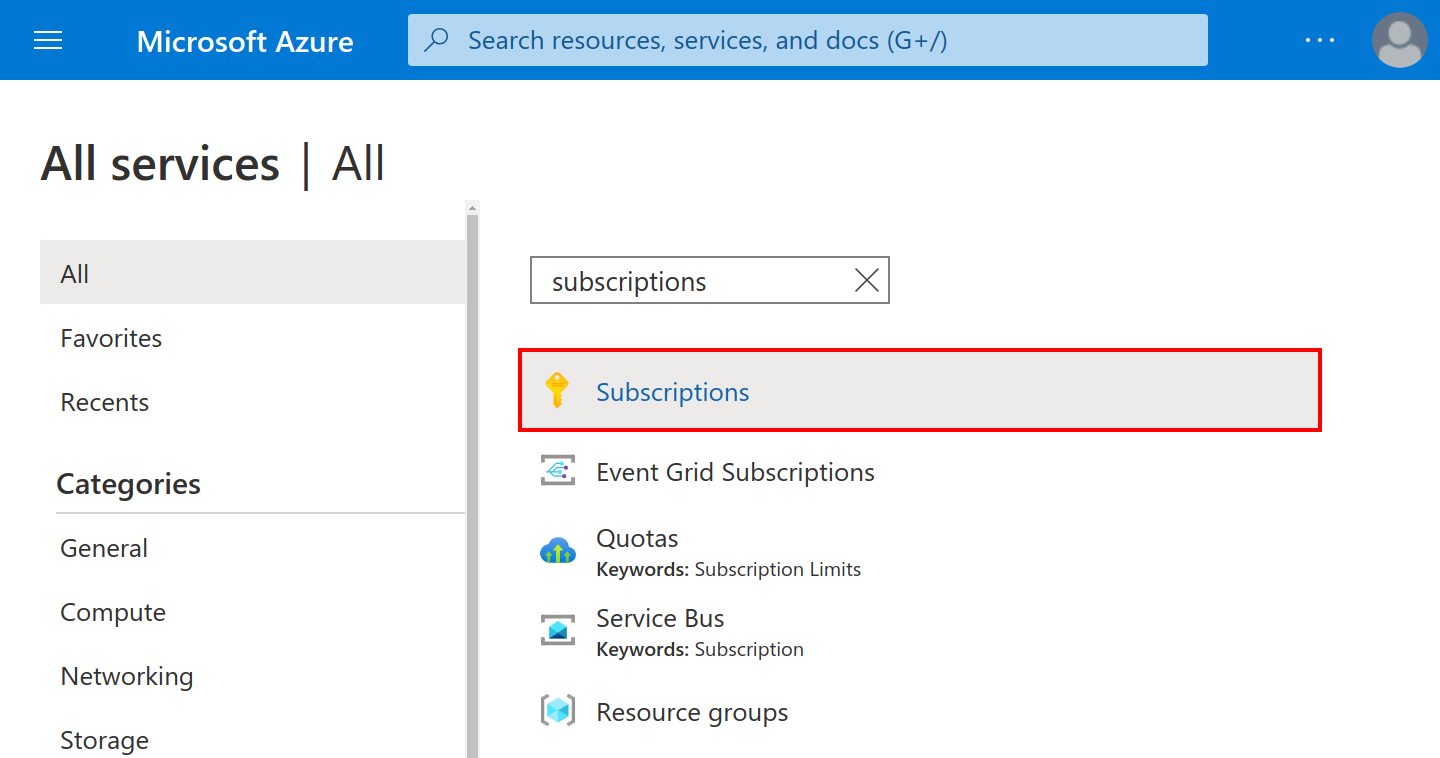
In order for your new app to have access rights to the monitoring data, you must assign them here. On the left of the main navigation page select the All resources item, and then select the point Subscriptions:
In this page’s navigation go to Access Control (IAM) and select Add, and Add role assignment:

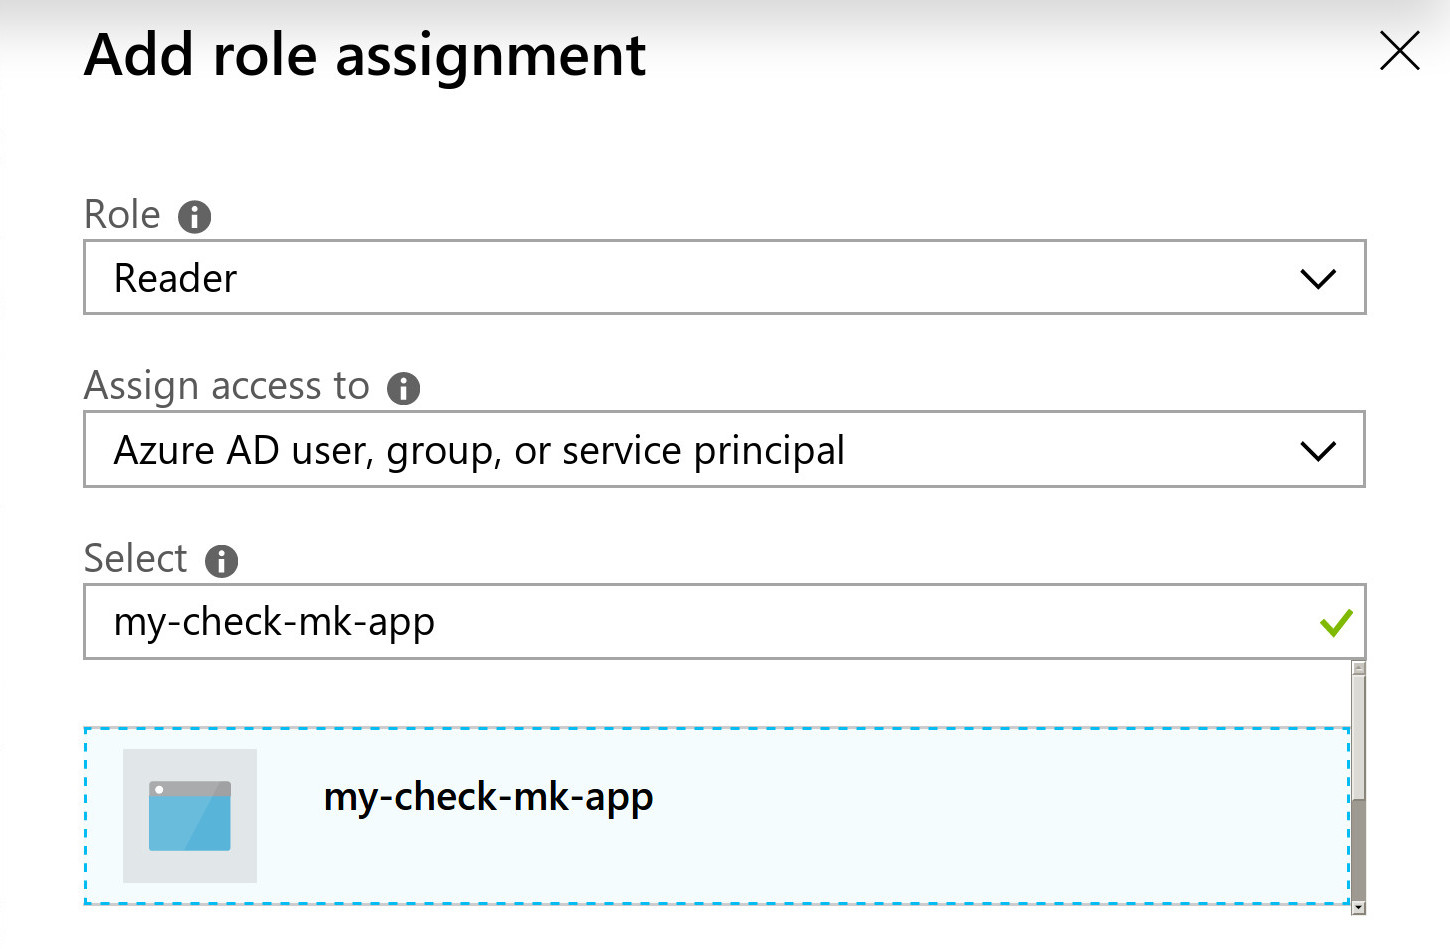
Now, under role enter Reader, under Assign access to select the value Azure AD user, group, or service principal, and enter your new app’s name in the Select option:
2.3. Create a key for the app
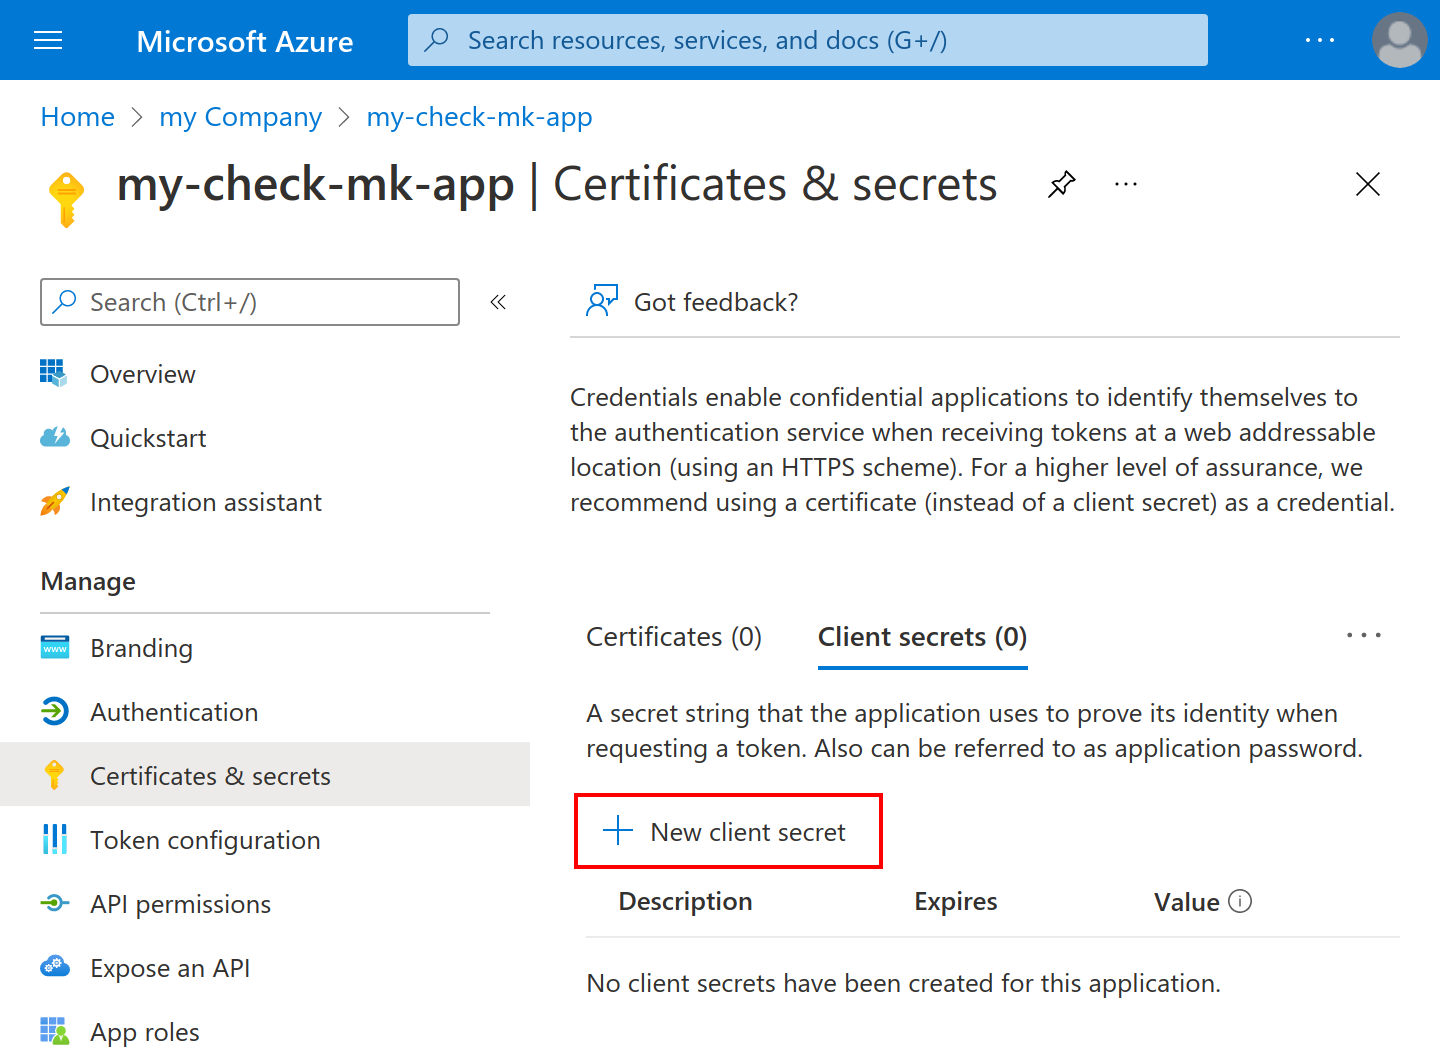
Now you need a key (a secret) with which Checkmk can log in to the API. You can create a key in the app settings under Certificates & secrets. Simply click New client secret in the Client secrets section.
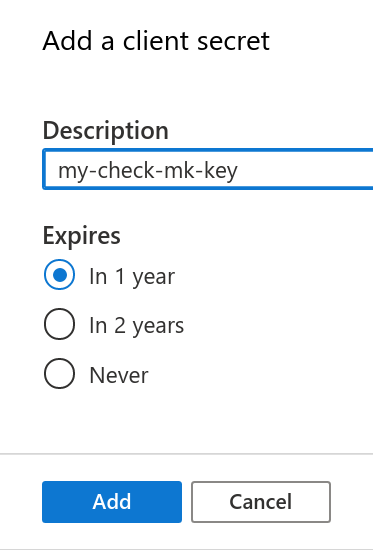
In the following window Microsoft would like you to enter a name of your choice in the Description field. We have chosen my-check-mk-key here.
Don’t forget to select the correct timeframe for your needs at the Expires option.
The setup under Azure is now complete, and you should now have the following four pieces of information:
Your Subscription-ID
Your Tenant-ID (also known as the ‘Directory-ID’).
The Application-ID (Client-ID) for the App my-check-mk-app
The secret for the key my-check-mk-key for this app
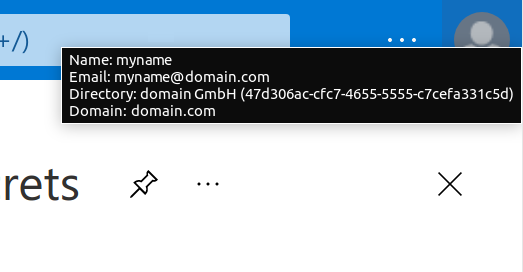
If you do not have your tenant-ID at hand, find it by hovering over your login name in the pop-up help under Directory: default directory ….:
You can see the subscription ID — for example on the Cost Management + Billing under My subscriptions. Note: Nowadays Microsoft does not display this ID as a hash, but instead as a human-readable name. You can use this new-style name in the usual way.
3. Setting up monitoring in Checkmk
3.1. The Azure-Host
Even though you are not dealing with a physical host in Azure, create a host for your Azure directory in Checkmk. The host name you can define at will. Important: Because Azure is a service and therefore does not have an IP address or DNS name (the special agent does the access itself), you must set the IP Address Family to No IP.

It is best to save with Save & Finish at this point, because of course the service detection cannot work yet.
3.2. Configuring the Azure-Agent
Since Azure cannot be queried through the regular Checkmk agent, you now set up the Azure Special Agent — which is also known as a data source program. In this situation Checkmk does not contact the destination host over TCP port 6556 as usual, instead it calls a utility that communicates with the target system via Azure’s application-specific API.
To do this, under Setup > Agents > VM, Cloud, Container > Microsoft Azure create a rule whose conditions apply exclusively to the Azure host that has just been created. There you will find the input fields for the IDs and the secret:
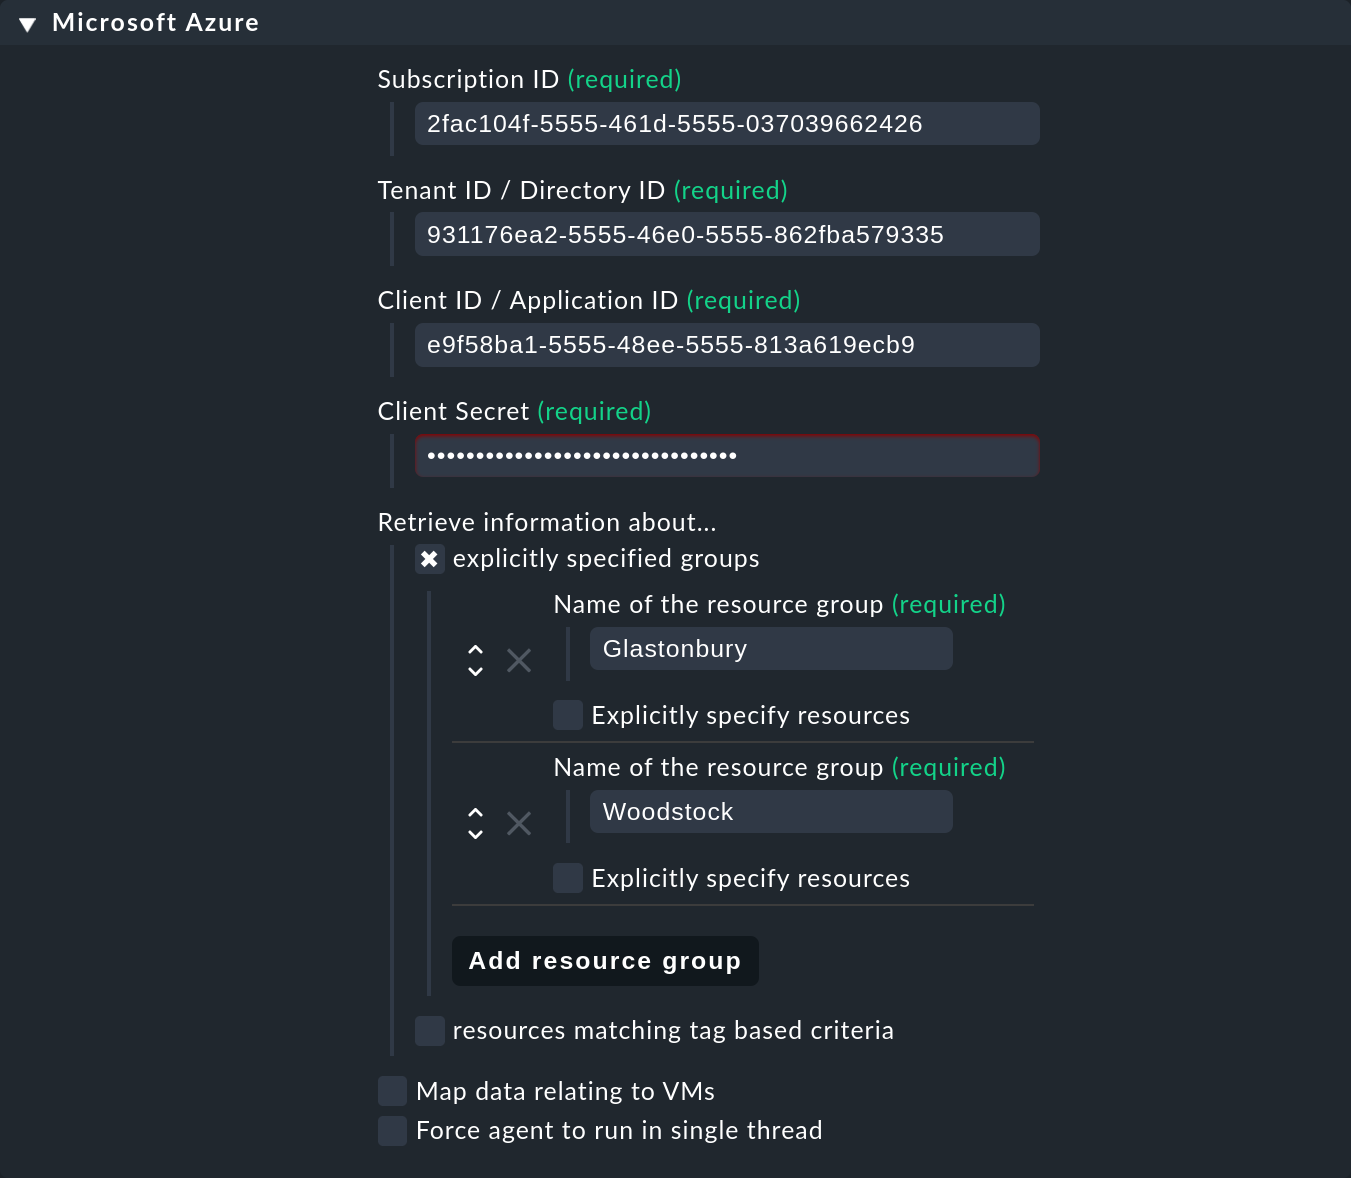
Here you can also select the resource groups or resources that you want to monitor. If you have not checked explicitely specified groups, all resource groups are automatically monitored.
3.3. Test
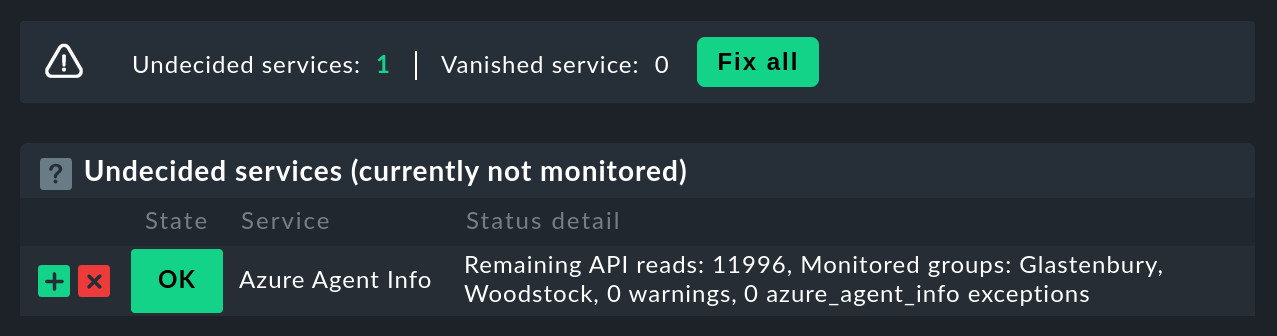
If you now perform a service discovery on the Azure host, only a single service called Azure Agent Info should be detected:
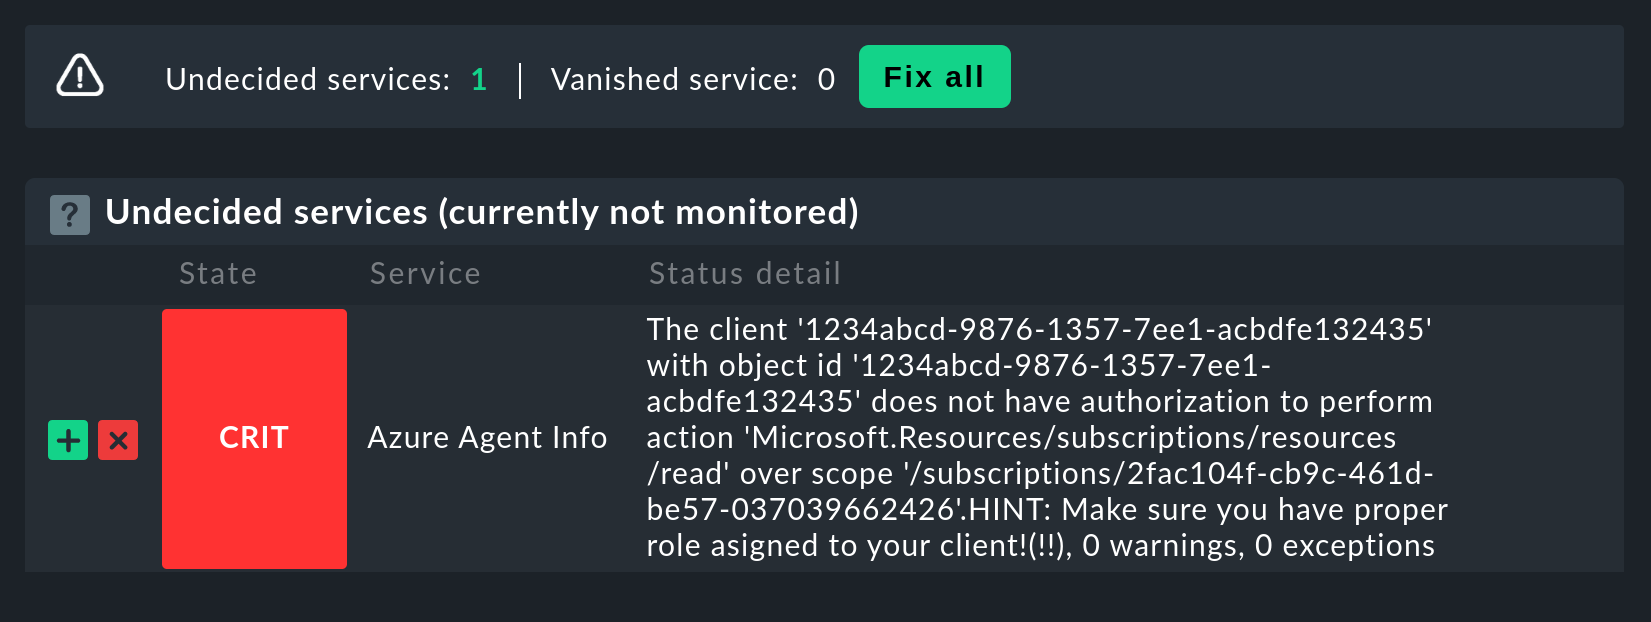
If access to the API does not work (because of a wrong ID or bad permissions, for example), an error message from the Azure API appears in the status text of Azure Agent Info:
3.4. Make resource groups available as hosts
For clarity, Azure monitoring in Checkmk has been designed so that each Azure resource group is represented by a logical (so to speak) host in Checkmk. This is done with the help of a piggyback procedure. This piggyback will take data from the Azure host using special agents, and within Checkmk redirect it to these resource group hosts.
The resource group hosts do not automatically appear in Checkmk. Place these hosts either manually or optionally with the new Dynamic Configuration Daemon (DCD). Important — when doing so the names of the hosts must exactly match the names of the resource groups — and this is also case-sensitive! If you are uncertain about the exact spelling of the groups’ names, you can do this directly from the Azure Agent Info service on the Azure host.
By the way — with the auxiliary find_piggy_orphans script from the
Treasures Directory you will find all of the Piggyhosts for which there are data,
but which have not yet been created as a host in Checkmk:
OMD[mysite]:~$ share/doc/check_mk/treasures/find_piggy_orphans
Glastonbury
Woodstock
Configure the resource group hosts without an IP address (analogous to the Azure host), and select No API integrations, no checkmk agent as the agent and Always use and expect piggyback data as piggyback.

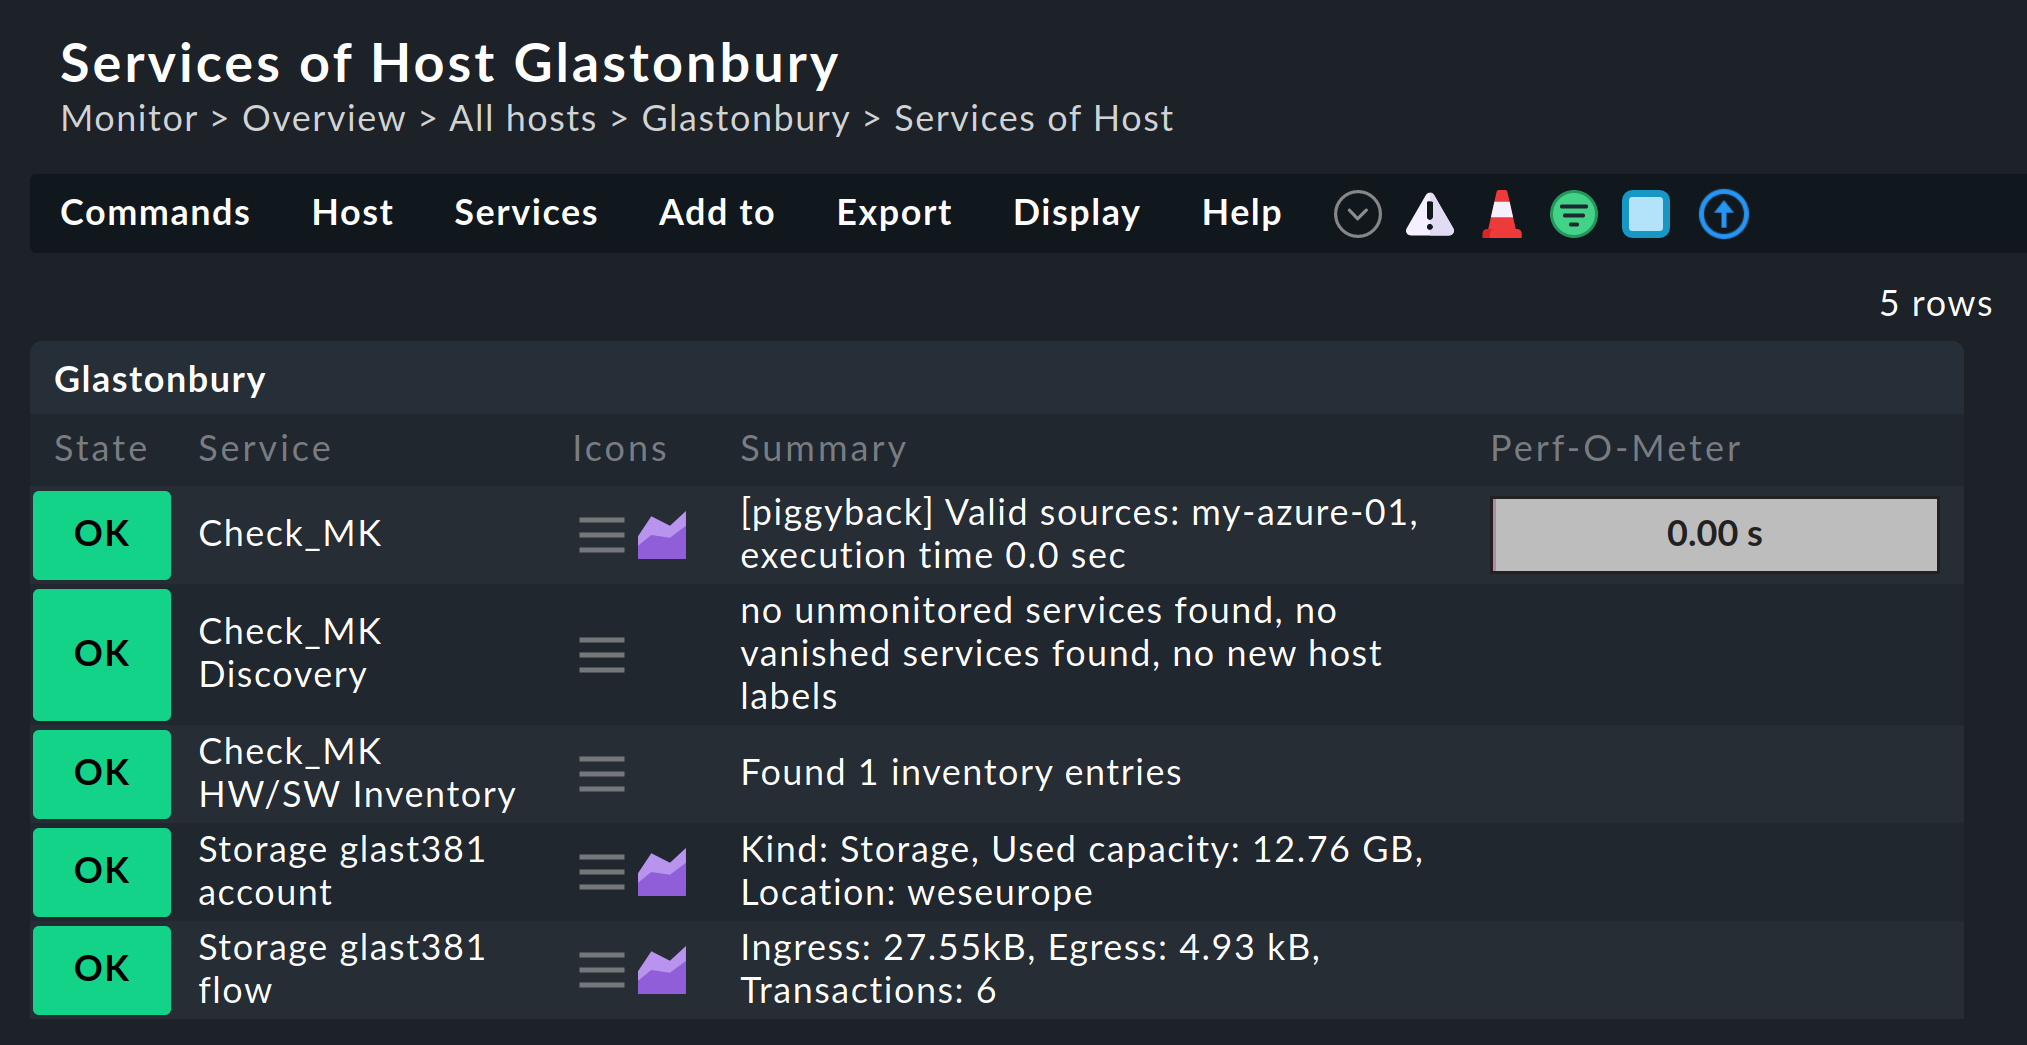
If you now perform a service discovery on one of these resource group hosts, you will find there are additional services that specifically relate to this resource group:
Choosing different names for the resource group hosts
Tip: If you want to freely-choose the names of the resource group hosts, with the Setup > Agents > Access to Agents > Hostname translation for piggybacked hosts rule you can define a conversion of resource groups to hosts.
3.5. Virtual machines (VMs)
When you use Azure to monitor virtual machines which simultaneously serve as your normal host in Checkmk — you can use the Azure services associated with those VMs instead of the resource group hosts associated directly with the VM hosts in Checkmk. To do this, in the Azure rule, under the Map data relating to VMs option, select the Map data to the VM itself setting. For this to work the VM’s Checkmk host in monitoring must have exactly the same name as the corresponding VM in Azure.
3.6. Rate limit for API queries
Currently the API queries that Checkmk needs for monitoring Azure (as opposed to AWS) are free — however there is a limit to the number of queries permitted per time period (the ‘Rate Limit’). Per Application ID the limit is 12,000 read requests per hour.
Due to the structure of the API, Checkmk requires at least one or more queries per requested resource. Therefore the total number of queries scales linearly with the number of resources being monitored. If the query limit is reached or exceeded, the query fails with a HTTP code 429 (too many requests), and the Check_MK service for the Azure host is flagged as critical.
This rate limit results from Azure’s so-called ‘token bucket’ algorithm. It all starts with you having a ‘credit’ of 12,000 remaining queries — each query consumes one of these. Simultaneously 3.33 queries per second are added to the credit. The output of the service Azure Agent Info lets you see how many queries are currently left.
Specifically, this means that:
If your query rate is sufficiently low, the available queries are always just under 12,000.
If your rate is too high, the credit will slowly go down to 0 and then errors will occur sporadically in the query.
In this case you can reduce the polling rate by querying fewer polling resource groups or resources, or by reducing the check interval for the Check_MK active check on the Azure host. This is possible with the Monitoring Configuration > Normal check interval for service checks rule.
So that you can react in time, the Azure Agent Info service monitors the number of remaining queries and warns you in advance. By default, for the remaining queries the warning threshold is 50%, and the critical threshold is at 25%.