1. Introduction
It is becoming increasingly common in cloud and container environments that hosts to be monitored can not only be generated but also expire automatically. Keeping up to date with the monitoring’s configuration in such an environment is no longer possible manually. Classic infrastructures such as for example, VMware clusters can also be very dynamic, and even if manual care is still possible it is in any case cumbersome.
The ![]() Checkmk Enterprise Editions of Checkmk support you in this process with a smart tool
the Dynamic Configuration Daemon or DCD for short.
The dynamic configuration of hosts means that,
based on information from monitoring AWS,
Azure, Kubernetes,
VMware and other sources, hosts can be added to,
and removed from the monitoring in a fully-automated procedure.
Checkmk Enterprise Editions of Checkmk support you in this process with a smart tool
the Dynamic Configuration Daemon or DCD for short.
The dynamic configuration of hosts means that,
based on information from monitoring AWS,
Azure, Kubernetes,
VMware and other sources, hosts can be added to,
and removed from the monitoring in a fully-automated procedure.
The DCD is very generic, and is not limited only to host creation. The DCD forms the basis for future extensions of Checkmk which will dynamically adjust the configuration. This can also mean the management of users, for example. For this purpose the DCD works with so-called connectors. Each connector can get information from a very specific type of source, and has its own specific configuration.
With special connectors, it will become even easier in the future, to automatically take hosts into Checkmk from an existing CMDB.
2. Managing hosts with the DCD
2.1. The piggyback connector
Currently, the DCD from Checkmk is only equipped with a single connector: the one used for piggyback data. This is very universal, since the piggyback mechanism is used by Checkmk in all situations where the query from a host (usually by special agent) provides data of other hosts (usually virtual machines or cloud objects).
Here are a couple of examples in which Checkmk uses piggyback in the monitoring:
In all of these cases the monitoring automatically retrieves data from other hosts (for example, the VMs) which are not contacted directly via the network and on which also no Checkmk agent needs to run. With the DCD you can add and also remove such hosts automatically in the monitoring so as to always reflect the real situation in a timely manner.
To do this the DCD analyzes the existing piggyback data and compares it to the hosts which already exist in the Setup, and then re-creates any missing hosts, or respectively, removes redundant ones. There are hosts which are automatically created by the DCD but which are still editable for you in the Setup-GUI.
2.2. The automation user
By default, the automation user exists in Checkmk. This user is created by Checkmk to enable automated fetches. An existing automation user is also mandatory for dynamic host configuration.
If, for whatever reason, you have deleted or changed this user in your system, you have to establish another user with automated access to the API. In this case open the global basic settings via Setup > General > Global settings:

Clicking Credentials: Use "Checkmk Automation" user will take you to the web API connection editing page:
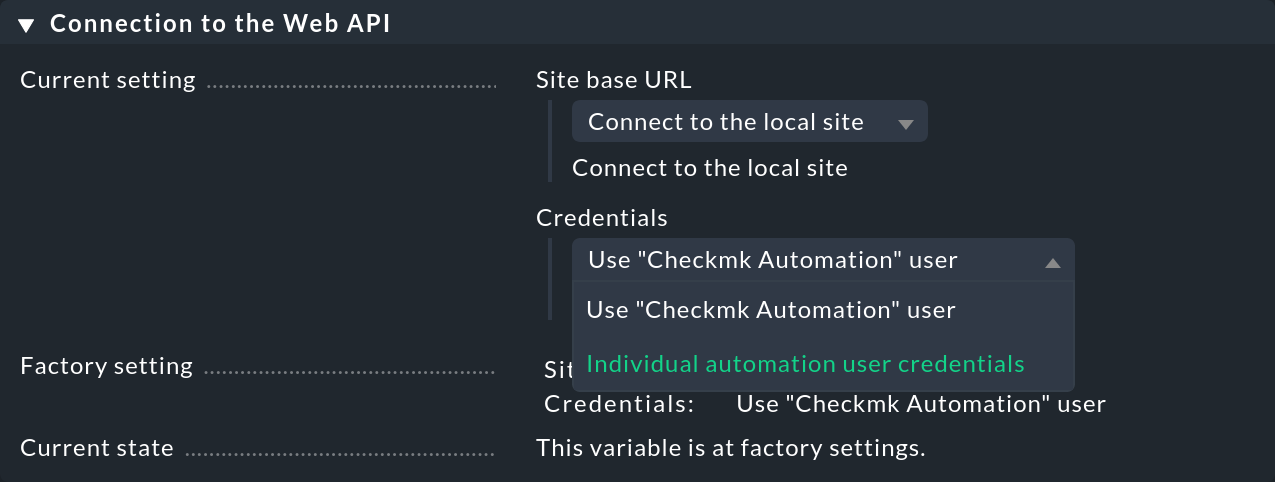
Here you can enter another user and his or her access data (name, password) or enter changes to the existing automation user.
As soon as you have saved the changes with ![]() Save, the defined user will be used for the automation and you can continue with the dynamic host configuration.
Save, the defined user will be used for the automation and you can continue with the dynamic host configuration.
2.3. Setting-up dynamic configuration
Is piggyback data present?
The only requirement to be able to use the DCD is to have piggyback data.
You will always have this data if you have correctly set up the monitoring of AWS, Azure and Co.
You can easily verify that via the command line as well, because the piggyback data from Checkmk will have been
created in the tmp/check_mk/piggyback directory:
OMD[mysite]:~$ ls tmp/check_mk/piggyback
myvm01  myvm02  myvm03
If this directory is not empty, piggyback data has been generated in this site.
General connector settings
Now go to the host administration. The Setup > Hosts > Dynamic host management menu entry brings you to the configuration of the DCD respectively its connector:
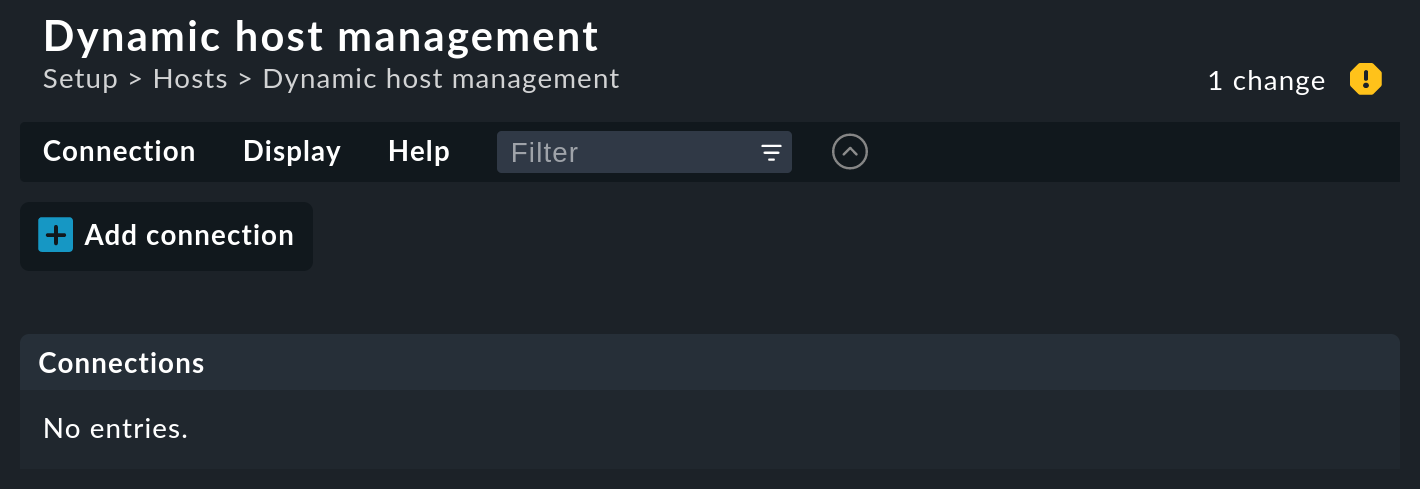
Create a new connection with ![]() Add connection.
The first part of the configuration is the General properties:
Add connection.
The first part of the configuration is the General properties:
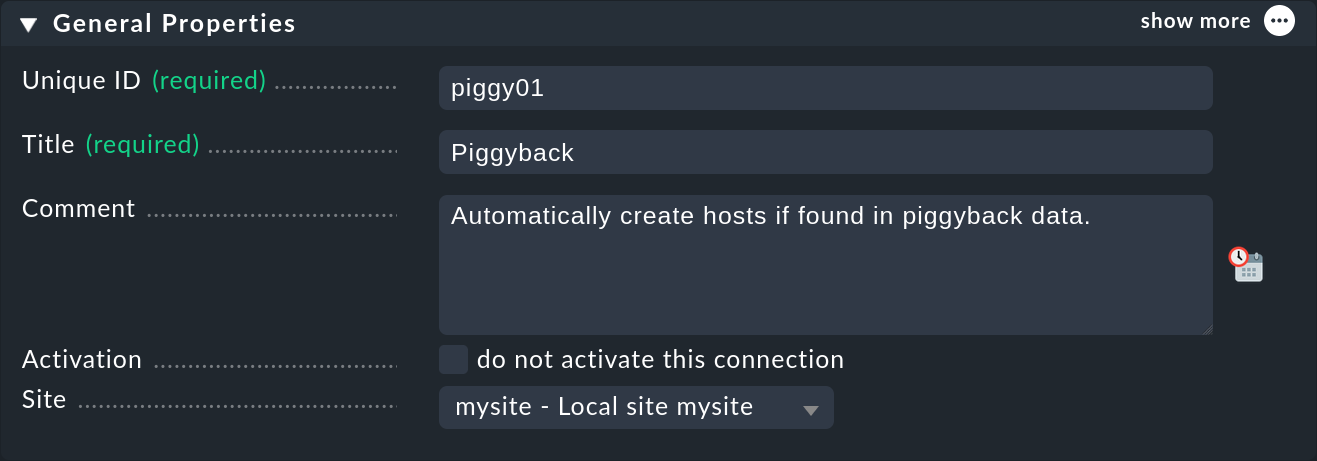
Here you assign, as so often, a unique ID and a title for this connector. Also important is the selection of the Checkmk site on which this connector should run. Because piggyback data is always processed locally, the connector must always be assigned to a specific site.
Properties of the connector
The second part is the Connection Properties:
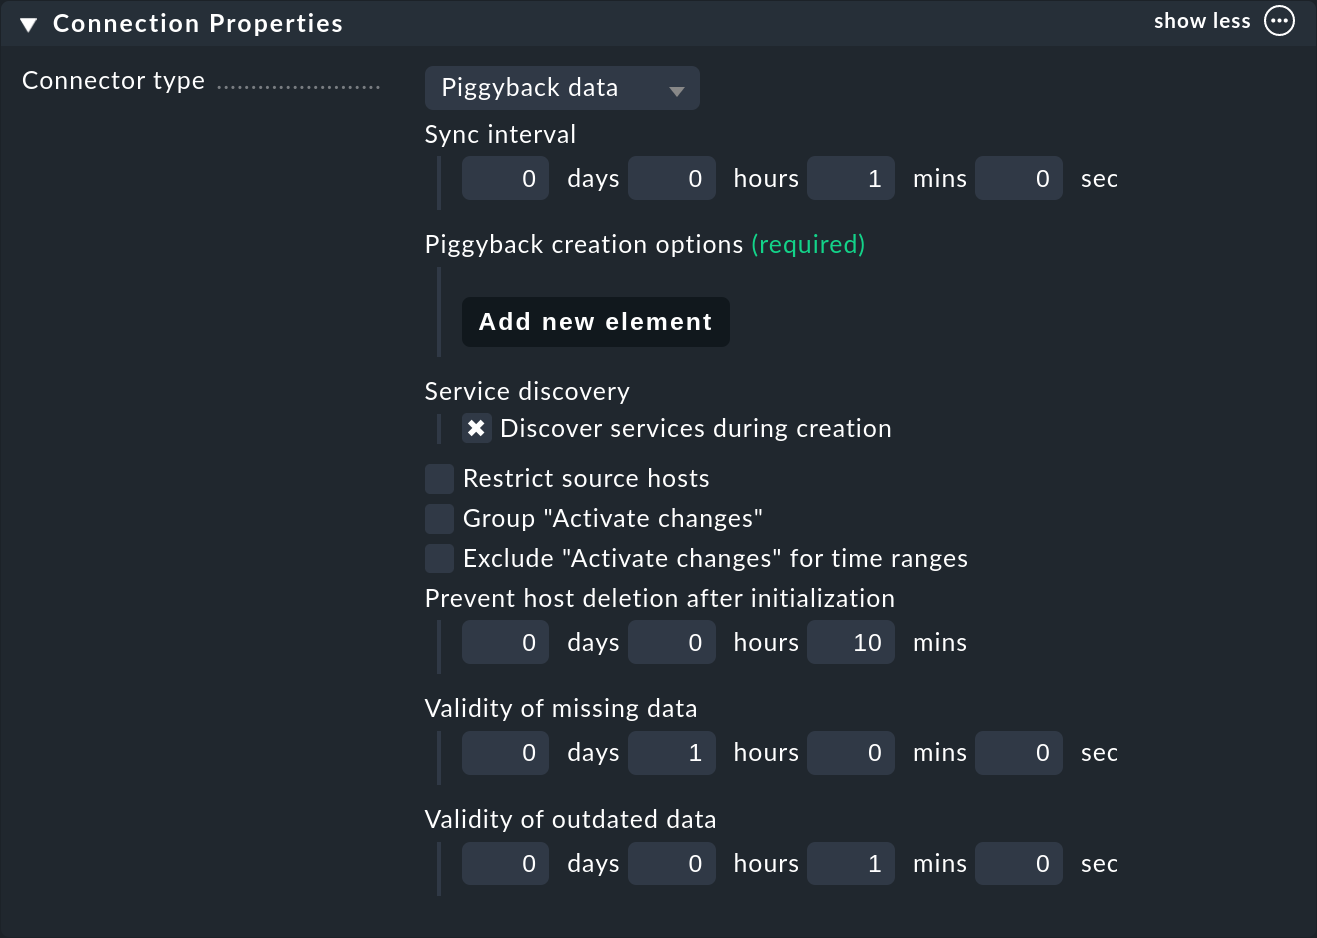
The connector Piggyback data is already preselected here (and is currently the only one possible).
The Sync interval determines how often the connector should search for new hosts. If you keep the regular check interval of one minute, it makes no sense to do that much more often, since a piggyback data change can take place once a minute at most. In very dynamic environments you can use both check interval as well as the connector interval set to much lower values. However this also results in a higher CPU utilization on the Checkmk server.
Now it is important to add under Piggyback creation options at least one element (Add new element). This will take you to the settings for automatically created hosts:
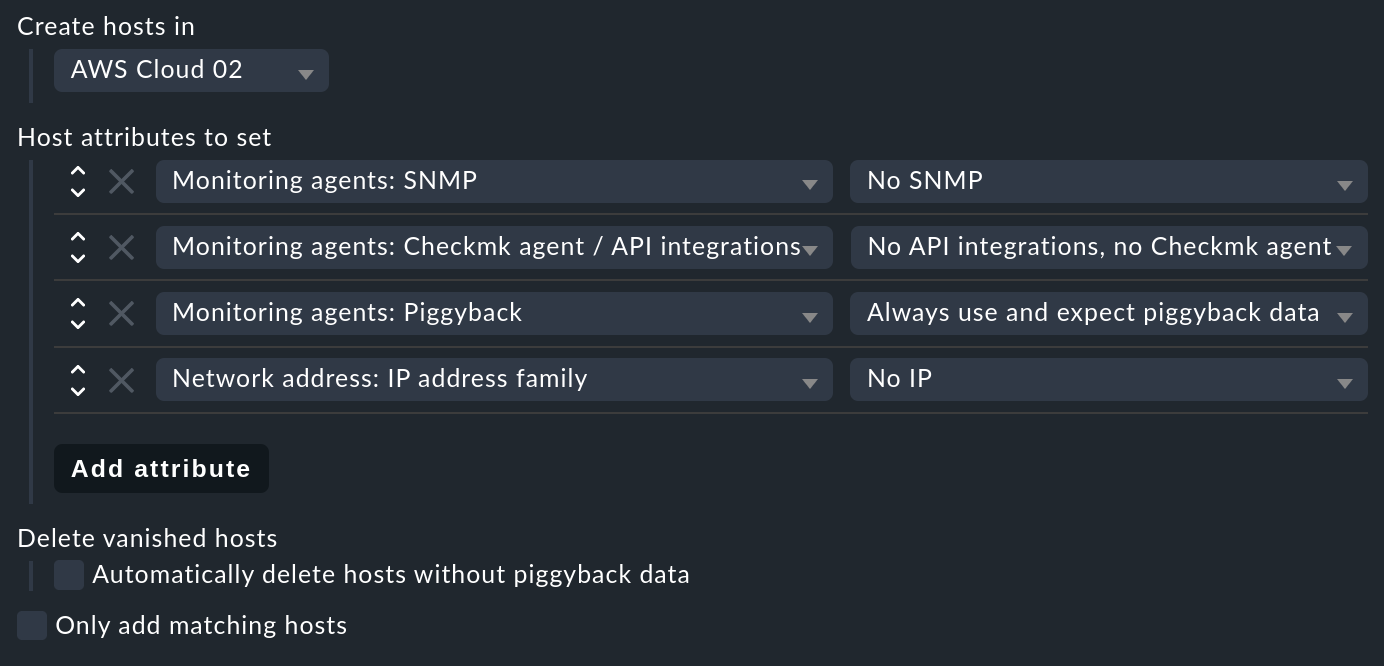
Here you can specify two important things: In which folder the hosts should be created (here for example AWS Cloud 02), and which host attributes should be set (for the latter you must have Show more mode enabled)). Four important attributes are preset which are mostly applicable for piggybacked hosts:
No monitoring via SNMP.
No Checkmk agent on the host itself (data comes via piggyback).
Piggyback data is always expected (and there is an error if it is missing).
The hosts do not have an IP address.
Important: Only if you enable Delete vanished hosts will hosts be deleted when they disappear from your dynamic environment.
If you do not want to automatically create all hosts, you can do this by restricting the Only add matching hosts option with a regular expression. Important: here we mean the hosts that are being created, and not the hosts you have set up to monitor AWS, for example.
The latter can be achieved with the Restrict source hosts option. This refers to the names of the hosts that generate piggyback data.
Activate changes
Two further options deal with the automatic activation of changes – for the case that hosts really have been created or removed, since only then will they appear in the monitoring.
If activate changes takes a long time on your site, you can use Group "Activate changes" to make sure that it does not start immediately with each new host, but rather once a few hosts have been ‘collected’.
Furthermore, you can also completely stop the automatic activation of changes for specified times during the day – for example, for the times when your monitoring system is being actively looked-after. Because if the DCD activates changes, all other changes that you or a colleague have just made will also become active!
After saving the connector appears in the list. It can however not yet run before you have activated the changes – only then does it start functioning. So therefore do not be irritated by the message Failed to get the status from DCD (The connection ‘piggy01’ does not exist) which appears right after saving.
3. Starting the connector
3.1. The first activation
After saving the connector properties, and following an activate changes, the connector will automatically start its operation. This can go so quickly that right after activating the changes you will immediately see how hosts are being created in monitoring:
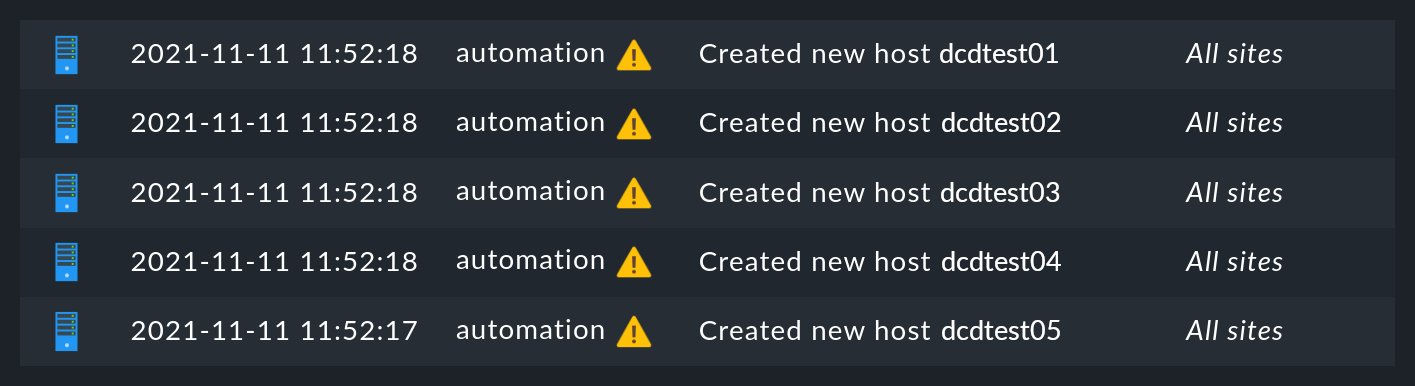
If you reload this page shortly afterwards, these changes will probably have already disappeared, because they were automatically activated by the DCD. The new hosts are already in the monitoring and will be regularly monitored.
4. Automatic deletion of hosts
4.1. When are hosts being deleted?
As mentioned above, you can of course allow hosts which ‘no longer exist’ to be deleted automatically from monitoring by the DCD. That sounds at first very logical. What exactly is meant by ‘no longer exists’ is however at second glance a bit more complex, as there are several situations to be considered. In the following overview we assume that you have enabled the delete option – since otherwise hosts will never be removed automatically.
| Situation | What happens? |
|---|---|
Removing a DCD connector |
If you shut down a DCD connector (do not activate this dynamic configuration connection), or remove it altogether, all hosts created by this connector are preserved. If necessary you must delete them by hand. |
Piggybacked host will no longer be monitored |
If you remove the host from which you monitor your cloud or container environment from monitoring, it will of course generate no further piggyback data. In this case the automatically-generated hosts will after one hour be automatically deleted. |
Piggybacked host can’t be contacted |
If your cloud environment is unreachable and the Checkmk service requesting it goes to CRIT, the generated hosts will remain in monitoring indefinitely. There is no one-hour timeout here! |
The Checkmk server itself is stopped |
Stopping all monitoring will cause piggyback data to become obsolete, but of course this will not result in created hosts being deleted. The same applies if the Checkmk server is rebooted (which causes a temporarily loss of all piggyback data since these are in the RAM). |
A host is no longer in the piggyback data |
This is a normal situation: A host in a cloud/container environment has disappeared. In this case it will be immediately removed from monitoring. |
4.2. Configuration options
In addition to the question of whether hosts should be removed automatically at all, in the connector properties there are three more options that affect the deletion – options which we skipped discussing earlier:
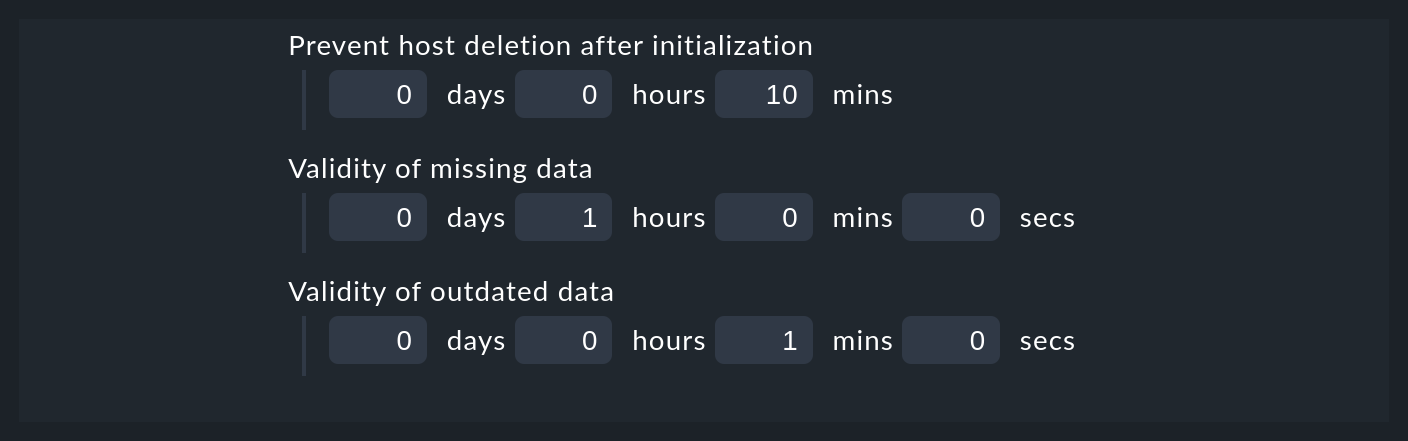
The first setting – Prevent host deletion right after initialization – affects a complete reboot of the Checkmk server itself. In this situation piggyback data for all hosts will at first be missing until the hosts are queried for the first time. To avoid the senseless deletion and reappearance of hosts (which is also accompanied by repeated notifications for known problems), deletions will by default be generally waived during the first 10 minutes. This time limit can be customized here.
The Validity of missing data option handles the situation where a host, whose monitoring data created several hosts automatically, returns no piggyback data. This can be the case, e.g. when access to AWS and Co. has stopped working. Or also of course if you have removed the special agent from the configuration. The automatically-generated hosts will remain for the set time in the system before being removed from the Setup.
The Validity of outdated data option is similar, but treats the case that even if piggyback data is being received, but not from some hosts. This is the normal case if, e.g. virtual machines or cloud services are no longer available. If you want the corresponding objects to disappear from Checkmk in a timely manner, then set a correspondingly short time span here.
5. Diagnoses
5.1. Execution history
If you want to watch the DCD at work, for each entry in the list of connectors you will find the ![]() icon.
This takes you to the execution history:
icon.
This takes you to the execution history:
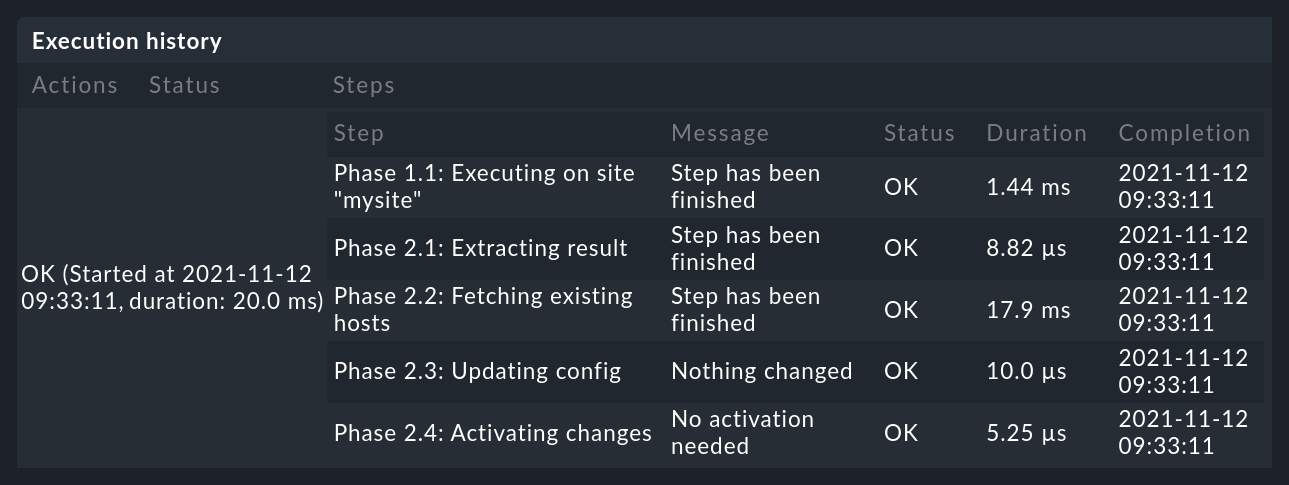
If for some reason the creation of a host fails, you will see this in the execution history.
5.2. Audit log
With Setup > General > Audit log you open a page with the list of all changes that have been made in
the Setup GUI — regardless of whether they have already been activated or not.
Look for entries from the automation user. The DCD works under this account and generates changes there –
so here you can follow which hosts the DCD has created or removed, and when.
5.3. DCD log file
The DCD’s log file is var/log/dcd.log.
Here is an example which fits the above description.
Here you will also find the error message that a specific host could not be created:
2021-11-10 14:45:22,916 [20] [cmk.dcd] ---------------------------------------------------
2021-11-10 14:45:22,916 [20] [cmk.dcd] Dynamic Configuration Daemon (2.0.0p14) starting (Site: mysite, PID: 7450)...
2021-11-10 14:45:22,917 [20] [cmk.dcd.ConnectionManager] Initializing 0 connections
2021-11-10 14:45:22,918 [20] [cmk.dcd.ConnectionManager] Initialized all connections
2021-11-10 14:45:22,943 [20] [cmk.dcd.CommandManager] Starting up
2021-11-10 15:10:58,271 [20] [cmk.dcd.Manager] Reloading configuration
2021-11-10 15:10:58,272 [20] [cmk.dcd.ConnectionManager] Initializing 1 connections
2021-11-10 15:10:58,272 [20] [cmk.dcd.ConnectionManager] Initializing connection 'piggy01'
2021-11-10 15:10:58,272 [20] [cmk.dcd.ConnectionManager] Initialized all connections
2021-11-10 15:10:58,272 [20] [cmk.dcd.ConnectionManager] Starting new connections
2021-11-10 15:10:58,272 [20] [cmk.dcd.piggy01] Starting up
2021-11-10 15:10:58,273 [20] [cmk.dcd.ConnectionManager] Started all connections
6. Files and directories
| Path | Function |
|---|---|
|
Piggyback data is created here. A directory is created for each piggybacked host included in the piggyback data. |
|
The log file for the Dynamic Configuration Daemon (DCD) |