1. Introduction
This article is currently a draft version. At present, it essentially contains only the chapters on parents and host groups that were previously included in the Host administration article. When this article has been completed, it should provide an overview of the various structuring elements in Checkmk and explain their similarities and differences. You should then have all the information at hand to set up the structure that is appropriate for your operational environment.
2. Folders and inheritances
2.1. Structuring with folders
Everyone who works with computers is familiar with files and folders. In Checkmk this well-known principle has been adopted for the structuring of hosts, which are stored in folders. Only the Main folder — the folder tree’s root — is predefined. Below (within) this main folder, you can create your own folder structure with as many subfolders as desired, visualized as a so-called host tree. Commonly used criteria for building the host tree are location, technology and organizational structure. You can access the Main folder by selecting Setup > Hosts > Hosts.
Via folders, attributes can be inherited by subfolders and the hosts they contain. See the Host administration article for details on how inheritance works. Inherited are the folder attributes, i.e. the folder properties displayed in the Setup on the Folder properties page such as monitoring agents and permissions — but also other structuring elements such as host tags, labels, or parents. Many of the folder properties can also be found in the host properties on the Properties of host page. Inheritance is especially useful for attributes that are common to many hosts, such as whether the host should be monitored by Checkmk agent or by SNMP. Another advantage with inheriting folder attributes is that you can prepare folders to hold any hosts that will be added in the future. Just drop the new host into the appropriate folder and all predefined attributes will be automatically correct for the new host.
In order to take full advantage of inheritance, it has proven useful to first think about an organizational system and then fill this system with content. Thus, you first create the structure of the folders and their hierarchy, and you then sort your hosts into the appropriate folders.
This is all the more important the larger the environment and the more numerous the hosts. Once a folder structure has been set up, it can be later modified and folders can be renamed without any problems. Care must be taken, however: Moving a host to another folder may change its attributes without you being aware of it — i.e. the target folder may have different attributes from the source folder.
Only in rare scenarios can a folder structure alone represent the complexity of real systems however. If you want (or need) to organize your hosts according to many different criteria, the host tags described in the next chapter can additionally come in handy.
2.2. The folder structure in monitoring
The tree structure generated by the folders is also visible in the monitoring environment.
The filter bar
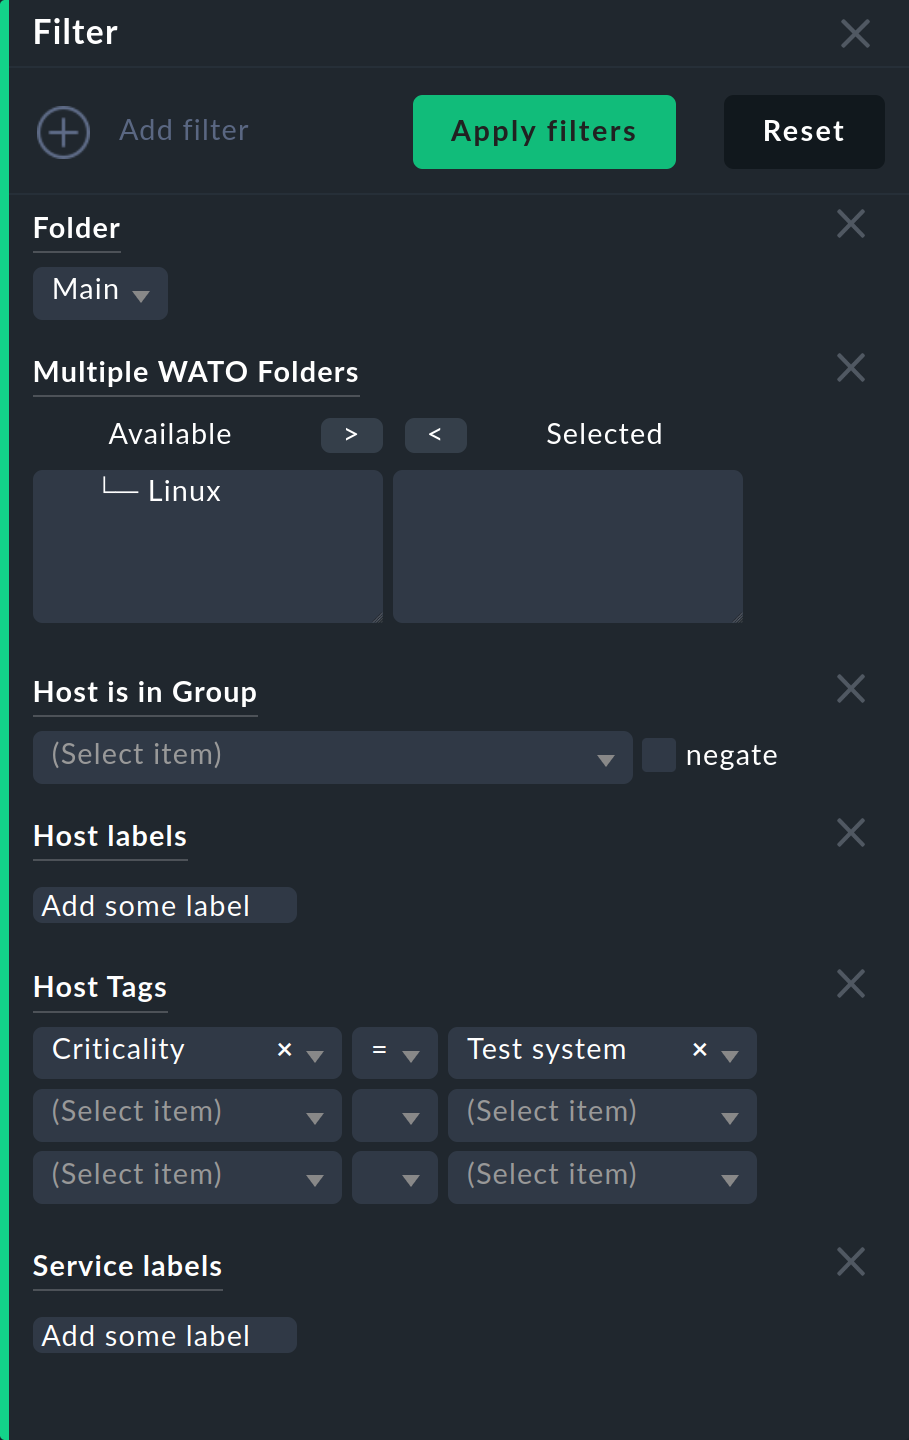
Firstly, in the view's filter bar, there is the Folder filter, which allows you to restrict the current view to the hosts below a specific folder.
As the following image shows, further filters are also available for other structuring elements such as host tags, labels and host groups.
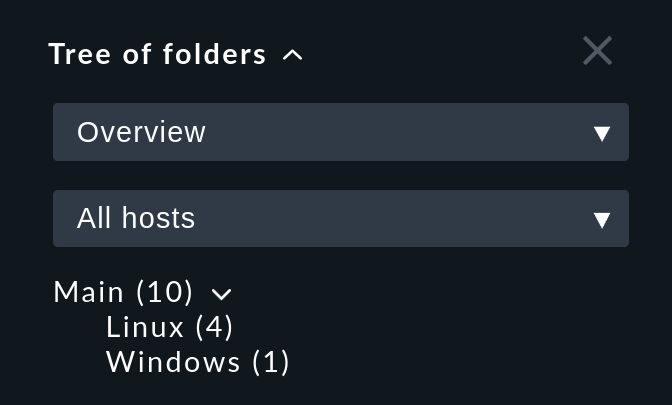
Tree of folders
Secondly, in the sidebar, the Tree of folders snapin provides the same selection options as the Monitor menu, but can additionally limit the display to one folder:
3. Host tags
4. Labels
5. Parents
5.1. Structuring using parents
You have already learned what parents are and how they work in the Basic principles of monitoring article.
5.2. Creating parents manually
To define a parent for a single host, do the following: Select Setup > Hosts > Hosts and click the desired host to display its properties. In the Basic settings box, enter the parent by its name or IP address. As soon as a parent has been specified, a further input field for an additional parent appears:
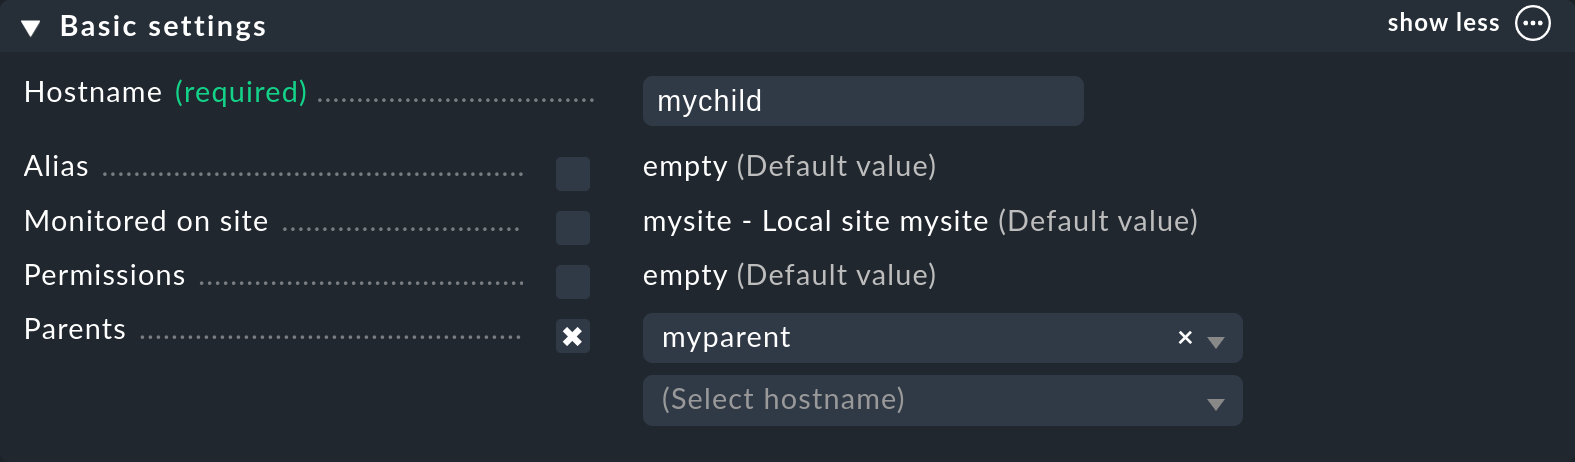
Important: Specify only direct parent hosts.
In a similar way, parents can also be specified in the properties of folders and thus inherited by the hosts the folders contain, as described in the earlier chapter on Folders and inheritances.
5.3. Specifying parents using a scan
When setting up a new monitoring system, and from the start creating a well organized structure with folders and parents, you will probably be fine with parent inheritance via folders. You can also set up parents automatically via the Parent scan however.
Using the IP protocol on the network layer of the OSI model (layer 3), using traceroute, the scan searches for the final gateway upstream of a host.
If such a gateway is found and its IP address belongs to one of your monitored hosts, it is set as the parent.
If traceroute does not get any information from the hops preceding the targeted host, the latest successful hop is used.
However, if no gateway is found among the monitored hosts, Checkmk creates an artificial 'ping-only host' by default in the Parents folder which is created at the same time.
However, this default setting can also produce undesirable results. As an example, let’s take a typical, small network with the address range 192.168.178.0/24. If a host with an address from a different address range — which cannot be pinged — is now added to the monitoring, the scan will try the route via the router, and will find only the network provider’s node there. And so, for example, a telecom server from the WAN area could then be set as the parent for this host. To avoid this you can deactivate the corresponding option before the scan.
If you want to scan a folder with new hosts for parents, do the following: First open the desired folder and select Hosts > Detect network parent hosts from the menu to open the scan configuration. By the way, instead of scanning an entire folder, you can also just scan a subset of hosts by selecting them in advance in the first column of the list.
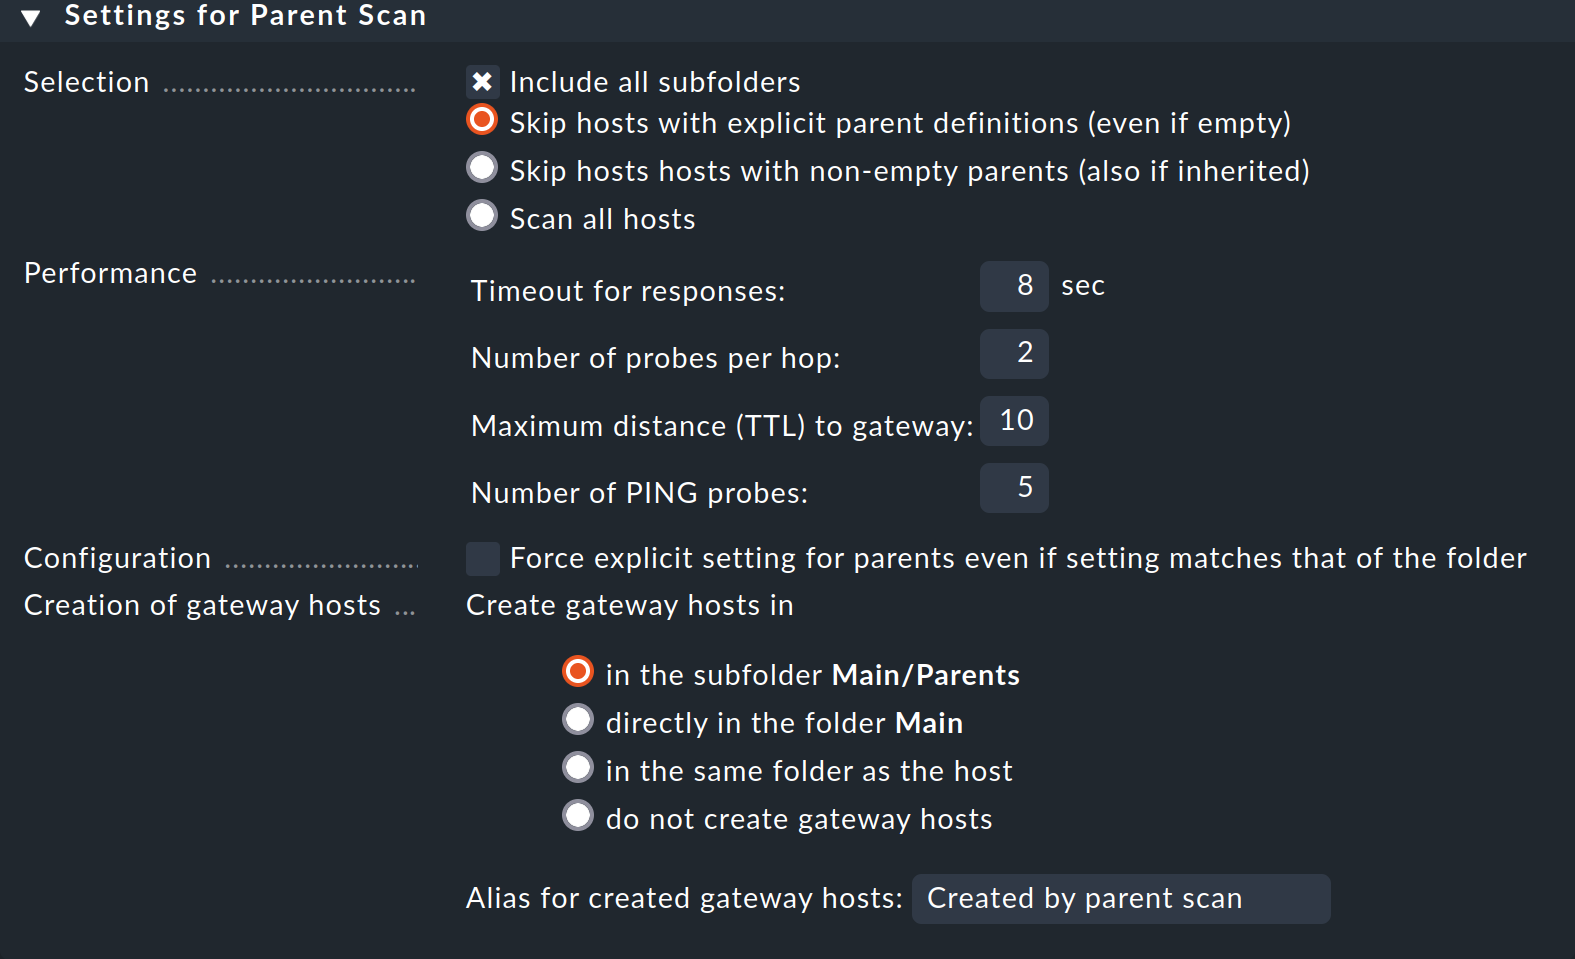
To completely rescan all hosts in all subfolders, regardless of any manually set parents, select the Include all subfolders and Scan all hosts options. In the Performance section, you can tailor the scan duration, which can take quite a long time if you have many hosts.
Under Creation of gateway hosts you determine whether, how and under which alias newly found parent hosts are created. Disable this function if you want to limit parents to monitored hosts.
Now click Start at the bottom of the page. You can watch the output of the scan in real time while it is being performed.
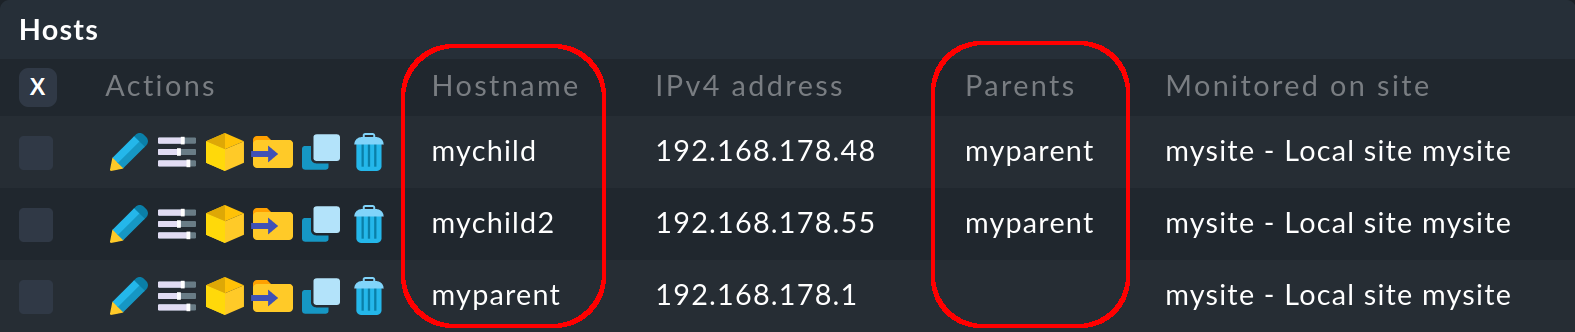
You will then see the configured parents and, if applicable, a new Parents folder in Main (if you specified this before the scan).
This completes the scan.
5.4. Parents in monitoring
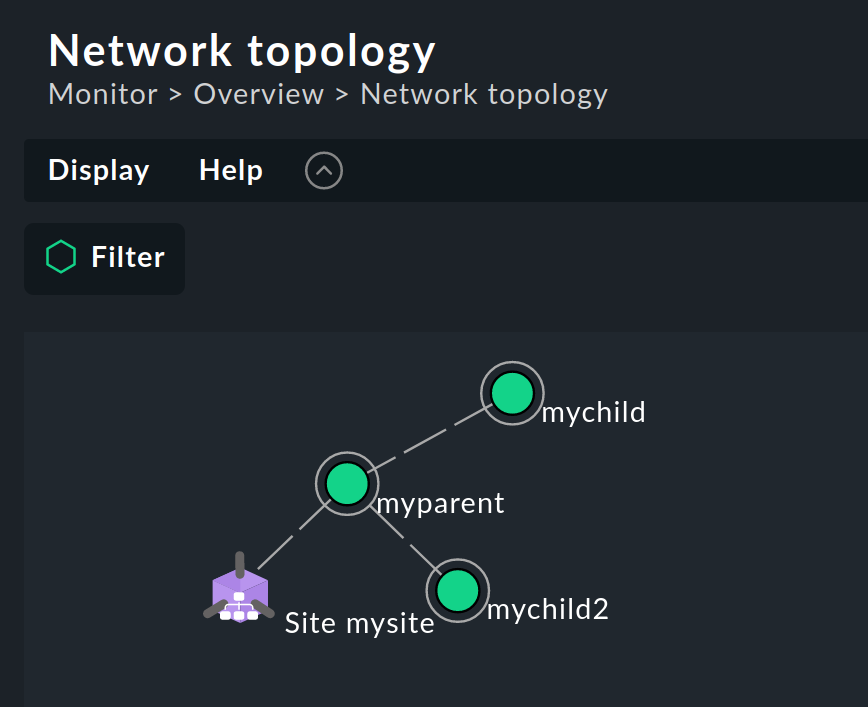
After a scan has been performed and the changes have been activated, the parent-child relationships are visualized as a topology map, which you can access via Monitor > Overview > Network topology:
Tip: If the results from the scan do not seem plausible in some places, a manual call to traceroute can sometimes be helpful for tracing the individual hops.
6. Host groups
6.1. Working with host groups
Host groups allow you to collect a number of hosts together for display in a monitoring view. For example, you can display all Linux servers, Windows servers, and certain application servers together by setting up a host group for each of these server types.
A host group is populated using a rule. In this rule’s conditions, you can access folders, host tags, and labels, as usual. Host groups themselves do not by default appear as selection criteria in rules because they are not used for configuration, rather they are used for views.
6.2. Creating host groups
You can find the host groups under Setup > Hosts > Host groups.
You create a new host group via the Add group action button. The creation is a simple process and is limited to the assignment of a unique name — which cannot be changed later — and an alias:

6.3. Adding hosts to host groups
To add hosts to host groups, use the Assignment of hosts to host groups rule set, which can be found at Setup > Hosts > Host monitoring rules. Create a new rule.
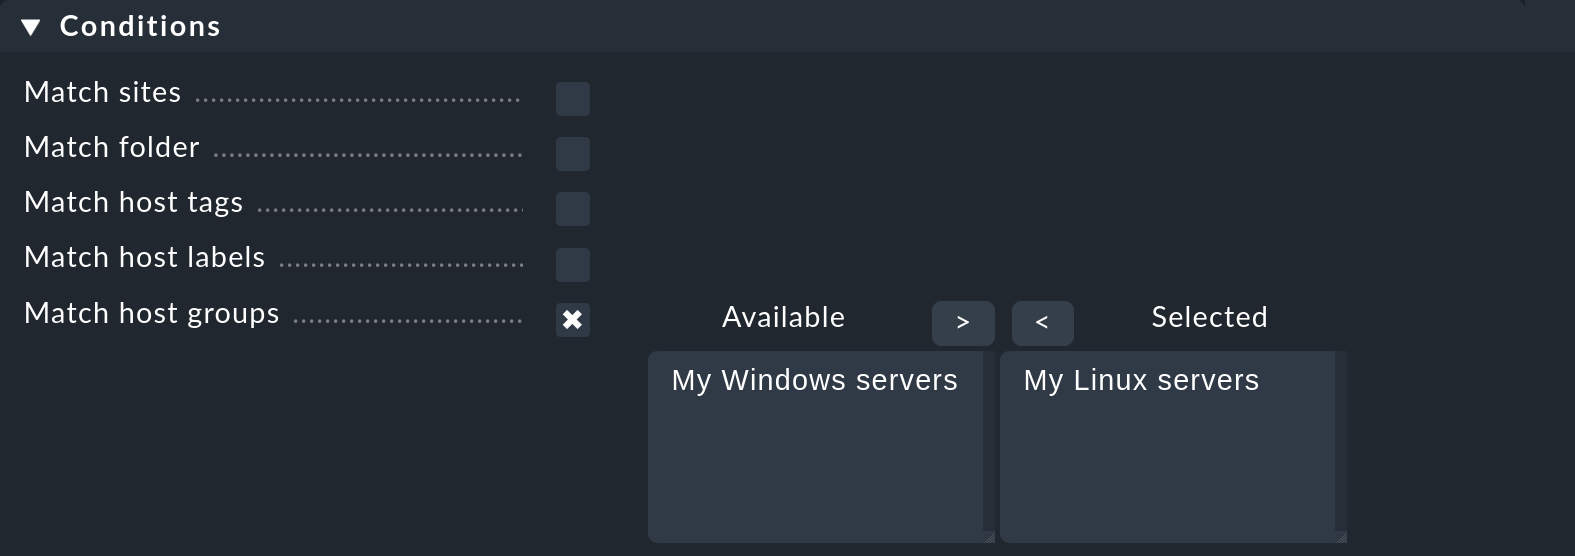
First, in the Assignment of hosts to host groups box, select the host group to which hosts should be assigned, such as the My Linux servers group in the example:

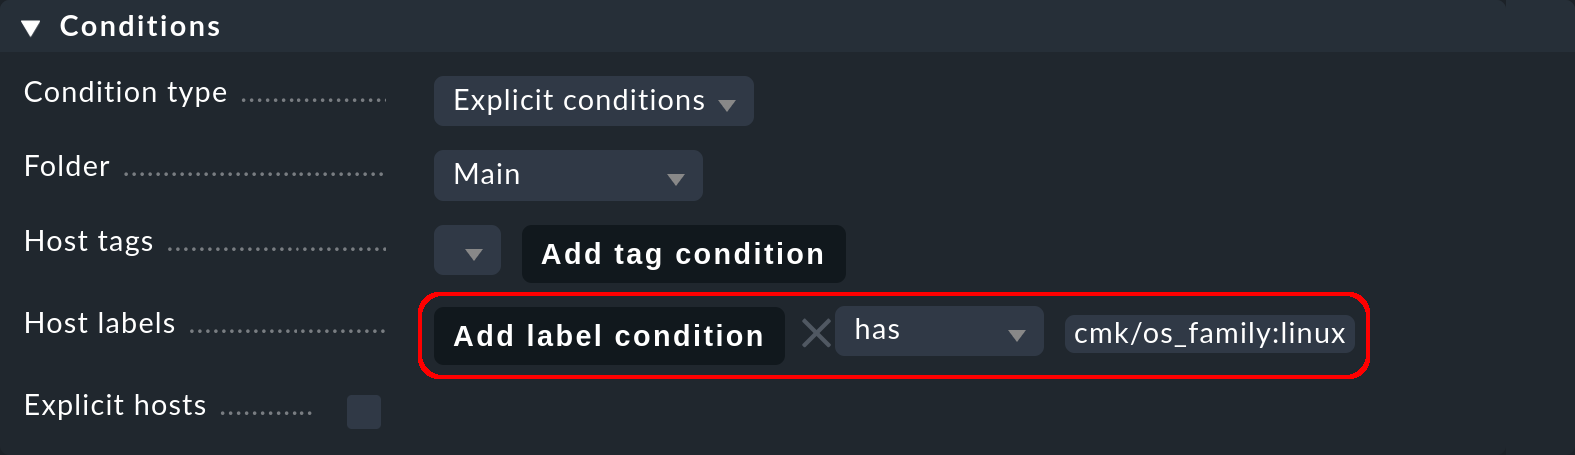
Next, in the Conditions box, attend to the filter or the filters to delimit the group — since filters can be combined, of course. You can filter hosts by folders, host tags, host labels, or specify specific hosts. If, in the host group, you want to include hosts with two tags from the same host tags group, you must create two separate rules. In general, group assignments are cumulative. Hosts can be in multiple groups and groups can be populated by multiple rules.
In the following example, we use the host label cmk/os_family:linux automatically assigned by Checkmk to add the Linux servers to the host group:
Afterwards you will still need to activate the changes as usual.
6.4. Host groups in monitoring
Overiew of the host groups
In monitoring, you can conveniently check the result of your assignments in Setup. The existing host groups will be listed under Monitor > Overview > Host groups:
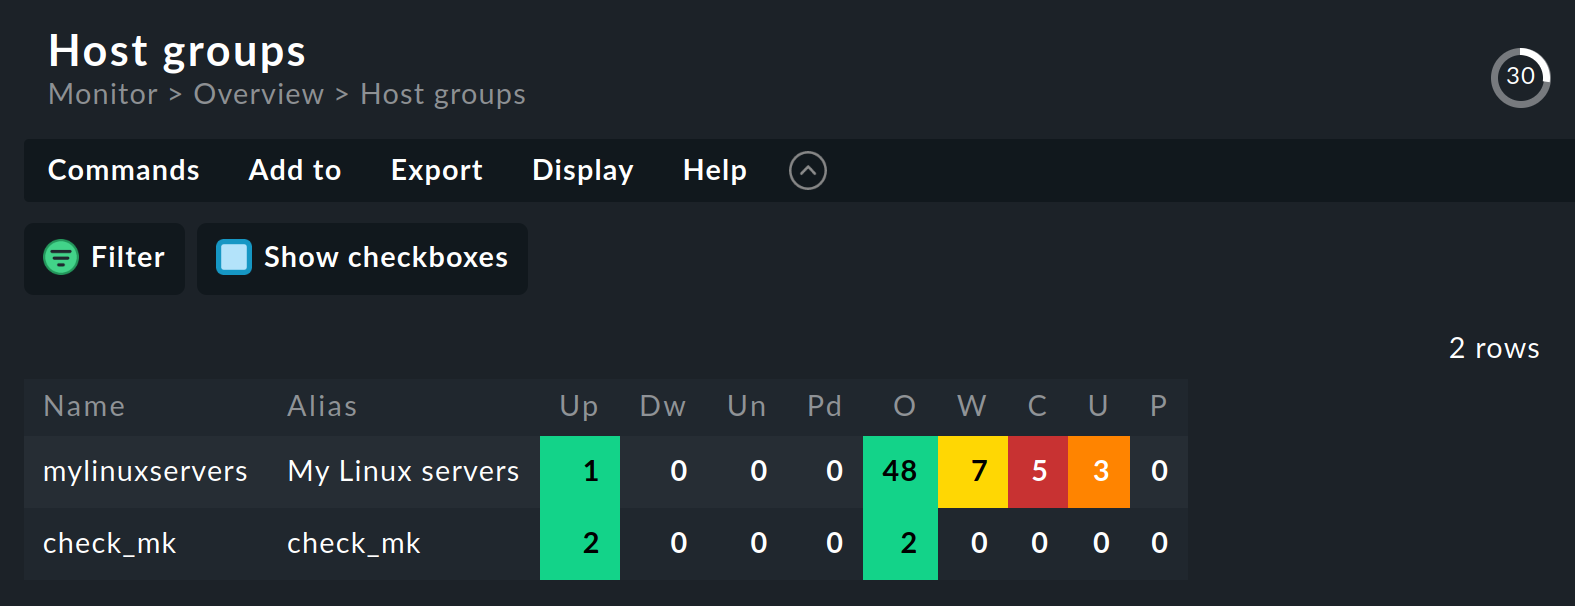
Clicking on a host group’s name will take you to a complete view of the hosts in that group.
Away from this overview you can use host groups in various places, such as for creating views and NagVis maps, and as filters in rules for notifications and alert handlers.
Views
The only important thing when creating views (via Customize > Visualization > Views) is to select a Datasource that uses host groups, e.g. Host groups.
In the Monitor menu you can find ready-made views, for example Host groups, which we have already shown in the previous section.
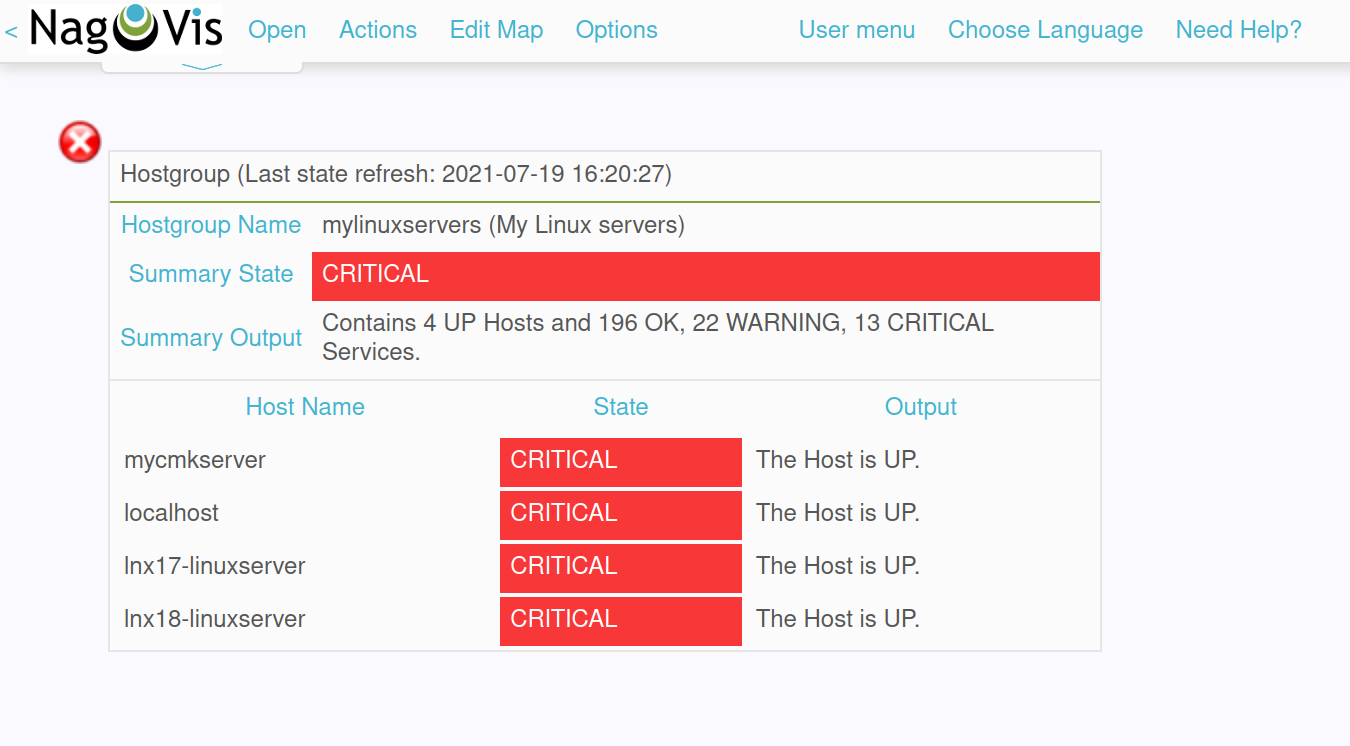
NagVis maps
You can access NagVis maps with the sidebar's NagVis maps snapin. In a NagVis map you get as a result for example the summary for a host group via hover menu over a single icon:
Notifications and alert handlers
In the rule sets for notifications and alert handlers, the host groups are available as filters under the Conditions: