1. The basics of notifications
Notification in Checkmk involves actively notifying users when the state of a host or service changes.
Let us assume that at a certain point in time on the host mywebsrv17 the service HTTP foo.bar goes from OK to CRIT.
Checkmk detects this and by default sends an email including the most important data regarding this event to all contacts for this service.
Later, the state changes again from CRIT to OK, and the contacts receive another email — this time reporting this event, which is referred to as a recovery.
But this is only the simplest way of notifying. There are numerous ways for you to refine it:
You can notify by SMS, pager, Slack, and other Internet services.
You can set notifications to specific time periods, for example, to take on-call rosters into account.
You can define escalations if the responsible contact does not take action quickly enough.
Users can independently 'subscribe' to or unsubscribe from notifications if you want to allow this.
You can generally define via rules who is to be notified about what, and when.
However, before you start working with notifications, you should note the following:
Notification is an optional feature. Some users do without the notifications because they have a control center that is manned around the clock and that only operates with the status interface.
Initially activate the notifications only for yourself and make yourself responsible for everything. Observe over at least a few days how large the number of notifications is.
Do not activate notifications for other users until you have reduced the false alarms (false positives) to a minimum. We have described what you can do for this in the chapter on fine-tuning monitoring.
2. Preparing for email notifications
The simplest and by far the most common method is to send a notification by email. There is enough space in an email to also include the graphs of metrics as well.
Before you can notify by email, your Checkmk server must be set up for sending emails. For all supported Linux distributions, this boils down to the following:
Install an SMTP server service. This is usually done automatically during the installation of the distribution.
Specify a smarthost. You will usually be asked for this when installing the SMTP server. The smarthost is a mail server in your company that takes over the delivery of emails for Checkmk. Very small companies usually do not have their own smarthost. In this case, you use the SMTP server supplied by your email provider.
If the mail dispatch has been set up correctly, you should be able to send an email from the command line, for instance via this command:
OMD[mysite]:~$ echo "Testcontent" | mail -s Test harry.hirsch@example.comThe email should be delivered without delay.
If this does not work, you will find clues as to the source of the problem in the SMTP server’s log file in the /var/log/ directory.
More details on setting up mail delivery under Linux can be found in the article on notifications.
3. Activating email notifications
Once the email dispatch is basically working, activating the notification is very simple. In order for a user to receive notifications by email, the following two conditions must be fulfilled:
An email address has been assigned to the user.
The user is responsible for hosts or services — through the assignment of contact groups.
You assign email address and contact groups via the user’s properties, as we showed earlier in the chapter on user administration, for instance by adding your email address to your cmkadmin user account and to the Everything contact group.
4. Testing notifications
It would be a bit cumbersome to wait for a real problem or even provoke one to test the notifications.
It is easier to do this with Fake check results, a command with which you can manually change the state of a host or service for testing purposes — provided you are a Checkmk administrator, that is, you have the admin role.
You can find Fake check results in a similar way as with the commands for acknowledge problems and set scheduled downtimes. Open a view with a service list (quickest via the Overview), show the checkboxes and select a service — preferably one that is currently OK. In the menu click Commands > Fake check results. However, this command is only offered if the 'Show more' mode is active in the menu.

Click Critical and confirm the request to set the service to CRIT. This should immediately trigger a notification. After one minute, at the latest — when the next regular check is carried out — the service will then go back to OK by itself and a second notification for a recovery should be triggered.
If you have not received an email, this does not necessarily mean that there is a fault, because there are situations in which a notification from Checkmk is deliberately suppressed, for example:
when the notification has been disabled in the Master control snapin
when a host or service is in a scheduled downtime
when a host is DOWN and therefore no notifications are triggered by its services
if the status has changed too often recently and the service has therefore been flagged as
 flapping.
By the way, this can also happen quickly if you have changed the status frequently using Fake check results.
flapping.
By the way, this can also happen quickly if you have changed the status frequently using Fake check results.
5. Fine-tuning notifications
You can adapt the notifications in Checkmk to your, or your organization’s, needs in a variety of ways by means of complex rules. You can learn all the details for this in the article on notifications.
6. Troubleshooting
The notification module in Checkmk is very complex — because it covers many, very different requirements that have proven to be important over many years of practical experience. The question "Why didn’t Checkmk notify here?" will therefore be asked more often than you might expect, especially at the beginning. For this reason, here are a few tips for troubleshooting.
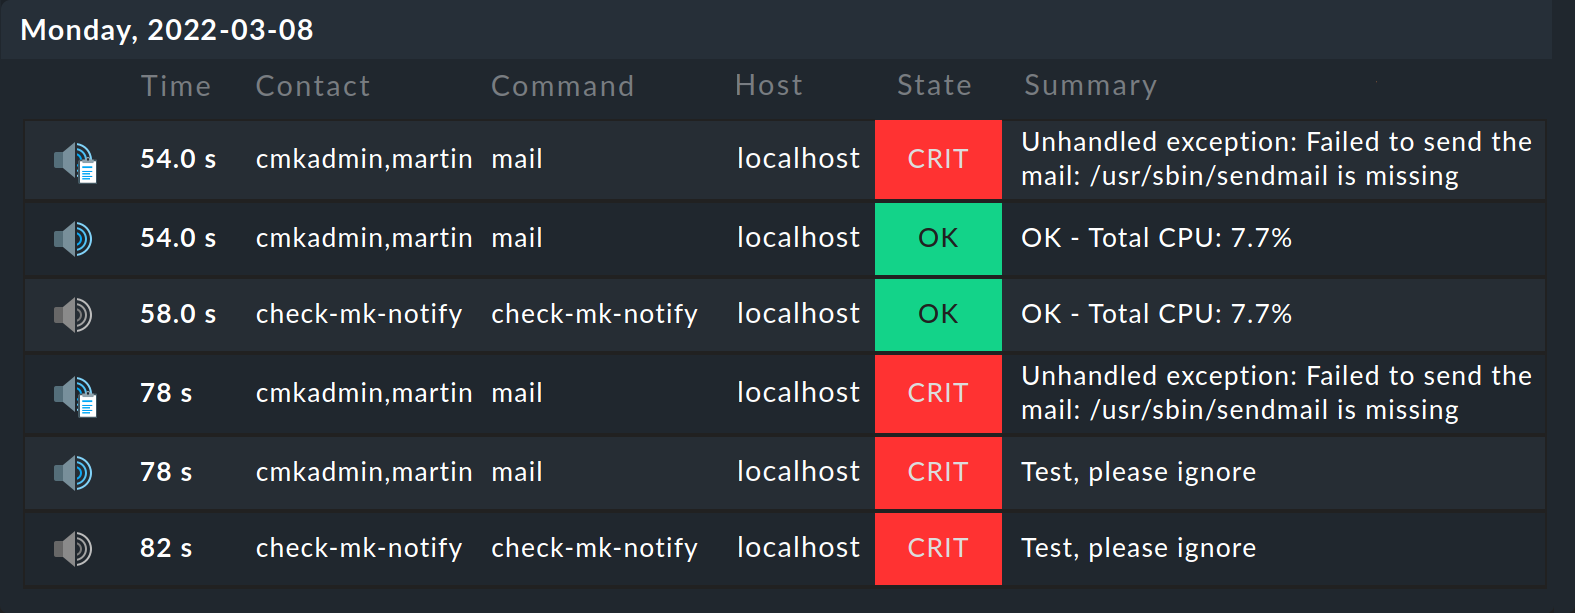
If a notification has not been triggered by a particular service, the first step would be to check the history of the notifications for that service. To do this, open the detail page for that service by clicking in the monitoring on the service. Select Service > Service Notifications from the menu. There you will find all notification events for this service listed chronologically from the most recent to the oldest.
Here is an example of a service for which notification was attempted, but for which the sending of emails failed because no SMTP server has been installed.
You can find even more information in the file ~/var/log/notifiy.log.
You can view this as a site user, with the less command, for example:
OMD[mysite]:~$ less var/log/notify.logIf you are not yet familiar with less — with the key combination Shift+G you can jump to the end of a file (which is useful for log files), and quit less with the Q key.
With the tail -f command, you can also observe the file contents 'live' while it is running.
This is useful if you are only interested in new messages, i.e. those that only appear after tail has been entered.
Here is an excerpt from the notify.log for a successfully triggered notification:
2022-03-04 10:21:48 Got raw notification (localhost;CPU load) context with 71 variables
2022-03-04 10:21:48 Global rule 'Notify all contacts of a host/service via HTML email'...
2022-03-04 10:21:48  -> matches!
2022-03-04 10:21:48    - adding notification of martin via mail
2022-03-04 10:21:48 Executing 1 notifications:
2022-03-04 10:21:48   * notifying martin via mail, parameters: (no parameters), bulk: no
2022-03-04 10:21:48 Creating spoolfile: /omd/sites/mysite/var/check_mk/notify/spool/cbe1592e-a951-4b70-9bac-0141d3d74986
By setting up the notifications, you have completed the finishing touches — Your Checkmk system is ready for use! This does not mean, of course, that the full capabilities of Checkmk have been fully explored.