1. Introduction
Using the Checkmk REST API as an application programming interface, you can submit and execute tasks—which you would otherwise perform via the GUI in Checkmk—using commands or scripts that send HTTP requests to the Checkmk server.
The REST in the term REST API stands for REpresentational State Transfer and describes an architecture for exchanging data on distributed systems—particularly for web services. An API implemented according to the REST architecture follows certain principles, such as the client-server model, stateless communication, and a uniform interface. In practice, implementation is typically done via the HTTP protocol, whereby resources are addressed via Uniform Resource Identifiers (URIs) and accessed using HTTP methods (GET, POST, PUT, DELETE).
So much for the REST principles. Their advantages are evident in the specific features offered by the Checkmk REST API:
Protocol |
The Hypertext Transfer Protocol (HTTP/1.1) is used as the transport protocol for communication. |
Encoding |
JavaScript Object Notation (JSON) is used as the data format. The payload of the responses is serialized using JSON and encoded in UTF-8. Date and time information is encoded in ISO-8601 format with valid time zone information. |
Language |
English is the language used for labels, identifiers, and the API documentation. |
Authentication |
A client is only granted access to the API if it has proven its authorization via HTTP authentication (e.g., 'Bearer'). |
Versioning |
The API is versioned and follows the basic principles of the Semantic Versioning 2.x standard. Details can be found in the section on versioning below. |
Documentation |
The API is documented in a machine-readable schema and a human-readable format in English, including all resources, their input and output parameters, and the associated value ranges. The API is created using the OpenAPI Specification (OAS) 3.x, an API description format specifically designed for REST APIs. The API document created with this specification is displayed to the user using ReDoc, a responsive web design for OpenAPI documents. |
Sample code |
To demonstrate usage, the REST API documentation provides sample code for various applications (e.g., for Python with Requests or Bash with Curl) for each request. |
Error handling |
In the event of an error, the API returns numeric HTTP status codes and a diagnostic message describing the problem, which helps in identifying possible causes of failed requests. |
REST API Classification |
The API meets all four levels (0 to 3) of the Richardson Maturity Model (RMM), which can be used to assess the degree of RESTfulness in an API. Level 1 requires the introduction of resources so that communication can occur via the API to individual endpoints rather than a single global endpoint. Level 2 is met when HTTP methods are used for requests. At the (highest) Level 3, the API essentially documents itself by having the server include the next possible actions and the resources to be addressed in the response to a request, thereby enabling the client to discover the available functionality on its own. This provision of additional information is also known as 'Hypermedia as the Engine of Application State' (HATEOAS). |
In addition to these general convenience features, the REST API is intended to cover the full range of functionality that Checkmk offers via its GUI and command-line interface.
![]() For features that are only available in the commercial editions, such as Service Level Agreement (SLA) or Agent Bakery, the corresponding methods of the REST API are also only provided in these editions.
In the documentation for the REST API, you can find information on each feature indicating in which editions it is available.
For features that are only available in the commercial editions, such as Service Level Agreement (SLA) or Agent Bakery, the corresponding methods of the REST API are also only provided in these editions.
In the documentation for the REST API, you can find information on each feature indicating in which editions it is available.
2. Versioning
One of the advantages of the REST API is that the software and documentation come from the same source — the OpenAPI document. As a result, the API documentation always matches the software and describes exactly what the API can do. Consequently, it is not necessary to describe the reference section of the available resources, methods, parameters, etc., in the Checkmk User Guide — instead, you will find the API documentation outside of this User Guide, directly in your Checkmk site.
The API and its documentation are versioned.
Since Checkmk 2.5.0, the REST API in version v1 has been delivered together with the Checkmk software.
This version of the API is compatible with version 1.0, which is available up to Checkmk 2.4.0.
The version number is part of the URL used to send an API request to the server.
The versioning scheme introduced with v1 is based on the core principles of the specification for Semantic Versioning 2.x.
However, the version numbers of the Checkmk REST API only indicate the major version.
In the event of incompatible changes, the major version number of the REST API is incremented.
Starting with version v1, bug fixes (patch versions) and compatible changes (minor versions) occur only 'under the hood' and do not require a change to the path for API requests.
The versioning of the REST API for Checkmk is independent of the versioning of the Checkmk software itself. Changes to API functions—in the form of bug fixes, compatible changes, or even as a new major version with incompatible changes—can be delivered with any patch version of Checkmk. You will be informed of this as usual via Werks.
When a new major version of the REST API is released, you can continue to use the previous version of the REST API temporarily. Deprecation notices for older versions of the REST API will be announced well in advance. Deprecated API versions will not be removed until the next major version of Checkmk. This means it is up to you to decide when to update your scripts to the new REST API version. In the article on updating sites to version 2.5.0, you will find current information on the recommended approach for handling the REST API versions supported in this Checkmk major version.
In addition to the supported major versions of the REST API, you also have the option to use the |
3. API Documentation
3.1. Access
The REST API documentation is available in HTML format for viewing in a web browser.
In the Checkmk GUI, open the API documentation via the navigation bar by selecting Help > Developer resources > REST API > Version 1 > Documentation. This menu always displays all REST API versions supported by the Checkmk version of your instance.

You can open this article using the Introduction menu item.
In addition to the Documentation entry, for each major version of the REST API, you can also use Interactive GUI to open the interactive GUI of the REST API.
Information on using the unstable version of the REST API can be found in a separate chapter of this article.
If you select the Documentation entry for the desired API version in the Help menu, the API documentation will be displayed in a new browser window (or browser tab). This documentation was included when your site was created, but was generated separately using ReDoc and therefore looks different from the pages of the Checkmk web GUI.
3.2. Structure and Content
The API documentation uses a responsive web design with three sections:
The left navigation panel is used for navigation, searching, and quickly jumping to the detailed description of the entries in the middle panel. The table of contents contains an entry for each API endpoint. An endpoint identifies, via a URL, the resource provided by the API (e.g., hosts), along with the method used to access the resource (e.g., GET to display a host). The endpoints are organized into multiple folders.
The central content area contains the key facts in the documentation: all information regarding the definition of a request (including parameters, value ranges, default values, and descriptions) and the corresponding responses (also with all details). The possible responses are displayed in different colors, depending on whether the returned HTTP status code indicates success or an error.
The right-hand example section (Request samples) shows the method and URL for the endpoint selected in the content area, followed by several request examples: the payload in JSON format (if relevant for the endpoint) and code examples, e.g., for Python with
requests, Python withurllib, Bash with Httpie, and Bash with Curl. Below that are the responses corresponding to the HTTP status code. All code examples can be copied to the clipboard using the Copy button.
The navigation area is scroll-synchronized with the other two areas; in other words, when you scroll up or down in the content area, the navigation area automatically scrolls to the corresponding entry in the table of contents.
The responsive web design ensures that in a narrow browser window, the example area disappears (the examples are then displayed below the corresponding method) and the navigation area is converted into a menu.
In all sections, you will find content that you can show or hide, such as the entries for the endpoints in the navigation section and nested parameters in the content section. By clicking > or Expand all, you can show the hidden content, and by clicking ∨ or Collapse all, you can hide it again.
How to use the API documentation to create specific requests, send them to the Checkmk server, execute them, and verify their success: you’ll learn all of this in the next chapter.
4. Using the API
4.1. Authentication
To use the Checkmk server’s REST API from a client, the client must prove its identity. The REST API supports the following authentication methods: Bearer, Webserver, and Cookie — in that order of priority. This means, for example, that if authentication with Bearer is successful, none of the other methods will be checked.
Bearer or Header Authentication
'Bearer' refers to the transmitter or holder of an identity. The client authenticates itself using the credentials of a user configured on the Checkmk server. Ideally, this is a so-called automation user, which in Checkmk is intended for executing actions via an API. Bearer authentication is recommended for use in scripts.
For authentication, you need the username and the associated automation secret for machine accounts, i.e., the automation user’s password. Both pieces of information must be included in the header of every request to the Checkmk server.
You can find automation users, just like other users, under Setup > Users > Users. To use all endpoints of the REST API, you need an automation user with fairly extensive permissions.
First, configure the permissions for your automation user under Setup > Users > Roles and permissions. By default, there is already a predefined admin role with all permissions, as well as a no_permissions role with no permissions at all. Depending on the desired scope of permissions for the new automation user, copy one of these roles as a template and give the copy a descriptive name. You can now enable or disable permissions individually for the newly-created role.
Next, under Setup > Users > Users, create a new user with a descriptive name, such as automation. Configure the properties for the newly created automation user as described in the article on Users and Permissions. Select the role you created earlier in order to assign all necessary permissions to the new user.
For the scripts presented in this article, an automation user named automation is always used as an example.
Web Server Authentication
For web server authentication, the REST API uses the HTTP authentication method configured for the web server ('Basic' or 'Digest').
This authentication method is intended for large Checkmk installations with specific requirements, which are implemented through the use and configuration of software modules for Apache web server authentication. If you wish to use web server authentication, you must reconfigure the Apache web server of the Checkmk instance yourself.
Cookie Authentication
Cookie authentication is a special case of authentication via API key. Any Checkmk user who is logged into Checkmk and has been assigned an HTTP cookie can use the REST API. Cookie authentication can be used for trying out and testing the REST API’s interactive GUI. Whether requests can be executed depends on whether your Checkmk user account has the appropriate permissions.
4.2. HTTP Status Codes
For each request, the REST API returns an HTTP status code, which you can use to verify whether the request was successful. All possible HTTP status codes for the given request are listed in the API documentation.
Note that the HTTP status code only indicates whether the request was successfully transmitted, not whether it was in fact successfully executed. Commands are executed on the Checkmk server with Livestatus. To ensure that the request via the REST API actually achieves what you intended, you must perform a success check yourself. The API documentation contains an example script for this task in the 'Queries through the REST API' section.
4.3. Preparations
To use the REST API, the device from which you want to send requests must be able to connect to the Checkmk server.
For initial testing, you can work directly on the Checkmk server, for example.
If you are working as a site user, you can use local variables such as $OMD_SITE, which refers to the name of the site.
The examples in the following sections are general in nature and do not use these local variables. They can therefore be executed on any device that can establish a connection to the Checkmk server.
Below, we provide Python scripts for a few simple examples in which HTTP requests to the API are implemented using the requests module.
Besides these Python scripts, you will also find a Curl version for each example.
In terms of functionality, the alternative implementations are identical.
For possible differences in the behavior of the tools used, for example regarding redirects, we recommend consulting the documentation for the respective tool.
If you want to access the REST API using Python, you will need a working environment with Python 3 and the requests module.
Curl is pre-installed on Linux, Windows, and macOS, however, the encapsulation in shell scripts with variables shown here is only possible out-of-the-box on Linux and macOS. On Windows, you can install a comparable environment using the Windows Subsystem for Linux.
To prepare, create a script file for each of the requests to be executed in the next section; the sample code will be copied into these files later:
- Python with requests
For the
requestsexamples, create a set of Python scripts and make them executable.- Bash with curl
For the
curlexamples, create a set of Bash scripts and make them executable.
The REST API returns all responses in JSON format on a single line.
Since formatting the output makes the text much easier to read, the single-line output in the following examples is presented in a multi-line format.
There are various websites and tools available for processing JSON, such as the command-line JSON processor jq.
Before you begin, gather some basic information specific to your Checkmk configuration:
| Variable | Example Value | Description |
|---|---|---|
|
|
Name of the Checkmk server |
|
|
Name of the Checkmk site |
|
|
Name of the automation user |
|
|
Password of the automation user |
These variables are used in the sample code and must be modified by you before sending a request. The table above also lists the example values used in the following sections.
4.4. Making Requests via Script
We will now demonstrate how to use the REST API using a straightforward example: You will create a host and its services, using a total of four requests. In principle, you proceed exactly as you would with the Checkmk GUI:
Create a host
Perform a service discovery on the host
Display the pending changes
Activate the changes
Creating a host
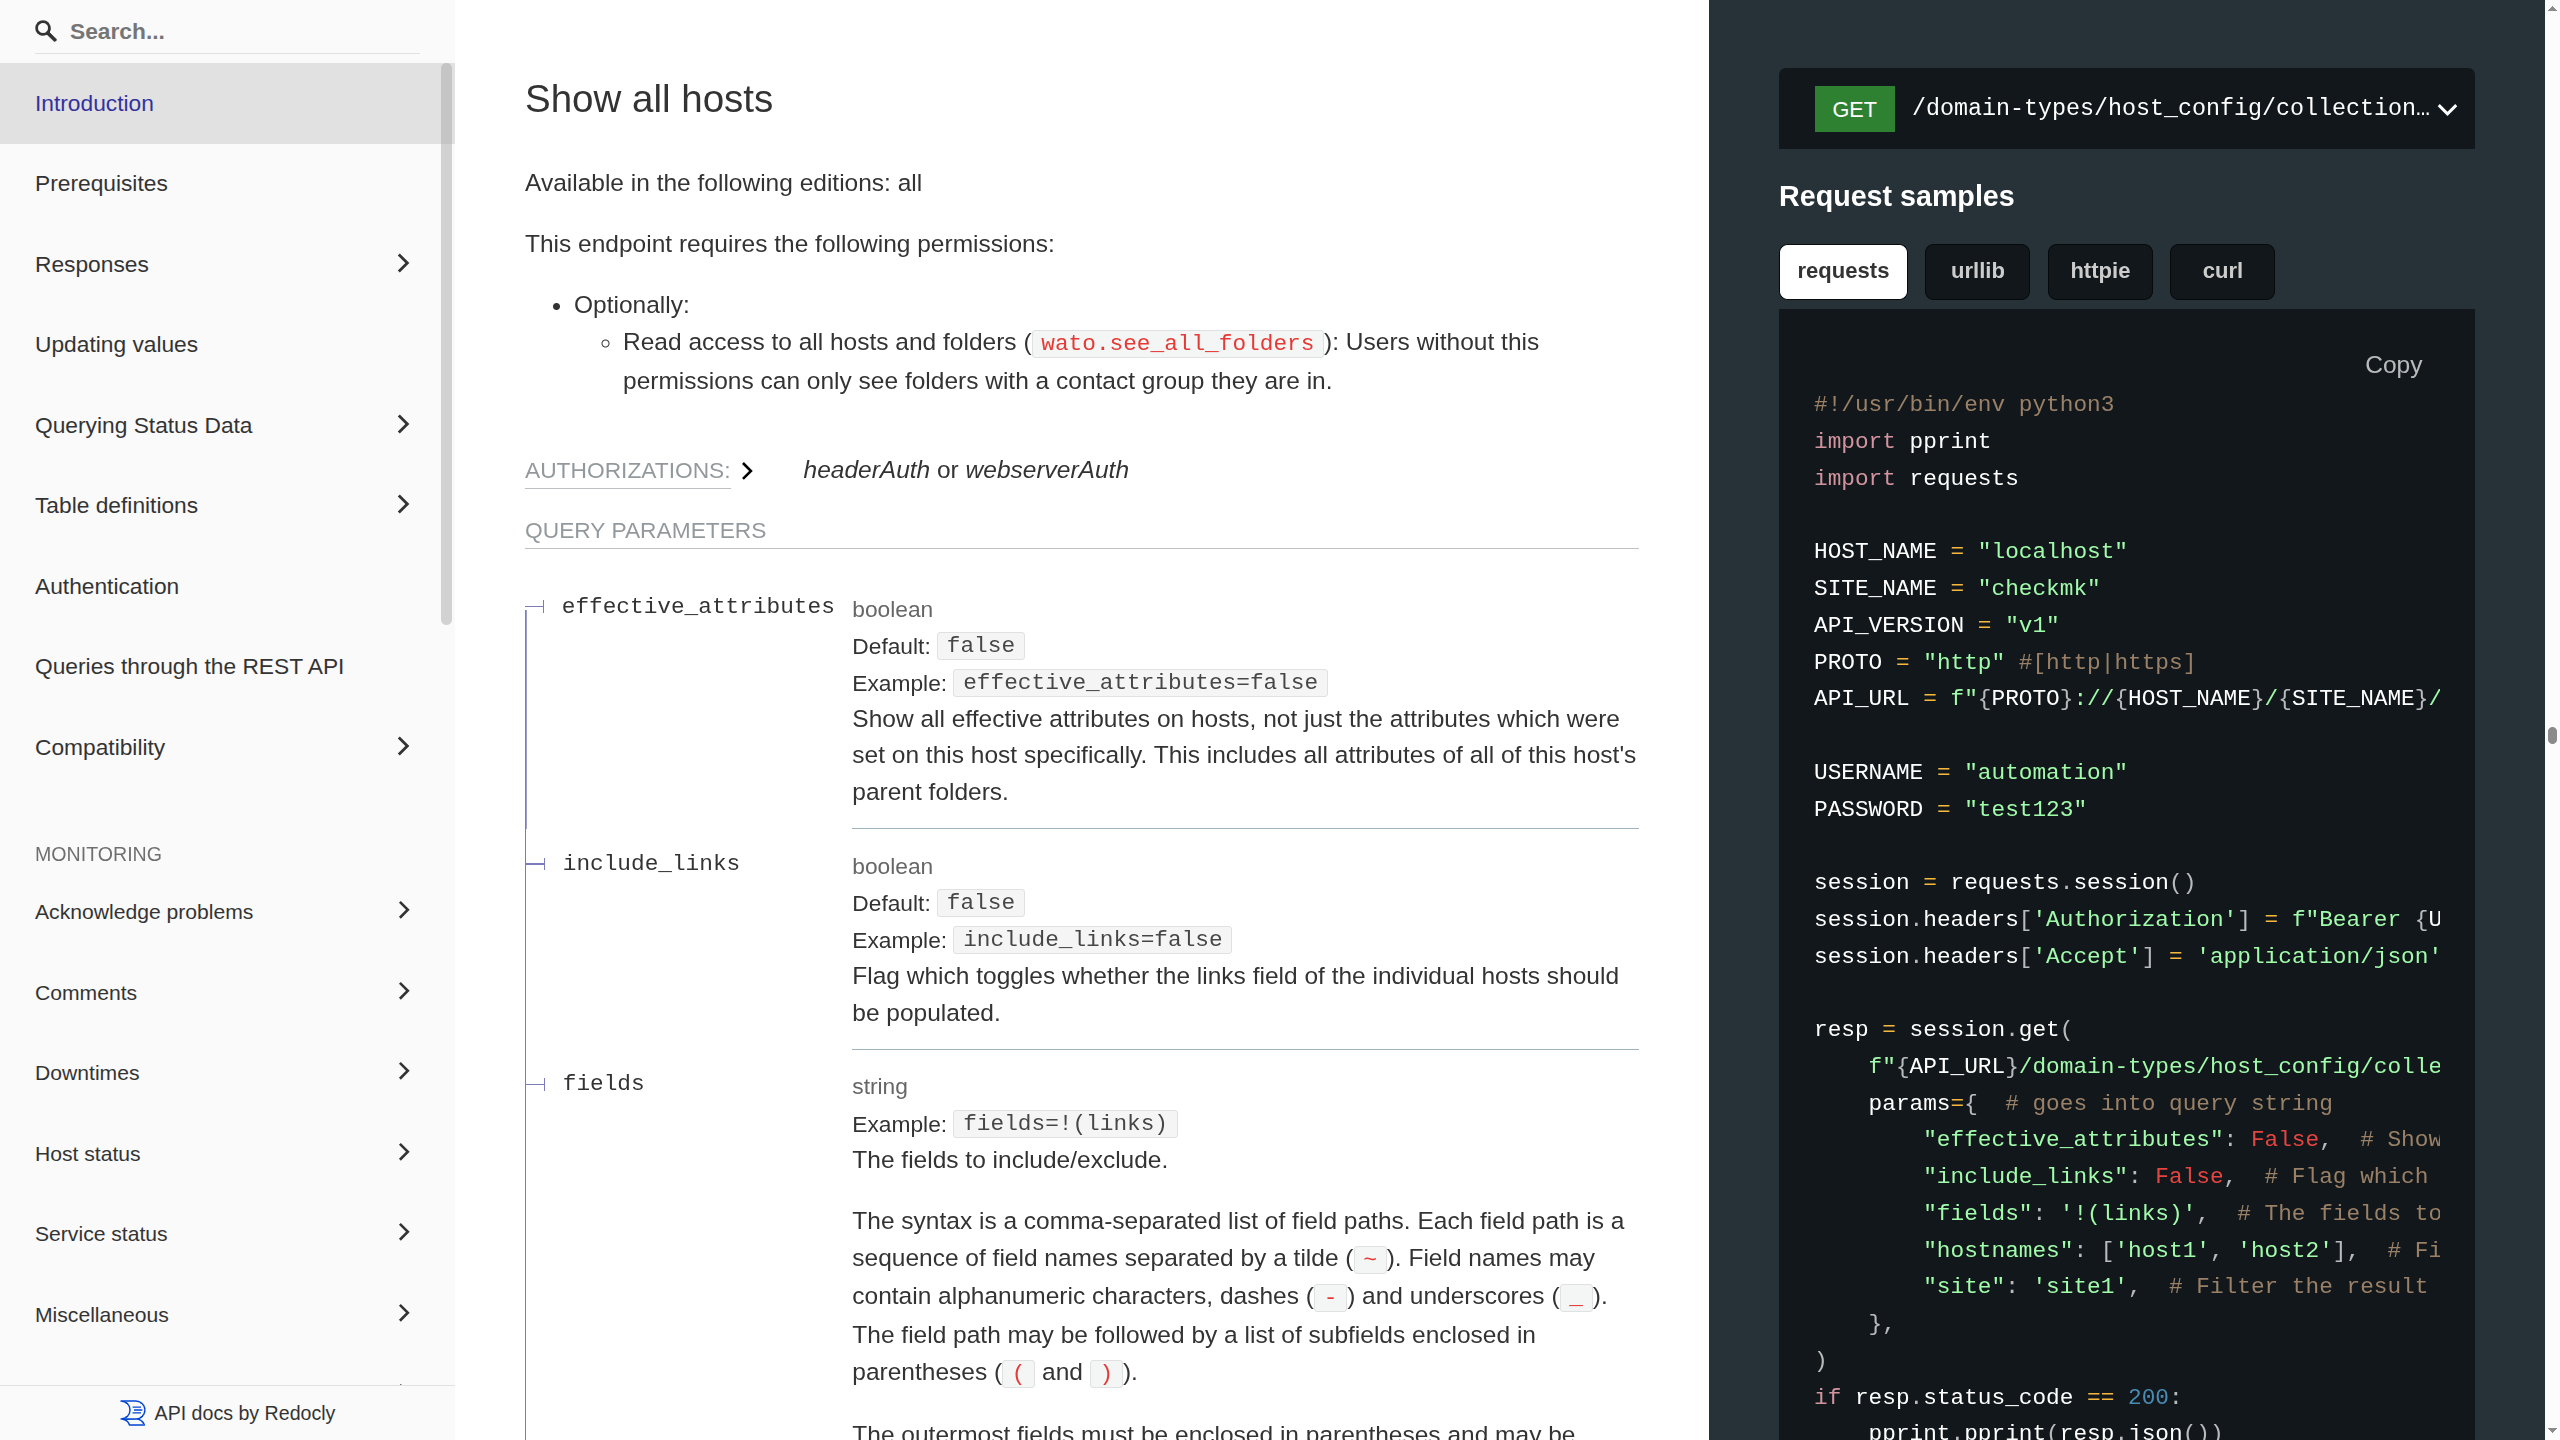
Open the API documentation and look for the entry on creating a host (Create a host) in the left navigation pane:
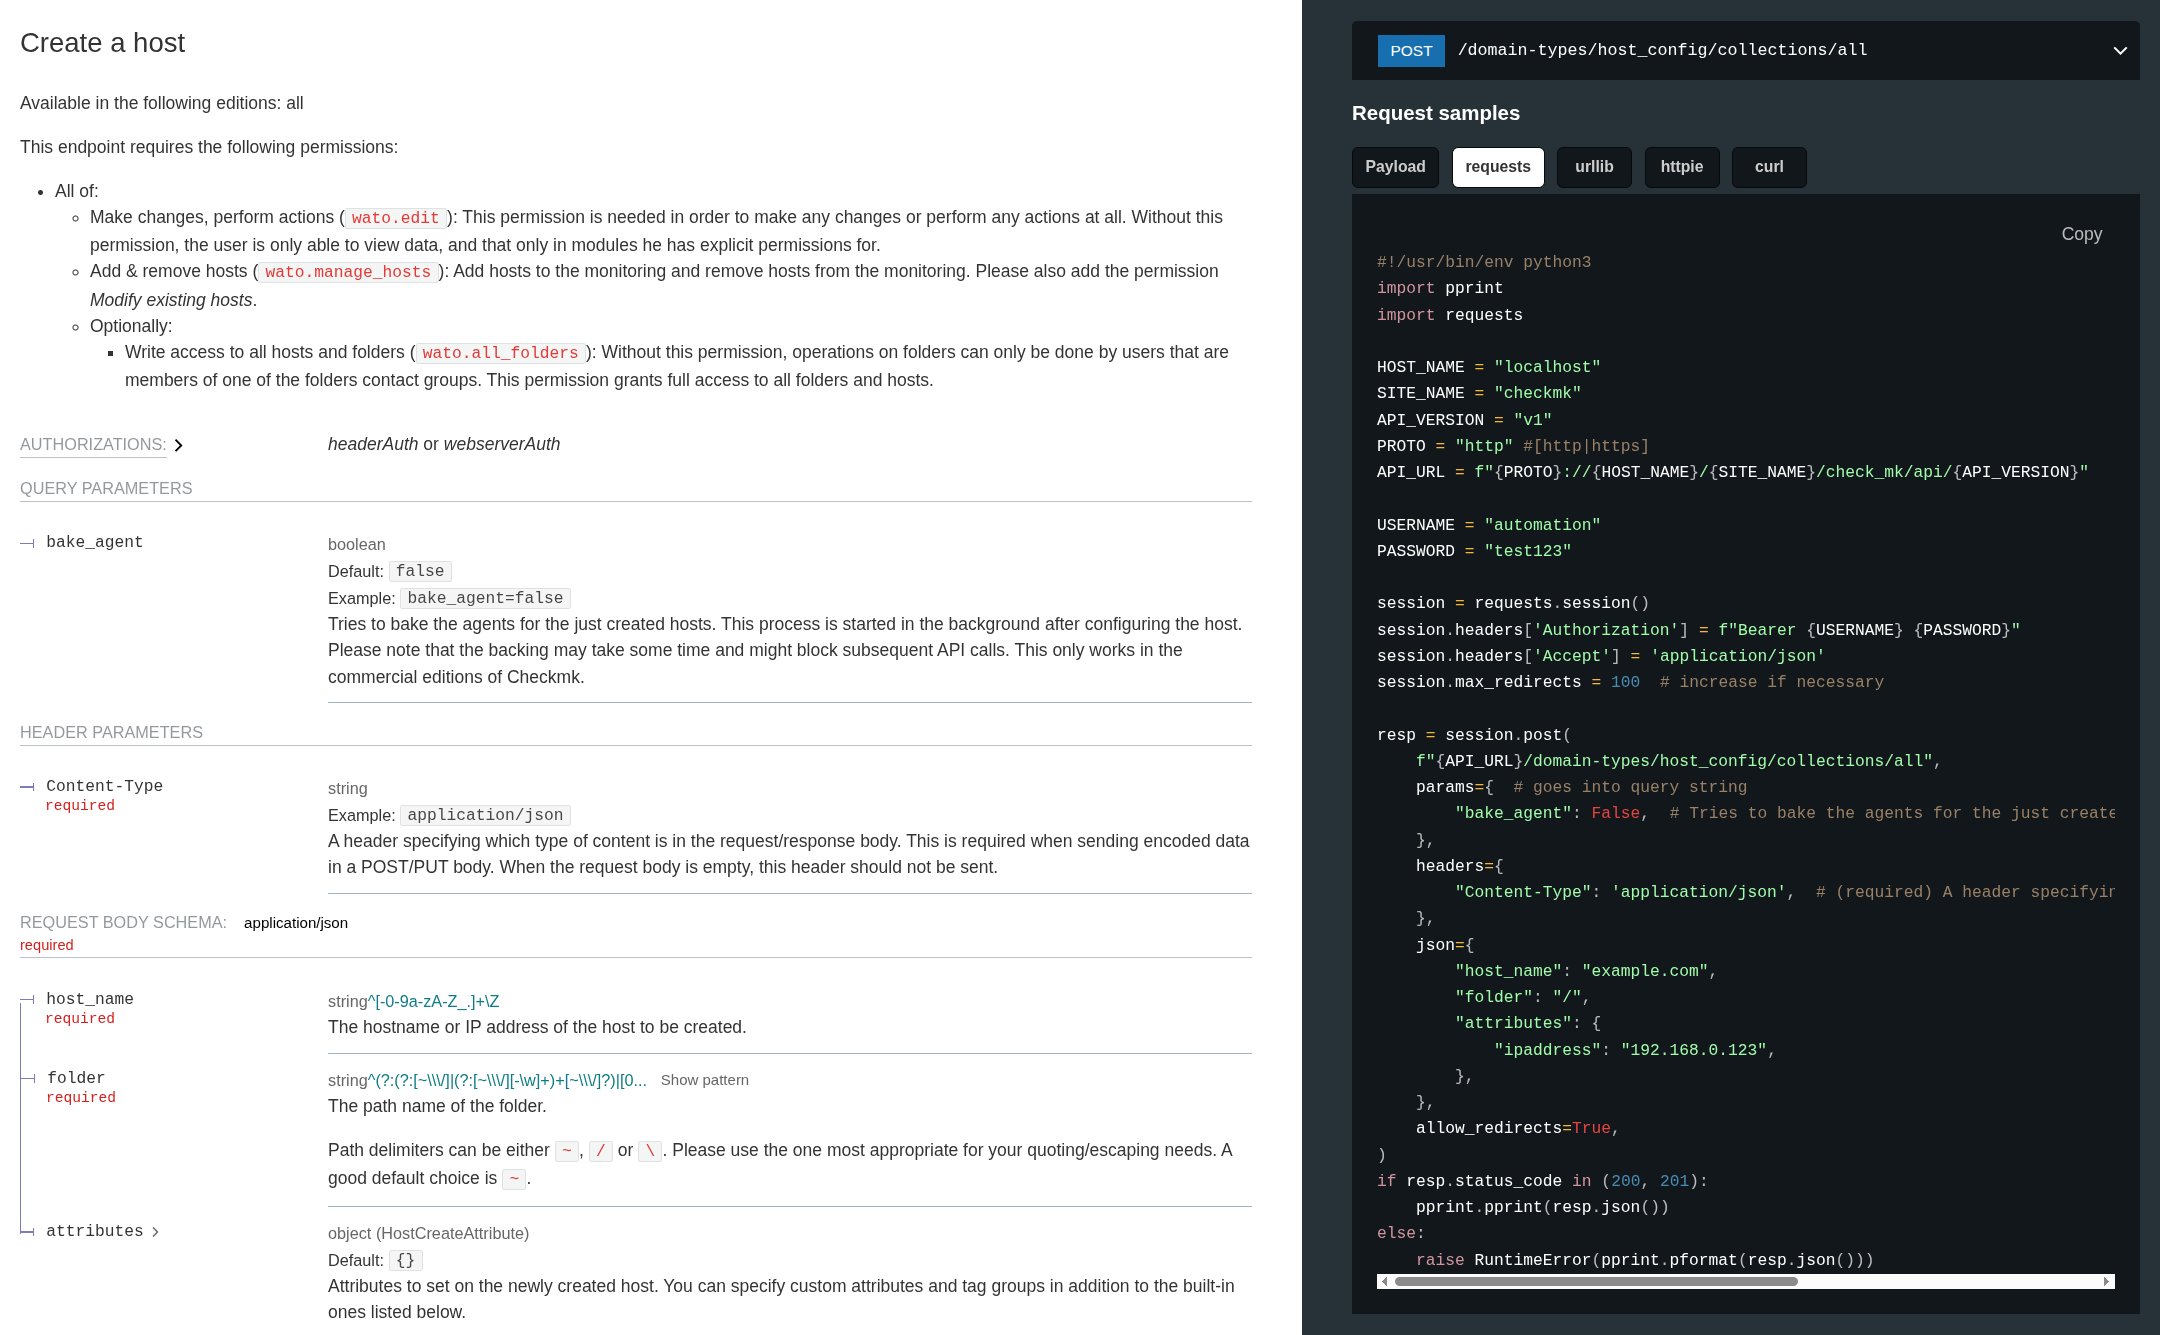
In the middle pane, you’ll see the details for the selected request: which HTTP authentication is required (this is the same for all requests via the REST API) and the required and optional parameters. Required are the host name and the folder in which it should be created. By default, the host is created in the Main folder. If you want to create the host in a different folder, you may first need to use another API request (Show all folders) to display the existing folders in order to find the ID of the desired one.
In the right-hand pane, you will see the path for the API request for the currently visible endpoint, as well as a series of sample requests and sample responses. For the scripts you prepared above, you can copy the appropriate sample request to the clipboard by clicking Copy.
- Python with requests
In the API documentation, click the requests button in the right-hand example pane, and then click Copy to copy the requests example code to the clipboard. Open the prepared script
create_host.pyand paste the contents of the clipboard:In the first part of the sample code, you will find the environment variables and the configuration for HTTP authentication.
Below that is the
postrequest to the resource located at the specified path, in this case the REST API endpoint/domain-types/host_config/collections/all. The arguments for thepostcall include the parameters for the request; in this case, these include the name of the new host to be created, the folder in which it should be created, and its IP address.If the request was successful (HTTP status code 200 or 201), the
postcommand is followed by a simple output of the API’s response to the request. Otherwise, an exception is generated, whose description contains the API’s response.- Bash with curl
In the API documentation, click the curl button in the right-hand example area and then click Copy to copy the curl example code to the clipboard. Open the prepared script
create_host.shand paste the contents of the clipboard:The first part of the sample code contains the environment variables.
Below that is the
curlcommand using the POST method to access the resource whose URL is listed on the last line. After the header lines (one of which defines HTTP authentication) comes the data section, where the parameters for the new host are specified.The API’s response to the request is output as a JSON object. The
--write-outoption also provides a final line containing the HTTP status code.
In this example, the host myhost123 with the IP address 192.168.0.42 is to be created in the main folder.
Note that the sample code from the API documentation may contain more parameters than you might need in a specific case.
However, this is not the case for the current example, and you only need to change the two existing parameters host_name and ipaddress.
Also insert the correct values for the environment variables to properly access your specific Checkmk site.
Your customized script should look something like this:
- Python with requests
- Bash with curl
Run this script:
- Python with requests
The Python script returns a dictionary that you can process directly.
- Bash with curl
The return value of the Bash script is a JSON object that you can process directly. For better readability, a formatted version of this originally single-line object is shown here.
Additionally, the HTTP status code returned by the API is displayed here at the end—in this case, the value
200, which stands forOKand indicates that the action was performed successfully.
The extensions field shows certain properties of the newly created host, such as the IP address you assigned, the folder in which the host was created, and relevant timestamps.
The id and title fields contain the ID and the host name.
The links field contains a selection (truncated in the example above) of requests that can be applied to the host you just created — as is typical for a REST API.
Performing a service discovery on the host
Once the host myhost123 has been created, its associated services can be identified.
To ensure that a service discovery actually returns the expected services, you must first install and register the appropriate agents on Linux and Windows hosts.
To perform a service discovery via the REST API, select the corresponding entry in the API documentation (Execute a service discovery on a host), copy the sample code into the script file created for this purpose, and adapt it.
You can copy the first part containing the environment variables directly from the previous example.
In the copied code for service discovery, also change the host name to myhost123 and, if desired, use the mode parameter to specify the type of service discovery.
- Python with requests
- Bash with curl
Run this script as well:
- Python with requests
If the requested service discovery can be performed using the specified values, the discovery process will be initiated as a background task. You will be redirected to another API endpoint, which in turn will return the HTTP status code
204in case of success. This HTTP status code indicates that the operation was performed successfully and that no response containing data was expected or returned from the API.- Bash with curl
In this case, the HTTP status code
303indicates that the background job for a service discovery has been initiated.
Show pending changes
Before committing the changes, one more step is required: displaying the pending changes using a Show all pending changes request. In addition to the changes that have accumulated, the REST API provides the HTTP ETag (entity tag) that you will need to activate these changes. Modifying an object via the REST API does not use the object’s ID or title. Instead, the generated ETag is used to prevent multiple concurrent requests from overwriting values of the same object.
The ETag is returned in the response header. Therefore, adapt the sample code from the API documentation so that the header is included in its entirety:
- Python with requests
Here as well you will need to modify a few lines to specify your Checkmk server, your site, and the correct credentials. Also, add two lines with
print/pprintcommands to output a Python dictionary containing all header information and the HTTP status code.- Bash with curl
Here, too, you’ll need to modify a few lines to specify your Checkmk server, your site, and the correct credentials. Add the
-ioption (for include response headers) in thecurlcall in order to display all header information.
After the script has been executed, the header lines will be displayed at the beginning of the output. The sample outputs shown here have again been abbreviated for clarity. Highlighted are the ETag in the header, the attributes of the two pending changes (create host and perform service detection), and the HTTP status code.
- Python with requests
- Bash with curl
You will need the ETag in the next and final step.
Activating the changes
To finish, the changes must be activated. The appropriate request is Activate pending changes.
Copy the code from the API documentation, change the If-Match header line and insert the ETag you retrieved in the previous section.
In the data section, enter the name of your site for the sites parameter—the one where the changes are to be activated.
- Python with requests
- Bash with curl
Run this script:
- Python with requests
- Bash with curl
The text in the title indicates that the activation has started.
Under links, the REST API once again suggests two useful follow-up requests:
to check the status of this activation and to wait for it to complete.
Finally, take a look at your Checkmk site’s web interface. If all scripts have run without errors, you should see the following there:
The host named
myhost123with the IP address192.168.0.42exists in the top-level folder of the setup.A number of services have been identified for this host. Which ones these are depends on the type of object behind the IP address used.
All prepared changes have been activated, or the activation is still in progress. Once the activation is complete, you will see the host and its associated services in the monitoring.
4.5. Making Requests Using the REST API’s Interactive GUI
In addition to the detailed REST API documentation discussed above, another resource is generated from the API specification: the REST API’s interactive GUI, which allows direct API access to the Checkmk site from within the browser. The interactive GUI is generated using Swagger and is linked in your Checkmk site’s Help menu.
The interactive GUI is tailored specifically to your Checkmk site — and therefore can only be used within your particular environment.
In the interactive GUI, you can select individual requests to specific API endpoints in your Checkmk site and submit these with parameter values of your choice. The GUI turns your inputs into Curl requests that are sent to your site. You then receive the REST API’s response to this request, clearly formatted, directly in the interactive GUI.
Since certain endpoints cannot be addressed in isolation without context, the interactive GUI covers only a subset of the API’s functionality.
You can open the interactive GUI from the Checkmk GUI via the navigation bar in the Help > Developer resources > REST API > Version 1 > Interactive GUI menu. The interactive GUI will be displayed in a new browser window (or browser tab):
Below, we outline how you can execute the first request from the example above (create a host) using the REST API’s interactive GUI instead of a script:
Authenticate: After clicking the Authorize button (on the right side above the entry for the first endpoint folder), the interactive GUI displays a dialog box for entering authentication information. However, if you are logged in as a user in the Checkmk web interface, you do not need to enter anything in the GUI, since as a Checkmk user you are already authorized to use the REST API via Cookie Authentication, meaning you will then have access to all API functions for which your user account has the necessary permissions.
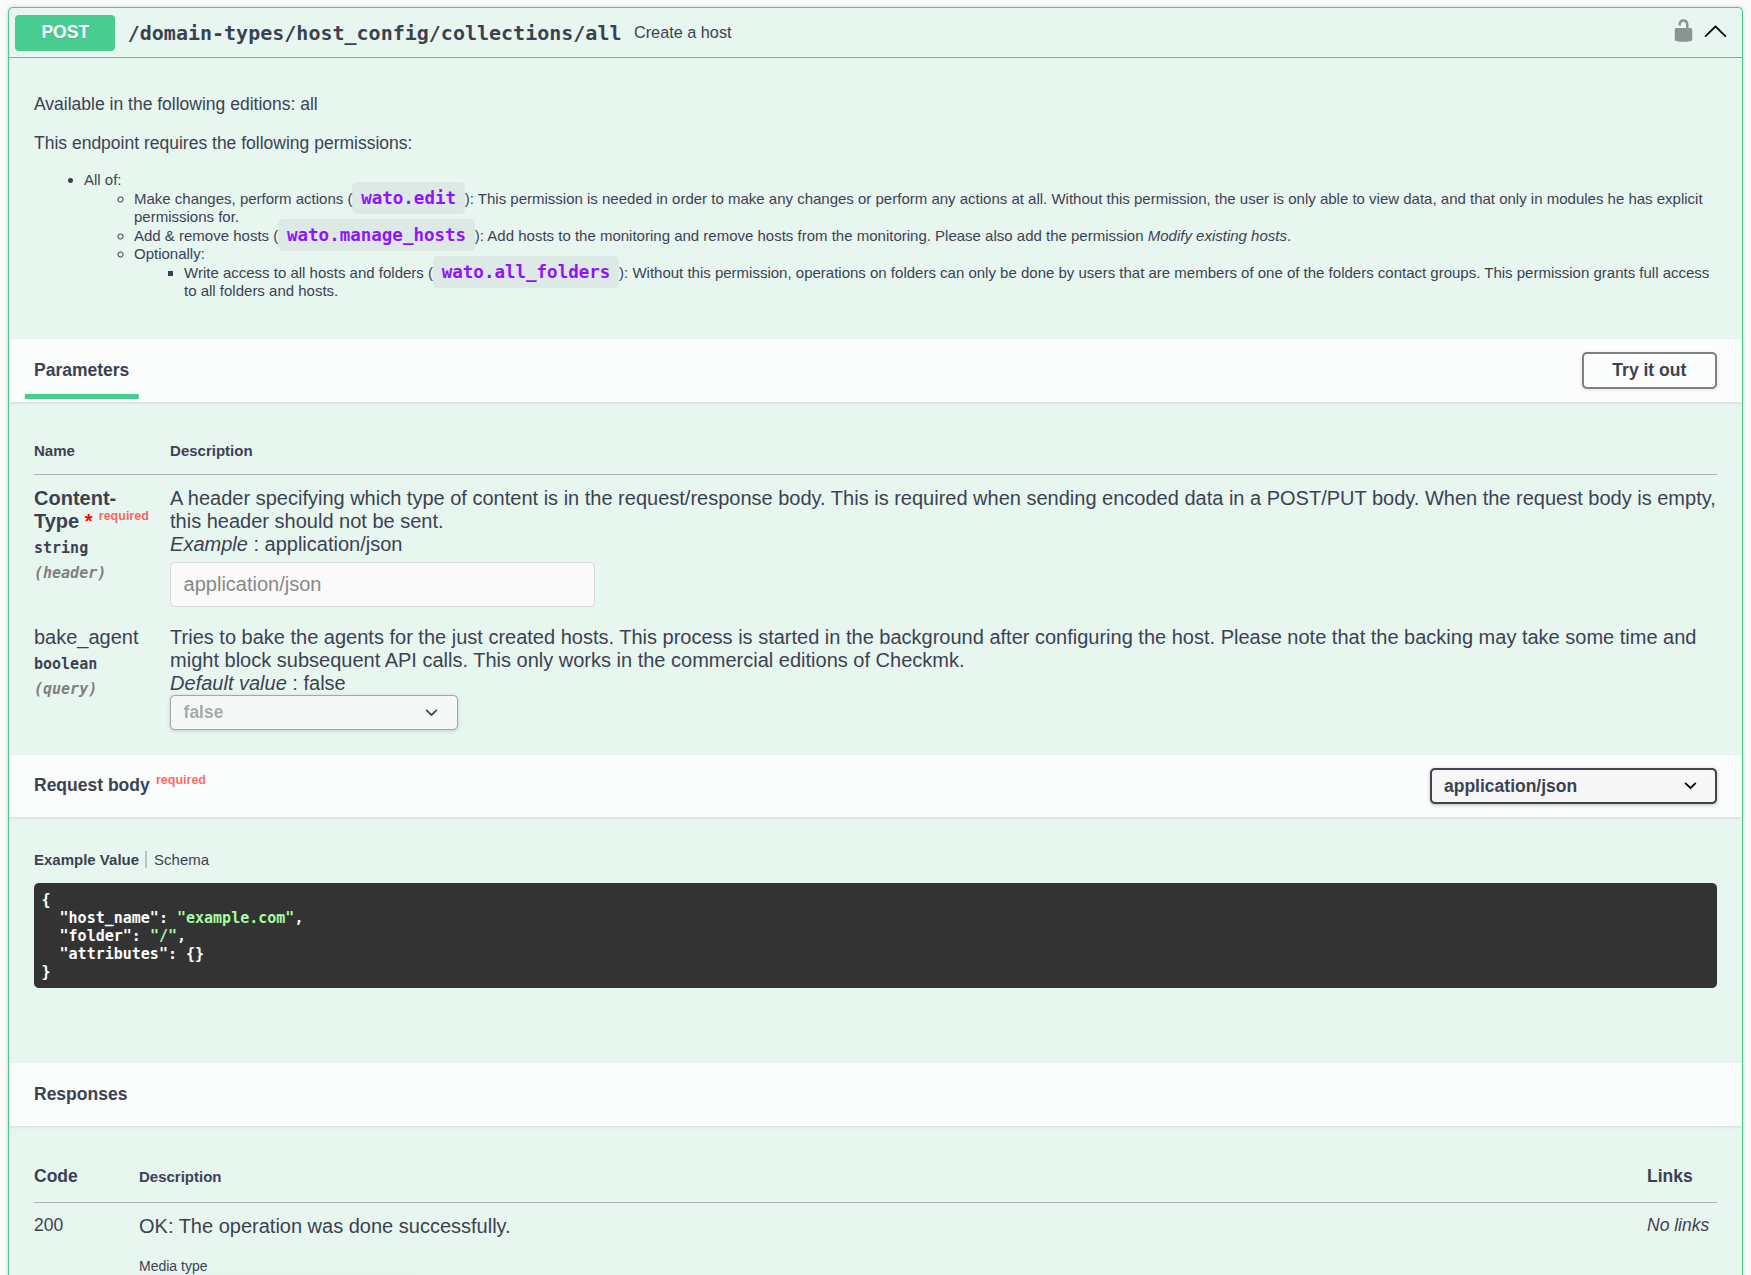
Select an endpoint: In the Hosts folder, select the Create a host endpoint and click Try it out.
Enter parameter values: In the Request body, overwrite the example value for
host_name. In theattributes: {}field, you can enter the desired IP address:"ipaddress": "192.168.0.42".Send request: Click Execute.
Check the response: Under Responses, you will first see the Curl command that was sent, along with the endpoint URL. Below this, the response is displayed under Server response, including the HTTP status code, and the (multi-line formatted) REST API response is shown under Details.
The REST API’s interactive GUI thus allows you to quickly and easily try out the API’s functions and familiarize yourself with the details of the input values and the specific responses.
4.6. API Responses in Case of Issues
For successful API requests, the API returns the appropriate HTTP status code along with a JSON object describing the results of the request.
Access to these values may vary across different frameworks.
For example, in the examples shown above, when using requests, you access the HTTP status code via resp.status_code and the JSON object returned by the REST API via resp.json().
The HTTP status code 204 represents a special case, indicating that a request was successful but, as expected, did not result in a response.
Logically, resp.json() cannot contain a value in this case either.
For failed requests, too, it’s worth taking a look at the JSON object returned by the API. Here you can find helpful information that will help you to identify the underlying problem(s):
{
  "detail": "There are changes from other users and foreign changes are not allowed in this API call.",
  "status": 401,
  "title": "The operation has failed."
}
Depending on the error, the parameters displayed in the output may vary.
However, as with successful requests, you will always receive the HTTP status code in status and a brief description of the API response in title.
In most cases, detail — as the name suggests — displays detailed information.
In the example above, you learn that while there are pending changes in Checkmk, these cannot be activated with the API request that was made.
By default, the API can only activate changes that were performed via the API and originate from the same user who is performing the activation via the API.
You can override this behavior by explicitly setting the force_foreign_changes field to True.
In the next example as well, helpful details are found in the detailed information:
{
  "detail": "These fields have problems: host_name",
  "fields": {
    "host_name": [
      "'my/host' does not match pattern '^[-0-9a-zA-Z_.]+\\\\Z'."
    ]
  },
  "status": 400,
  "title": "Bad Request"
}
The problem in this case is that a parameter value does not fall within the valid range (due to a slash / in the host name).
This article does not aim to provide an exhaustive list of all possible errors that could arise with API requests. However, as you can see from the examples shown, the REST API usually provides enough information about the cause of a problem in its response, giving you a starting point for analysis and troubleshooting.
5. Using the unstable version of the API
In the course of Checkmk’s development cycle, it occasionally occurs that fixes for existing features are backported to patch releases for older major versions of Checkmk that are still within their support period. In such cases, however, the corresponding changes will not be made available in those older versions of the REST API.
To enable you to have access to such backports, starting with version 2.5.0, Checkmk provides the REST API not only in all currently supported versions (e.g., v1) but also in an additional, unsupported version called unstable.
This way, with patch updates, you gain access to specific changes to the REST API that are not included in the supported REST API versions of your Checkmk version.
The unstable version of the REST API may also include new, experimental features.
In such cases, consider the unstable version to be a testing ground for features that will be fully supported in an upcoming release.
As the name suggests, the functionality of the REST API in the |
The scope and exact content of the unstable version can vary between major versions of Checkmk.
To find out which endpoints you can use for a specific Checkmk site via the unstable version of the REST API, it’s worth taking another look at the menu under Help > Developer resources > REST API:
unstable version.Here you can navigate to Unstable > Documentation and use the documentation as usual.
The interactive GUI of the REST API is not available for the unstable version of the REST API.
In the documentation for the unstable version, you will find several endpoints whose behavior differs from the currently supported major version of the REST API.
These endpoints can be distinguished as follows:
In the code samples provided for the endpoint, the value for
API_VERSIONis given explicitly asunstable. For endpoints whose behavior is identical to their counterpart in the supported major version, the version is specified asv1.The description of the endpoint starts with the note NEW: This endpoint is new in this API version. or CHANGED: This endpoint has been modified in this API version.
6. Securing the API
Since sensitive data is transmitted when accessing the REST API and — depending on the automation user’s permissions — extensive changes can be made to Checkmk, you should secure access accordingly. Here are some of the options:
Checkmk via HTTPS: Use the API exclusively via Hypertext Transfer Protocol Secure (HTTPS), as otherwise the username, password, and configuration data will be transmitted in cleartext over the network.
Assign a sufficiently long password to the automation user. Since the password is typically stored only in a script, you can easily assign a very long and complex one.
Pay attention to the permission settings for the scripts you use to send requests to the API. The scripts may contain sensitive data, such as configuration data, passwords, etc. Therefore, ensure that only authorized users and groups can read these scripts.