1. Basics
Over time you will put quite a bit of work into the exact configuration of your hosts and services, limits, notifications and so on — so you should make backups. This is not only useful in the event of something going wrong, but also for testing purposes or for use in alternative configurations. You can back up a complete configuration and restore it if necessary. Backups can be scheduled, encrypted and compressed.
Note: Checkmk alternatively offers the possibility to perform the basic backup and restore functions via command line with omd backup and omd restore.
This is explained in the article Site administration with omd.
To get started with creating backups in the Checkmk GUI, use Setup > Maintenance > Backups.
2. Prerequisites
In order to create backups on the source system and later 'restore' them on a target system, two main requirements must be met:
The exact same Checkmk version must be installed on both systems, e.g.
2.1.0p1.Both systems must have the same Checkmk edition installed, e.g. the
 Checkmk Raw Edition.
Note: The system platform is not relevant, so you can, for example, backup with Ubuntu as the source system and restore with Red Hat or an appliance as the target system.
3. Configuring encrypted backups
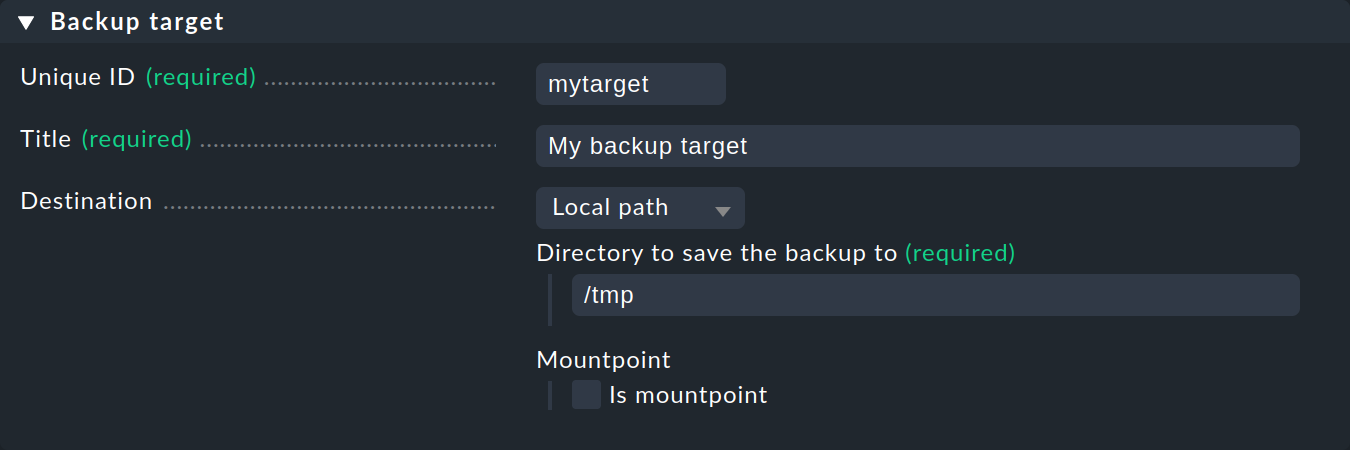
In the first step, switch to the list of backup targets on the Site backup page, and there with the ![]() Backup targets action button create a new target with Add target:
Backup targets action button create a new target with Add target:

The absolute file path specification under Destination refers to the system, not the site.
Once you have saved the backup target, go back to the Site backup page. Open the list of backup keys with Backup encryption keys and create a new key for your backups with Add key and specify a meaningful name and a secure password (passphrase):

After creating the key you will see a message informing you that you have not yet downloaded the keys:

You can download the key in PEM format using the Download this key button. By the way, you also have to enter the passphrase of the key when downloading. Since you need these keys to restore backups, the message will remain until all keys have been saved.

Note: If a backup key should ever no longer be available, you can upload the backed-up key again. You must also enter the passphrase before uploading.
4. Creating a backup job
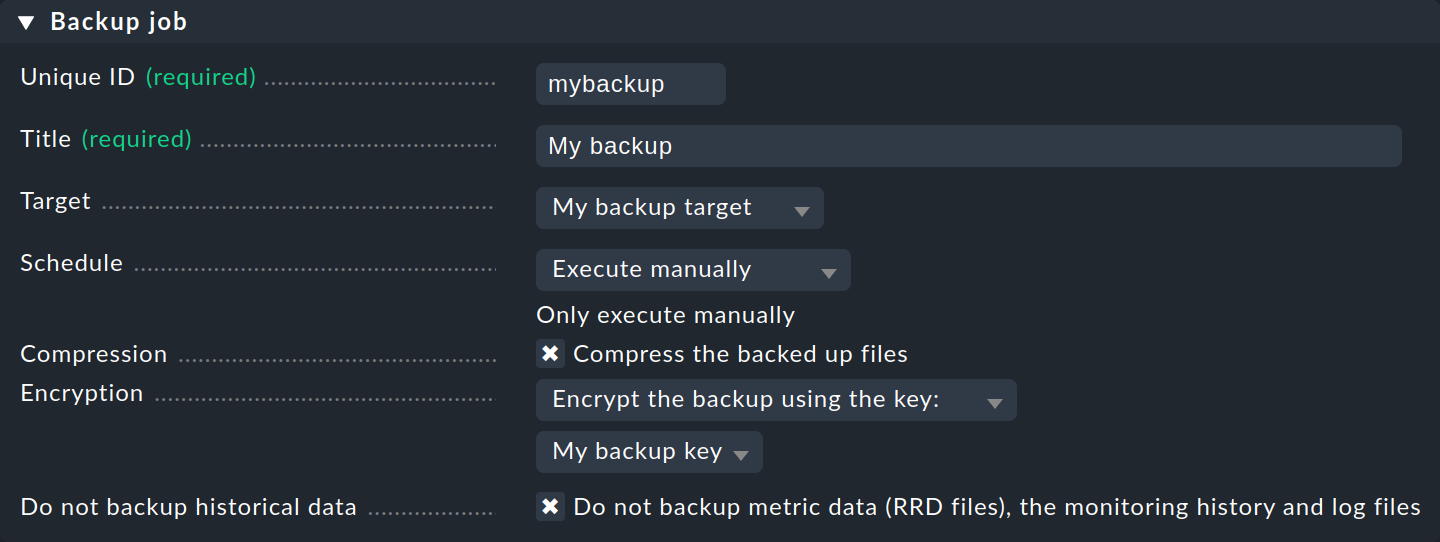
Now you can create a new backup job — again on the Site backup page, this time using the Add job button:

Here you can select, among other things, the items you just created under Target and Encryption. You will also find options for compression and scheduling backups. As you will soon see, you can also trigger backups manually. With Do not backup historical data you can save metrics (RRD files), monitoring history and log files, which results in significantly smaller backup archives.
5. Creating a backup
On the Site backup page you should now see your finished backup job and can start this using ![]() :
:

You can stop running backups with ![]() :
:

Finally, you will see a confirmation that the backup has completed:

For both running and completed jobs, ![]() takes you to the details for the job.
takes you to the details for the job.
6. Restore
You can start restoring backups on the Site backup page by clicking on Restore. The procedure is largely self-explanatory:
Select the backup target with
 .
.Select the desired backup to be restored with
 .
.Enter the passphrase for the backup key.
Start the restore.
After restoring, the site will be restarted, so you will temporarily see an HTTP 503 error message:

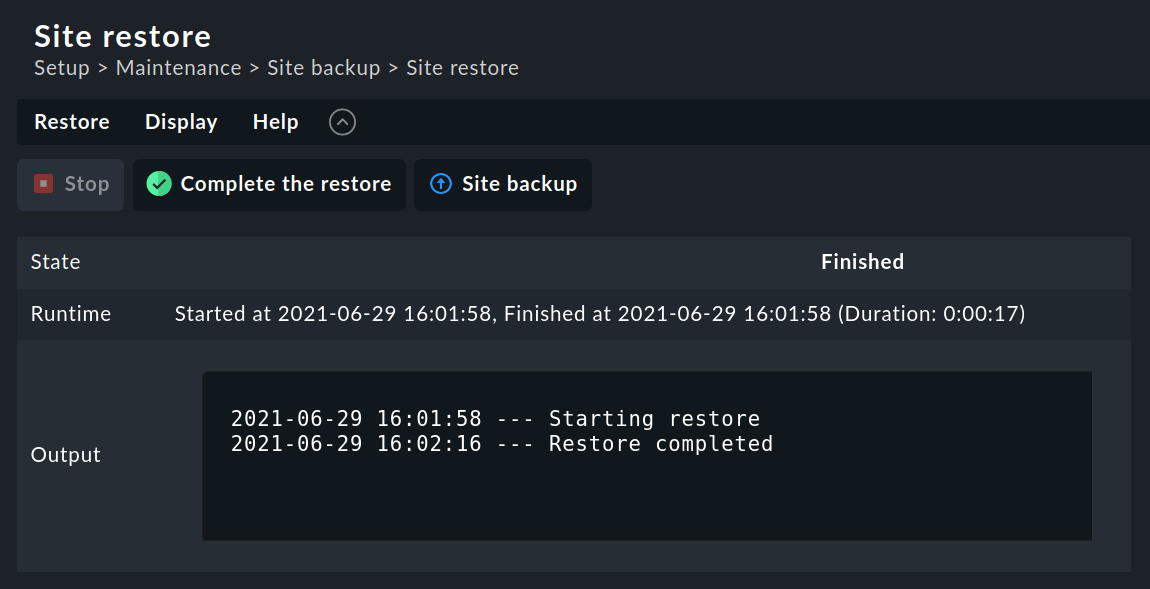
As soon as the site is available again, you will get the details on the result:

Finally, confirm the restore by clicking Complete the restore.
