1. Einleitung
In diesem Artikel erfahren Sie, wie Sie eine Anmeldung via Secure Assertion Markup Language (SAML) einrichten. Die Implementierung in Checkmk läuft auf Apache-Level über mod_auth_mellon, das im SAML-Design die Rolle des Service Providers (SP) übernimmt.
Diese Anleitung zeigt ausführlich den Weg mit Active Directory Federation Services (AD FS) als Identity Provider (IDP). In weiteren Abschnitten bekommen Sie Hinweise zur Konfiguration weiterer IDPs, etwa Azure AD und Micro Focus NetIQ Access Manager.
Hinweis: Dieses Feature wird von den SUSE Linux Enterprise Server (SLES) Versionen 12 SP3, 12 SP4 und 15 aufgrund fehlender Abhängigkeiten nicht unterstützt (ab SLES 15 SP1 ist die Anbindung möglich).
Achtung: Die ganze Thematik Transportverschlüsselung (TLS/SSL) wird in den Beispielen nur in einer simplen, beispielhaften Umsetzung aufgenommen. In Produktivumgebungen mit eigener CA und sorgfältiger Zertifikatsbehandlung werden sich entsprechende Abweichungen ergeben, die von Ihrer eigenen Infrastruktur abhängen.
2. Anmeldung mit Active Directory Federation Services
2.1. Voraussetzungen
Die Anmeldung an Checkmk mittels Active Directory ist im Grunde relativ simpel: AD Federation Service (FS) dient als Identity Provider (IDP), das Apache-Modul mod_auth_mellon sorgt als Service Provider via Security Assertion Markup Language (SAML) für die Authentifizierung. Voraussetzungen für diese Anleitung sind entsprechend:
Funktionierende LDAP-AD-Integration
Funktionierendes AD FS als IDP
Checkmk-Server mit SSL
Ein unterstütztes Betriebssystem. SLES15 SP4 wird derzeit nicht unterstützt!
Die Einrichtung erfolgt in drei Schritten:
Konfiguration von Apache (ein Ergebnis: XML-Datei mit Metadaten)
Konfiguration von AD FS: Relying Party Trust mit Mellon-Metadaten einrichten
Aktivierung des Logins in Checkmk selbst
2.2. Apache konfigurieren
Unter Umständen müssen noch zusätzliche Abhängigkeiten installiert werden, unter Debian/Ubuntu z.B.:
root@linux# apt-get update
root@linux# apt-get install wget libxmlsec1-openssl
Hinweis: In der Checkmk-Appliance ist libxmlsec1-openssl bereits installiert.
Es geht hier natürlich um die Konfiguration des Instanz-eigenen Apache-Servers, loggen Sie sich also zunächst dort ein:
root@linux# omd su mysiteErstellen Sie nun ein Verzeichnis für mod_auth_mellon und wechseln Sie in das Verzeichnis:
OMD[mysite]:~$ mkdir etc/apache/mellon
OMD[mysite]:~$ cd etc/apache/mellon
Machen Sie nun mellon_create_metadata ausführbar und starten Sie es unter Angabe Ihres Servers sowie Ihrer Instanz mit dem Zusatz mellon:
OMD[mysite]:~/etc/apache/mellon$ chmod +x ~/bin/mellon_create_metadata
OMD[mysite]:~/etc/apache/mellon$ mellon_create_metadata https://myserver "https://myserver/mysite/mellon"
Das Modul erzeugt dabei drei Dateien: Zertifikat (.cert), Schlüssel (.key) und statische Metadaten (.xml).
Die XML-Datei wird nicht benötigt und kann gelöscht werden:
OMD[mysite]:~/etc/apache/mellon$ rm *.xmlBenennen Sie und Schlüssel- und Zertifikatsdateien der Einfachheit halber um:
OMD[mysite]:~/etc/apache/mellon$ mv .key mellon.key
OMD[mysite]:~/etc/apache/mellon$ mv .cert mellon.cert
Nun besorgen Sie die benötigten Metadaten direkt von Ihrem AD-FS-Server (hier myadfs) und speichern sie als idp-metadata.xml:
OMD[mysite]:~/etc/apache/mellon$ wget --no-check-certificate -O ./idp-metadata.xml https://myadfs/FederationMetadata/2007-06/FederationMetadata.xmlNun benötigen Sie das öffentliche Zertifikat des AD-FS-Servers, das in der Datei idp-public-key.pem gespeichert wird:
OMD[mysite]:~/etc/apache/mellon$ echo -n | openssl s_client -connect myadfs:443 | sed -ne '/-BEGIN CERTIFICATE-/,/-END CERTIFICATE-/p' | openssl x509 -pubkey -noout > idp-public-key.pemNur für den Fall, dass Sie sich über das echo -n wundern: Darüber wird die folgende SSL-Session terminiert.
Hinweis: Das Zertifikat sollte oder muss gar in den Trust Store hochgeladen werden, für den Fall, dass zum Beispiel der IDP-Service die Zertifikatskette prüft. Weiter Informationen zum Thema finden Sie im HTTPS-Artikel.
Als letzten Schritt ersetzen Sie die Authentifizierungskonfigurationsdatei ~/etc/apache/conf.d/auth.conf mit der folgenden Variante — natürlich unter Angabe Ihres Checkmk-Servers (hier myserver) und Ihrer Instanz (hier mysite):
# Set this to the Name of your Checkmk site, e.g.
#Define SITE
Define SITE mysite

# ServerName from listen-ports.conf needs to be overwritten here
# and being set to the URL of the real server. auth_mellon uses this
# to generate the needed URLs in the metadata
ServerName https://myserver

# Load the module.
<IfModule !mod_auth_mellon.c>

	LoadModule auth_mellon_module /omd/sites/${SITE}/lib/apache/modules/mod_auth_mellon.so

</IfModule>

# Only enable this for debugging purposes
#MellonDiagnosticsFile /opt/omd/sites/${SITE}/tmp/mellon_diagnostics.txt
#MellonDiagnosticsEnable On

<Location /${SITE}>

	# Use SAML auth only in case there is no Checkmk authentication
	# cookie provided by the user and whitelist also some other required URLs
	<If "! %{HTTP_COOKIE} =~ /^(.*;)?auth_${SITE}/ && \
		! %{REQUEST_URI} = '/${SITE}/check_mk/register_agent.py' && \
		! %{REQUEST_URI} = '/${SITE}/check_mk/deploy_agent.py' && \
		! %{REQUEST_URI} = '/${SITE}/check_mk/run_cron.py' && \
		! %{REQUEST_URI} = '/${SITE}/check_mk/webapi.py' && \
		! %{REQUEST_URI} = '/${SITE}/check_mk/automation.py' && \
		! %{REQUEST_URI} -strmatch '/${SITE}/check_mk/api/*' && \
		! %{REQUEST_URI} = '/${SITE}check_mk/ajax_graph_images.py' && \
		! %{QUERY_STRING} =~ /(_secret=|auth_|register_agent)/ && \
		! %{REQUEST_URI} =~ m#^/${SITE}/(omd/|check_mk/((images|themes)/.*\.(png|svg)|login\.py|.*\.(css|js)))# ">

		MellonIdPMetadataFile /opt/omd/sites/${SITE}/etc/apache/mellon/idp-metadata.xml
		MellonIdPPublicKeyFile /opt/omd/sites/${SITE}/etc/apache/mellon/idp-public-key.pem
		MellonSPCertFile /opt/omd/sites/${SITE}/etc/apache/mellon/mellon.cert
		MellonSPPrivateKeyFile /opt/omd/sites/${SITE}/etc/apache/mellon/mellon.key
		MellonEndpointPath "/${SITE}/mellon"
		MellonDefaultLoginPath "/${SITE}/check_mk/"

		Order allow,deny
		Allow from all

		MellonSecureCookie On
		MellonCookieSameSite None

		AuthType Mellon
		AuthName "Checkmk SAML Login"
		MellonEnable auth
		Require valid-user

		# Get Username
		# ADFS sends username as DOMAIN\username pair.
		# Checkmk just wants the username.
		RewriteEngine on
		RequestHeader set X-Remote-User "expr=%{REMOTE_USER}"
		RequestHeader edit X-Remote-User "^.*\\\(.*)$" "$1"

		# When SAML auth fails, show the login page to the user. This should only happen,
		# if e.g. the mellon cookie is lost/rejected or if the IDP is misconfigured.
		# A failed login at the IDP will not return you here at all.

    ErrorDocument 401 '<html> \
      <head> \
        <meta http-equiv="refresh" content="1; URL=/${SITE}/check_mk/login.py"> \
      </head> \
      <body> \
        SAML authentication failed, redirecting to login page. \
        <a href="/${SITE}/check_mk/login.py">Click here</a>. \
      </body> \
    </html>'

	</If>

	# This header is also needed after authentication (outside of the If clause)
	RequestHeader set X-Remote-User "expr=%{REMOTE_USER}"
	RequestHeader edit X-Remote-User "^.*\\\(.*)$" "$1"

</Location>
Anschließend starten Sie Apache neu:
OMD[mysite]:~/etc/apache/mellon$ omd restart apacheZu guter Letzt laden Sie nun die dynamisch erstellten Mellon-Metadaten als XML-Datei herunter, um sie gleich im AD-Management importieren zu können:
OMD[mysite]:~/etc/apache/mellon$ wget https://myserver/mysite/mellon/metadata -o metadata.xml3. Active Directory konfigurieren
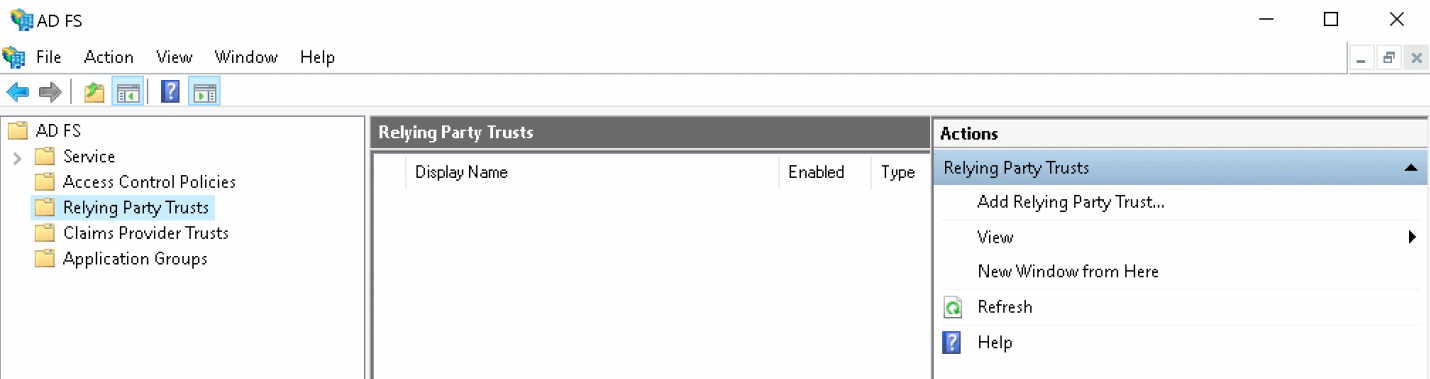
Um einen Relying Party Trust in AD FS anzulegen, gehen Sie wie folgt vor:
Starten Sie die AD-FS-Oberfläche:

Klicken Sie auf Add Relying Party Trust:
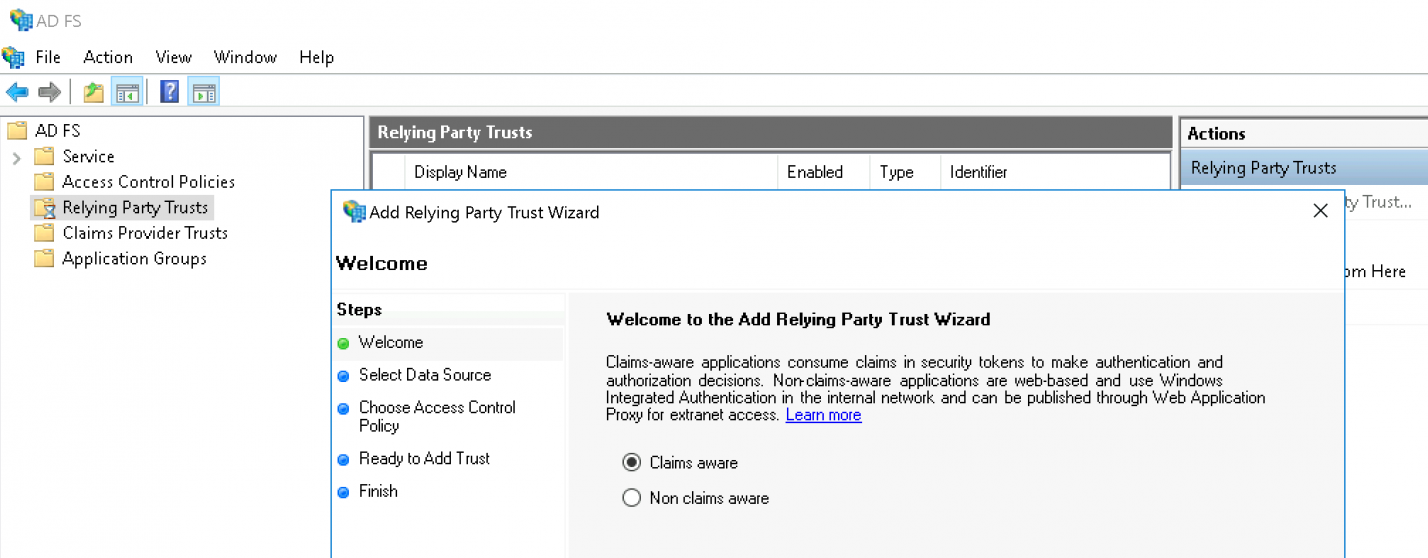
Belassen Sie die Option auf Claims aware und fahren Sie mit dem Start-Knopf fort:
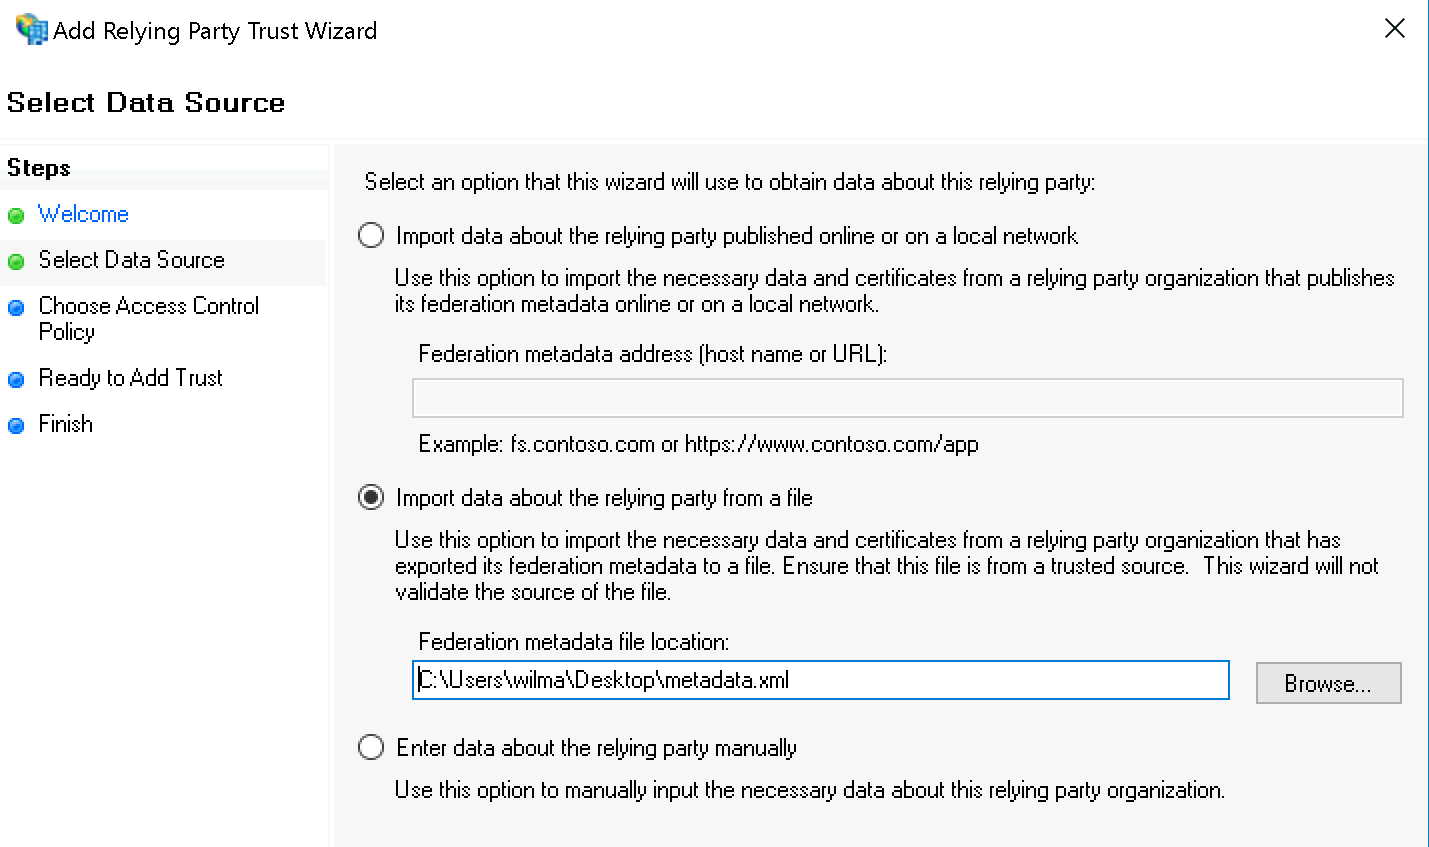
Wählen Sie nun Import data about the relying party from a file und geben Sie die eben heruntergeladene XML-Datei an:
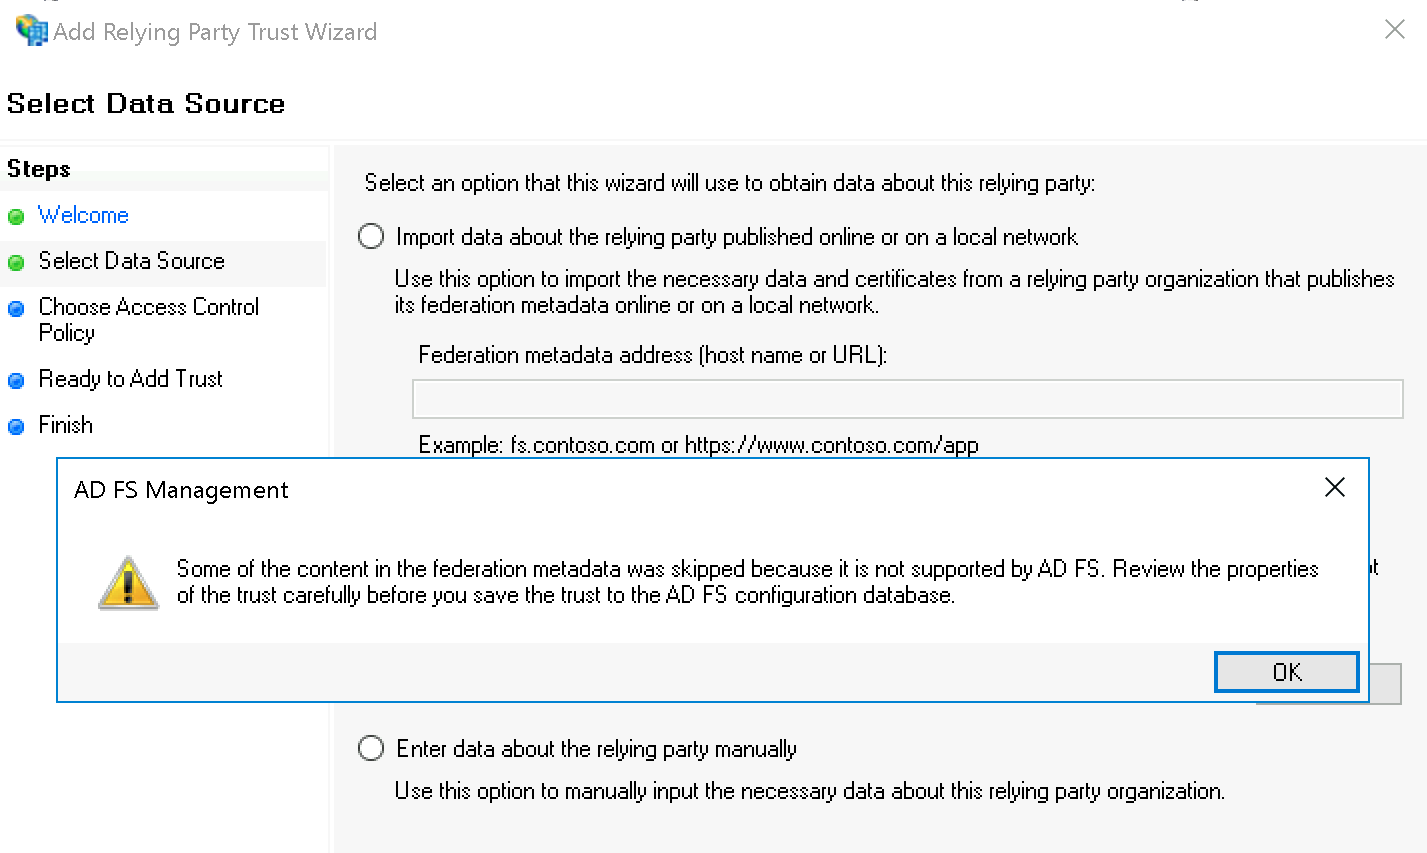
Die AD FS Management-Warnung können Sie getrost ignorieren:
Unter Specify Display Name geben Sie nun Checkmk als Namen ein:

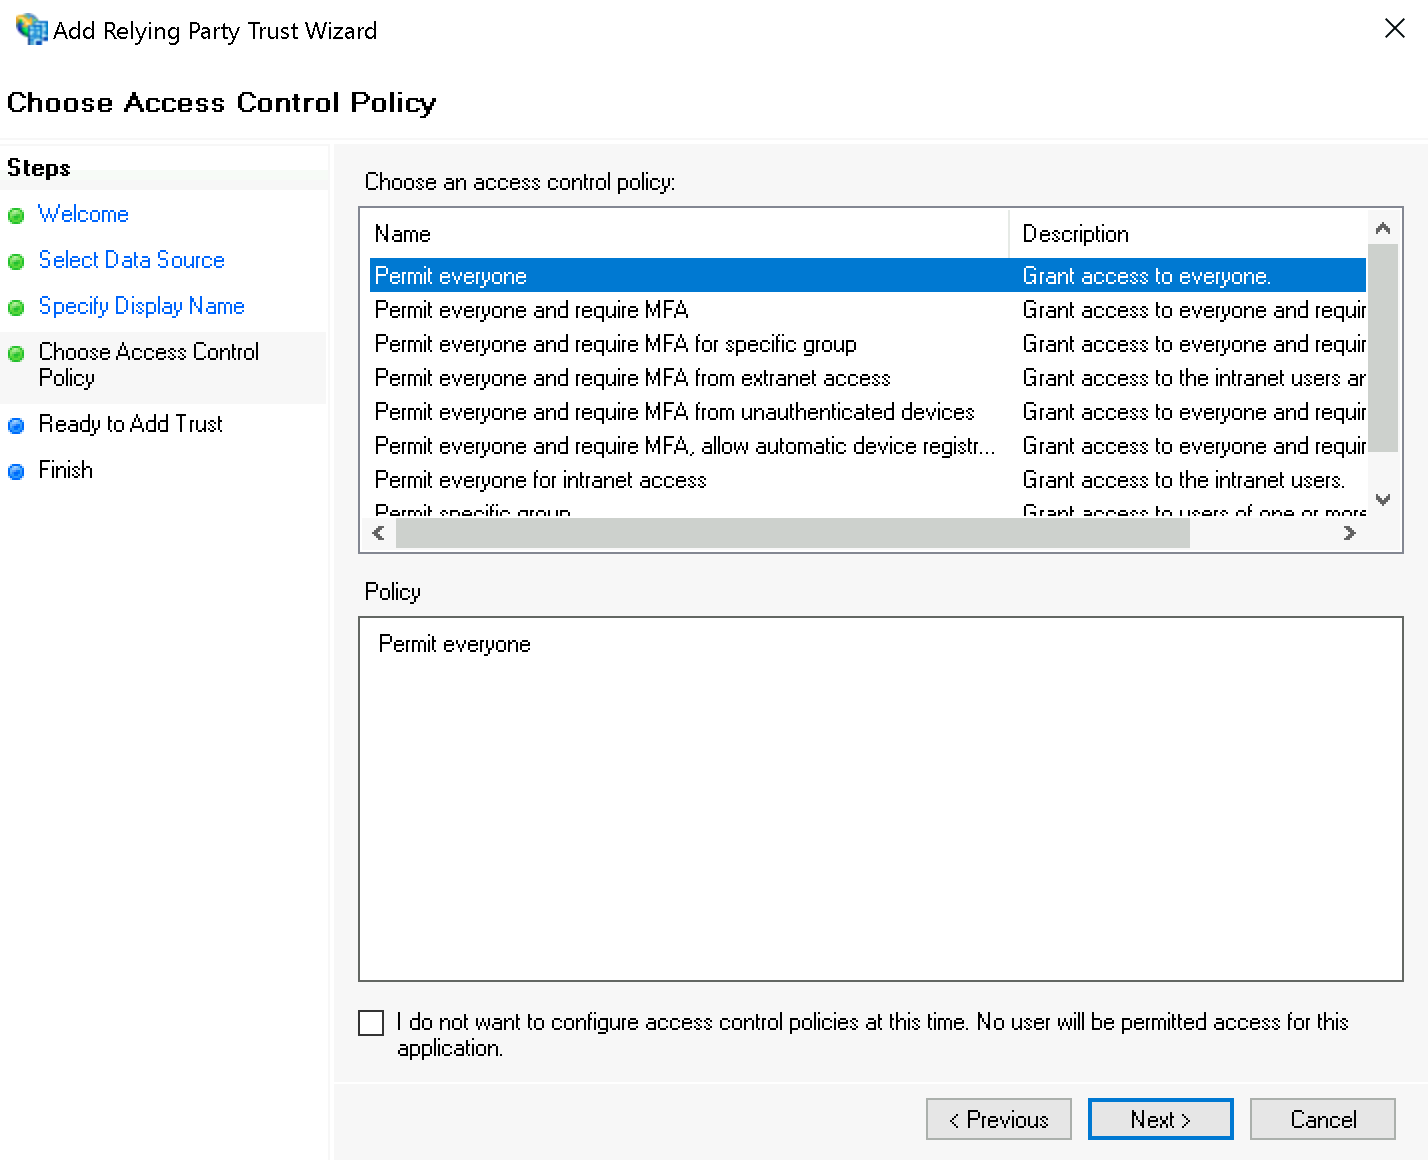
Bei der Rechtevergabe können Sie zum Testen zunächst für Choose Access Control Policy den Wert Permit everyone wählen; später sollten Sie nach Permit specific group ändern.
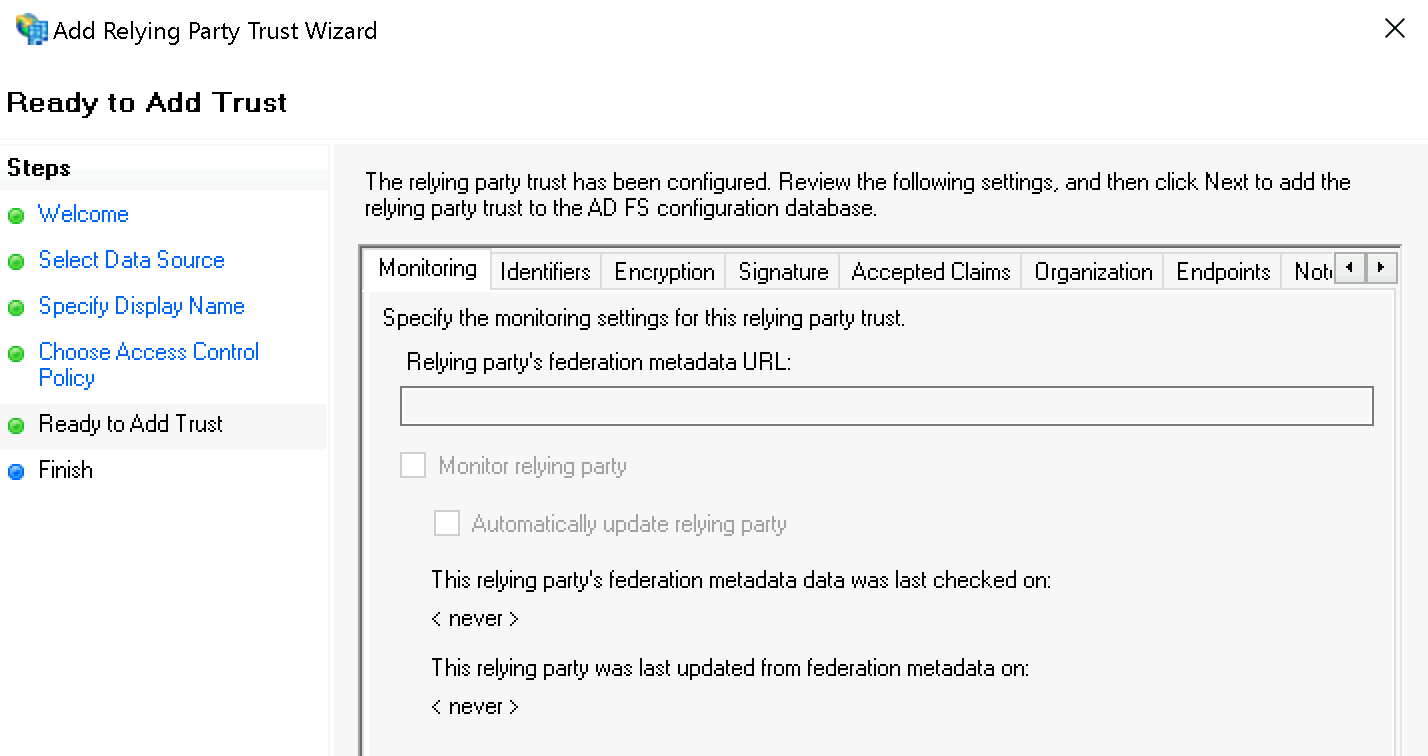
Bestätigen Sie die Zusammenfassung unter Ready to Add Trust:
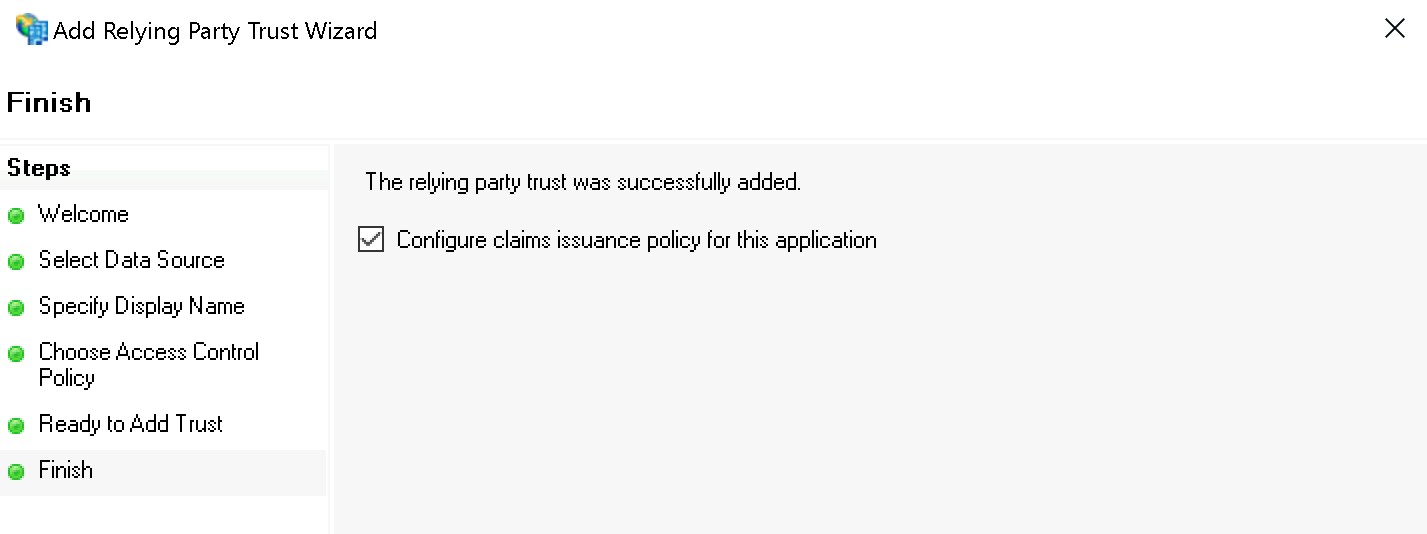
Bestätigen Sie abschließend den Finish-Dialog und behalten Sie das Häkchen bei Configure claims issuance policy for this application:
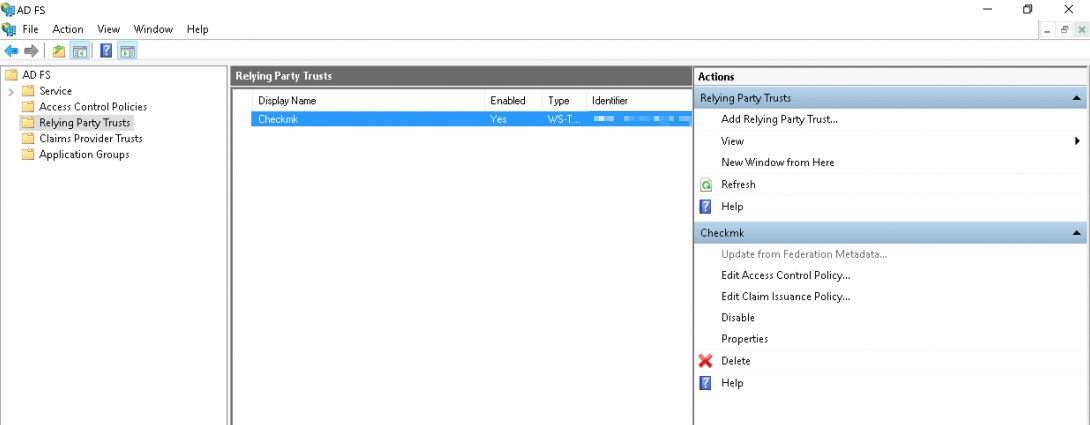
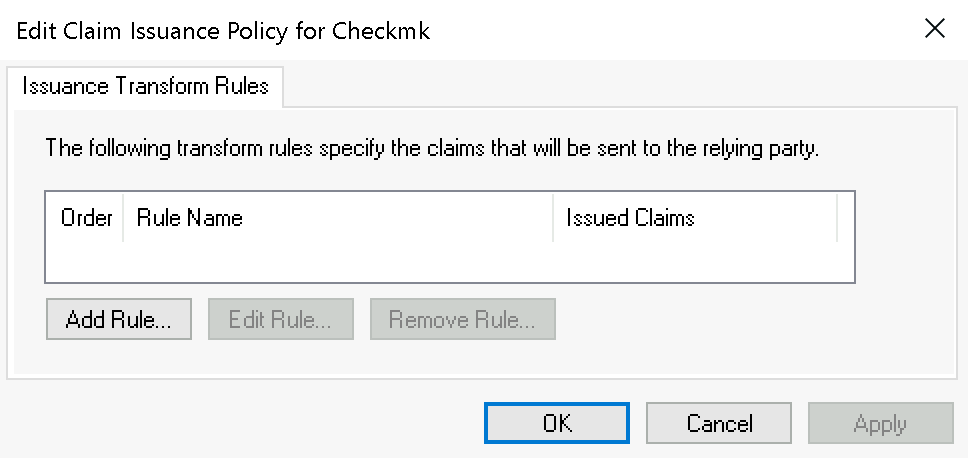
Wählen Sie den eben erstellten Relying Party Trust aus und starten Sie dann den Editor mit Edit Claim Issuance Policy… :
Fügen Sie im folgenden Dialog über Add Rule… eine neue Regel hinzu:
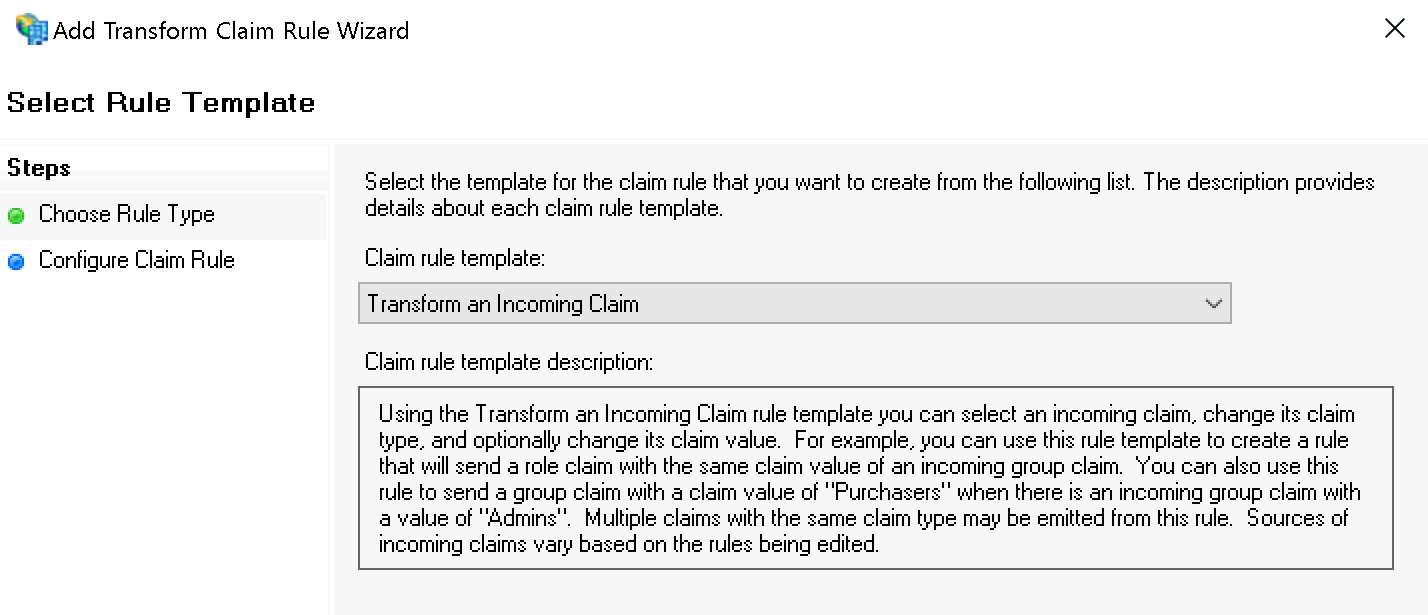
Im ersten Schritt Select Rule Template wählen Sie Transform an Incoming Claim und bestätigen:
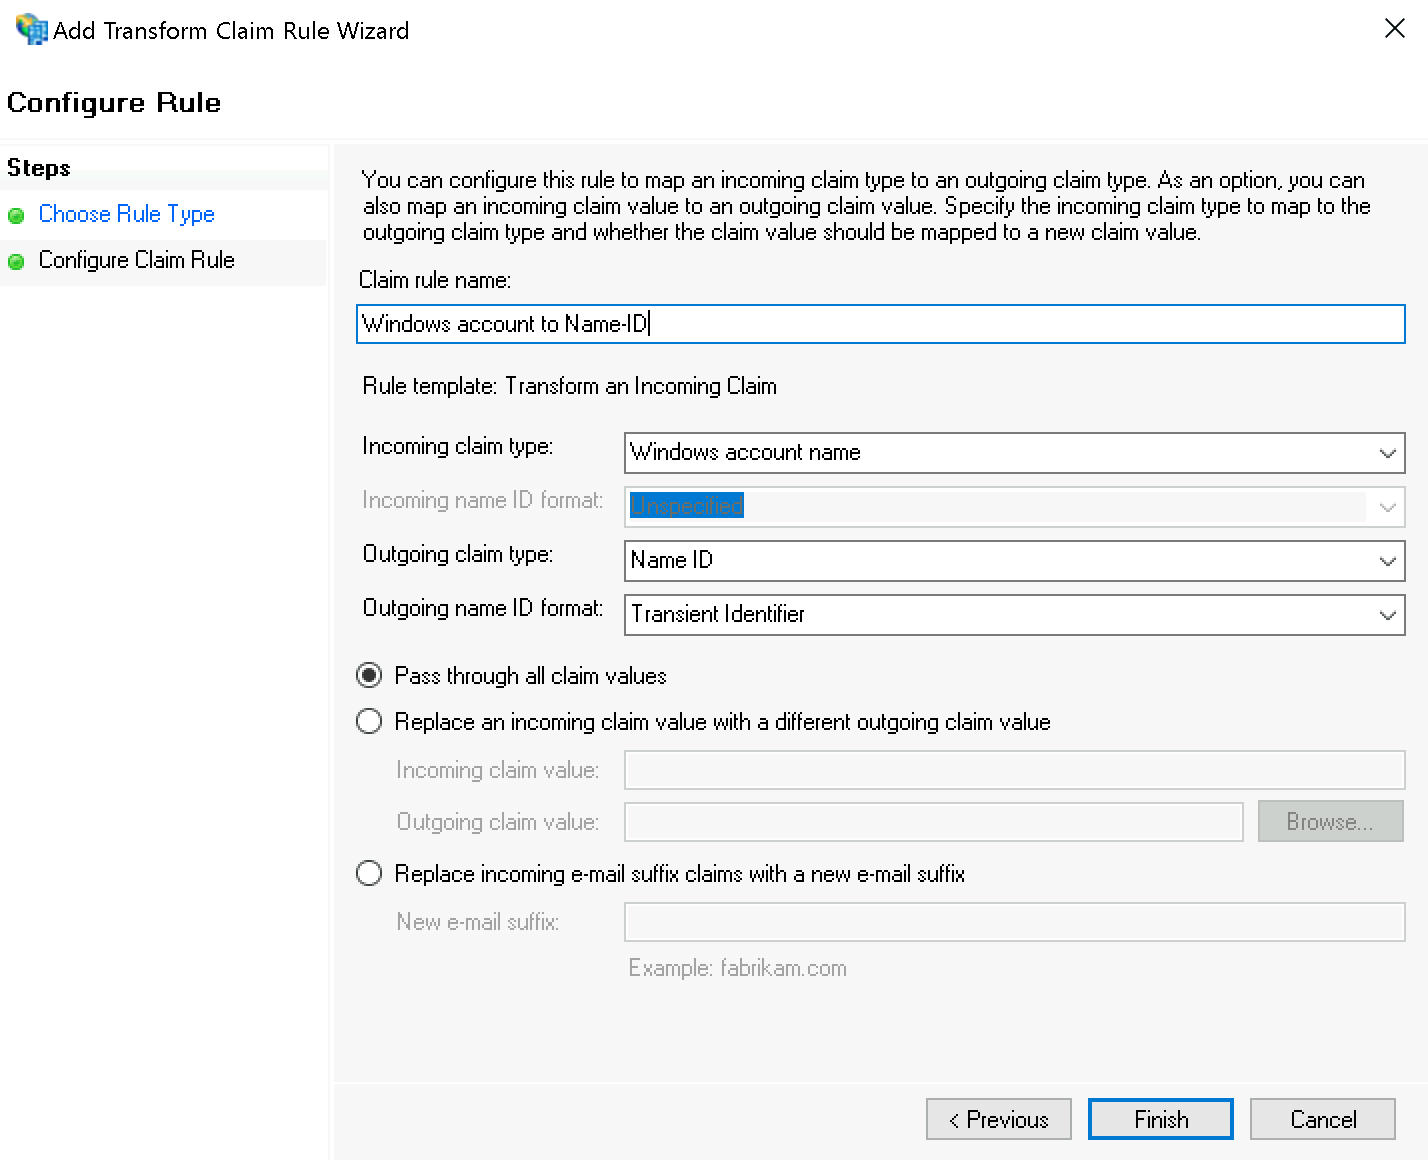
Im zweiten Schritt Configure Rule setzen Sie folgende Werte:
Incoming claim type:
Windows account nameOutgoing claim type:
Name IDOutgoing name ID format:
Transient Identifier
Damit ist auch die AD-FS-Konfiguration abgeschlossen. FS kann nun aus der Windows-Authentifizierung die Authentifizierung für Checkmk ableiten, das Sie im nächsten Schritt anweisen, Nutzer über HTTP-Anfragen zu authentifizieren.
4. Checkmk konfigurieren
In Checkmk müssen Sie nun nur noch unter Setup > General > Global Settings > User Interface > Authenticate users by incoming HTTP requests bei Current settings die Option Activate HTTP header authentication aktivieren:

5. Weitere IDPs
Die folgenden Abschnitte beschreiben lediglich die Konfiguration von Mellon/Apache für unterschiedliche, bereits laufende IDPs. Die Anbindung in Checkmk selbst beschränkt sich jeweils auf den letzten Schritt aus der ausführlichen AD-FS-Anleitung.
5.1. Azure AD
Wenn Azure AD als IDP fungiert, ergeben sich einige Änderungen, beispielsweise kann der Nutzername direkt gesetzt werden, ohne umgeschrieben zu werden.
Voraussetzungen für die folgende Beispielkonfiguration:
UserPrincipalName in LDAP-Verbindung als Identifier setzen (weitere Informationen bei LDAPwiki.com).
Custom Enterprise App in Azure AD mit UserPrincipalName als 'name'-Attribut - mehr in der Microsoft-Dokumentation).
Hier eine Beispielkonfiguration:
#Set this to the Name of your Checkmk site, e.g.
# Define SITE mysite
Define SITE mysite

# ServerName from listen-ports.conf needs to be overwritten here
# and being set to the URL of the real server.
# auth_mellon uses this to generate the needed URLs in the metadata.
ServerName https://myserver

# Load the module.
<IfModule !mod_auth_mellon.c>

	LoadModule auth_mellon_module /omd/sites/${SITE}/lib/apache/modules/mod_auth_mellon.so

</IfModule>

# Only enable this for debugging purposes
# MellonDiagnosticsFile /opt/omd/sites/${SITE}/tmp/mellon_diagnostics.log
# MellonDiagnosticsEnable On

<Location /${SITE}>

	# Use SAML auth only in case there is no Checkmk authentication
	# cookie provided by the user and whitelist also some other required URLs.
   <If "! %{HTTP_COOKIE} =~ /^auth_${SITE}/ && \
        ! %{REQUEST_URI} = '/${SITE}/check_mk/register_agent.py' && \
        ! %{REQUEST_URI} = '/${SITE}/check_mk/webapi.py' && \
        ! %{REQUEST_URI} = '/${SITE}/check_mk/run_cron.py' && \
	! %{REQUEST_URI} = '/${SITE}/check_mk/automation.py' && \
        ! %{REQUEST_URI} -strmatch '/${SITE}/check_mk/api/*' && \
        ! %{REQUEST_URI} = '/${SITE}/check_mk/deploy_agent.py' && \
		! %{REQUEST_URI} = '/${SITE}check_mk/ajax_graph_images.py' && \
        ! %{QUERY_STRING} =~ /(_secret=|auth_|register_agent)/ && \
		! %{REQUEST_URI} =~ m#^/${SITE}/(omd/|check_mk/((images|themes)/.*\.(png|svg)|login\.py|.*\.(css|js)))# ">

        RequestHeader unset X-Remote-User
        MellonIdPMetadataFile /opt/omd/sites/${SITE}/etc/apache/mellon/idp-metadata.xml
        # Azure-AD-specific: Not needed because in metadata:
        #MellonIdPPublicKeyFile /opt/omd/sites/${SITE}/etc/apache/mellon/idp-public-key.pem
        MellonSPCertFile /opt/omd/sites/${SITE}/etc/apache/mellon/mellon.cert
        MellonSPPrivateKeyFile /opt/omd/sites/${SITE}/etc/apache/mellon/mellon.key
        MellonEndpointPath "/${SITE}/mellon"
        MellonDefaultLoginPath "/${SITE}/check_mk/"

		Order allow,deny
		Allow from all

		MellonSecureCookie On
		MellonCookieSameSite None

		AuthType Mellon
		MellonEnable auth
		require valid-user

        # Azure-AD-specific:
        # Get Username
        # If your assertion offers the username for Checkmk in an attribute you can set it directly as the remote user (REMOTE_USER):
        MellonUser "http://schemas.xmlsoap.org/ws/2005/05/identity/claims/name"
        RequestHeader set X-Remote-User "%{MELLON_http://schemas.xmlsoap.org/ws/2005/05/identity/claims/name}e" env=MELLON_http://schemas.xmlsoap.org/ws/2005/05/identity/claims/name

        # When SAML auth fails, show the login page to the user. This should only happen, if e.g. the mellon cookie is lost/rejected or if the IDP is misconfigured.
        # A failed login at the IDP will not return you here at all.
        ErrorDocument 401 '<html> \
          <head> \
            <meta http-equiv="refresh" content="1; URL=/${SITE}/check_mk/login.py"> \
          </head> \
          <body> \
            SAML authentication failed, redirecting to login page. \
            <a href="/${SITE}/check_mk/login.py">Click here</a>. \
          </body> \
        </html>'

	</If>

	# Azure-AD-specific:
	# This header is also needed after authentication (outside of the If clause)
	RequestHeader set X-Remote-User "%{MELLON_http://schemas.xmlsoap.org/ws/2005/05/identity/claims/name}e" env=MELLON_http://schemas.xmlsoap.org/ws/2005/05/identity/claims/name

</Location>
5.2. NetIQ Access Manager
Wenn NetIQ Access Manager als IDP fungiert, ergeben sich einige Änderungen, beispielsweise kann der Nutzername direkt gesetzt werden, ohne umgeschrieben zu werden.
Hier eine Beispielkonfiguration:
# Set this to the Name of your Checkmk site, e.g.# Define SITE mysite
# Define SITE mysite
Define SITE mysite

# ServerName from listen-ports.conf needs to be overwritten here
# and being set to the URL of the real server. auth_mellon uses this to generate the needed URLs in the metadata.

ServerName https://myserver.mydomain.tld

# Load the module.
<IfModule !mod_auth_mellon.c>

	LoadModule auth_mellon_module /omd/sites/mysite/lib/apache/modules/mod_auth_mellon.so

</IfModule>

# Only enable this for debugging purposes
#MellonDiagnosticsFile /opt/omd/sites/${SITE}/tmp/mellon_diagnostics.log
#MellonDiagnosticsEnable On

<Location /${SITE}>

	# Use SAML auth only in case there is no Checkmk authentication
	# Cookie provided by the user and whitelist also some other required URLs.

    <If "! %{HTTP_COOKIE} =~ /^auth_${SITE}/ && \
        ! %{REQUEST_URI} = '/${SITE}/check_mk/register_agent.py' && \
        ! %{REQUEST_URI} = '/${SITE}/check_mk/run_cron.py' && \
        ! %{REQUEST_URI} = '/${SITE}/check_mk/deploy_agent.py' && \
        ! %{REQUEST_URI} = '/${SITE}/check_mk/webapi.py' && \
        ! %{REQUEST_URI} -strmatch '/${SITE}/check_mk/api/*' && \
		! %{REQUEST_URI} = '/${SITE}check_mk/ajax_graph_images.py' && \
        ! %{QUERY_STRING} =~ /(_secret=|auth_|register_agent)/ && \
		! %{REQUEST_URI} =~ m#^/${SITE}/(omd/|check_mk/((images|themes)/.*\.(png|svg)|login\.py|.*\.(css|js)))# ">

        MellonIdPMetadataFile /opt/omd/sites/${SITE}/etc/apache/mellon/idp-metadata.xml
        # NetIQ-specific: Not needed because in metadata:
        #MellonIdPPublicKeyFile /opt/omd/sites/${SITE}/etc/apache/mellon/idp-public-key.pem
        MellonSPCertFile /opt/omd/sites/${SITE}/etc/apache/mellon/mellon.cert
        MellonSPPrivateKeyFile /opt/omd/sites/${SITE}/etc/apache/mellon/mellon.key
        MellonEndpointPath "/${SITE}/mellon"
        MellonDefaultLoginPath "/${SITE}/check_mk/"

		Order allow,deny
		Allow from all

		MellonSecureCookie On
		MellonCookieSameSite None

		AuthType Mellon
		MellonEnable auth
		require valid-user


        # NetIQ-specific:
        # Even though it is set as 'optional' in https://docs.oasis-open.org/security/saml/v2.0/saml-metadata-2.0-os.pdf
        # a NetIQ Access Manager requires it to be set.
        # Specified in oasis link above - line 396
        MellonOrganizationName "<countrycode>" "<your organisation name>"
        # Specified in oasis link above - line 443 / 452
        MellonOrganizationURL  "<countrycode>" "<your organisation url>"
        # Specified in oasis link above - line 454
        MellonOrganizationDisplayName "<countrycode>" "<your organisation display name>"

        # NetIQ-specific:
        # If your assertion offers the username for Checkmk in an attribute you can set it directly as the remote user (REMOTE_USER)
        MellonUser "myusername"

        # NetIQ-specific:
        # If the assertion does contain the username (and was set to MellonUser) then you can set the header directly.
        RequestHeader set X-Remote-User "expr=%{REMOTE_USER}"

    # When SAML auth fails, show the login page to the user. This should only happen,
    # if e.g. the mellon cookie is lost/rejected or if the IDP is misconfigured.
    # A failed login at the IDP will not return you here at all.
        ErrorDocument 401 '<html> \
          <head> \
            <meta http-equiv="refresh" content="1; URL=/${SITE}/check_mk/login.py"> \
          </head> \
          <body> \
            SAML authentication failed, redirecting to login page. \
            <a href="/${SITE}/check_mk/login.py">Click here</a>. \
          </body> \
        </html>'

# This header is also needed after authentication (outside of the If clause)
RequestHeader set X-Remote-User "expr=%{REMOTE_USER}"

</Location>